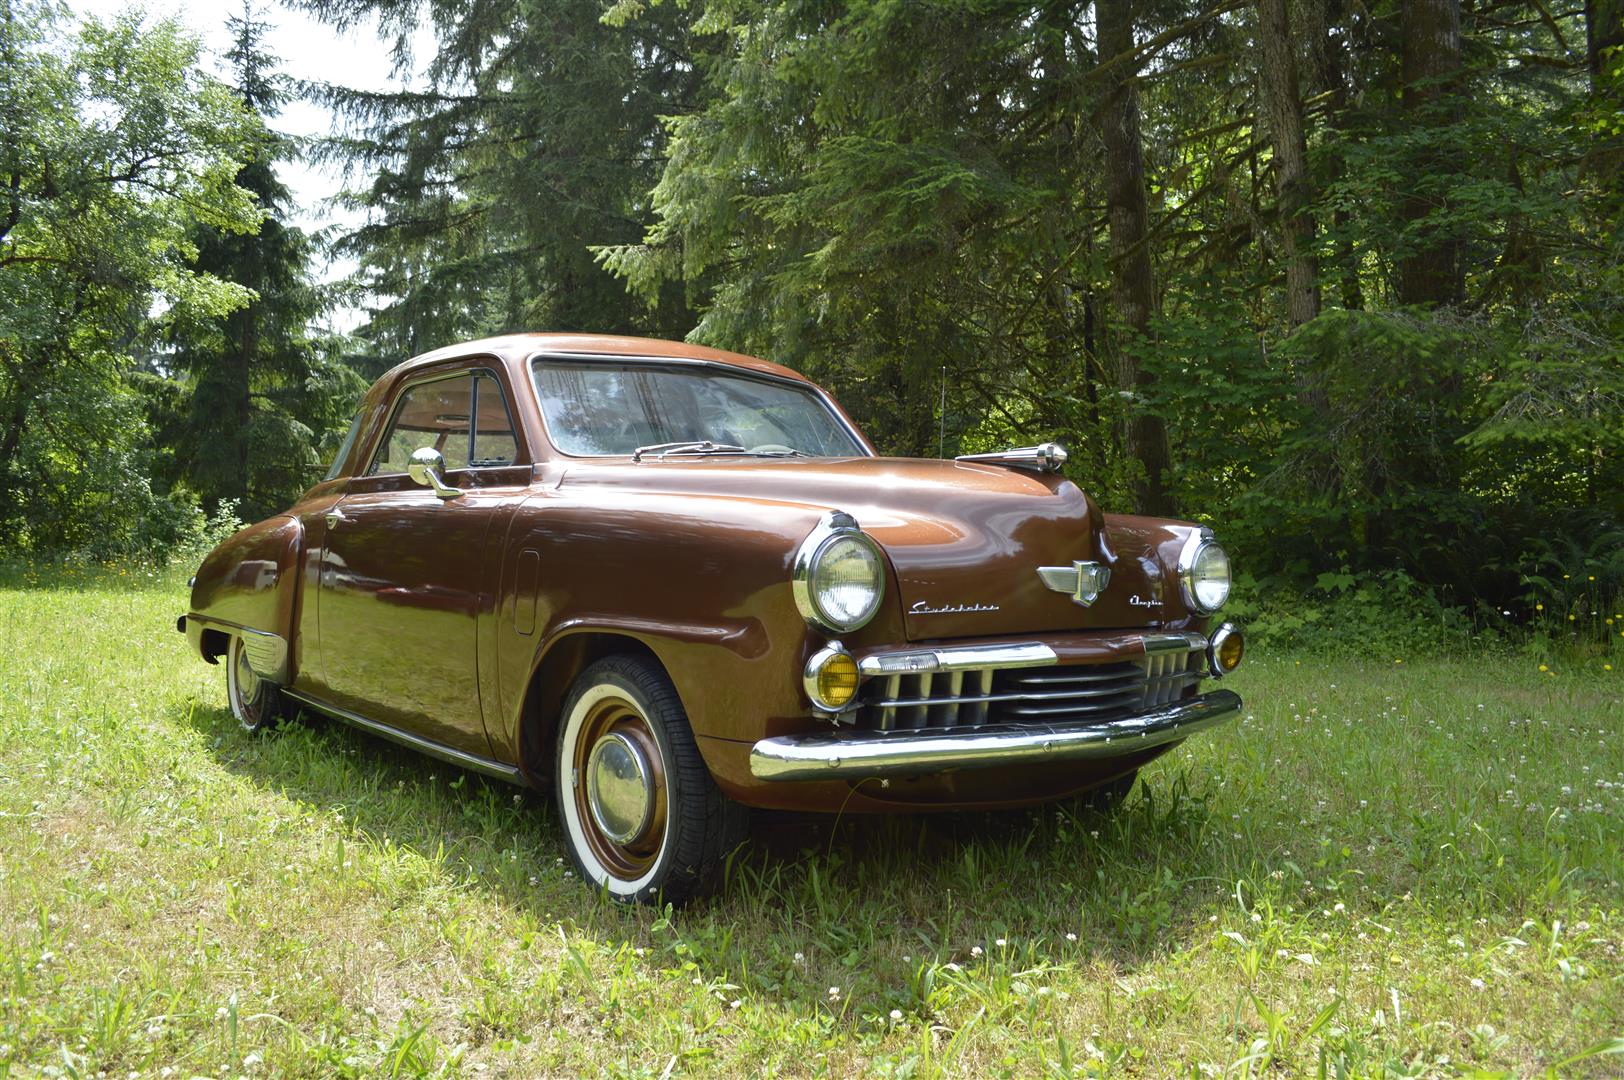
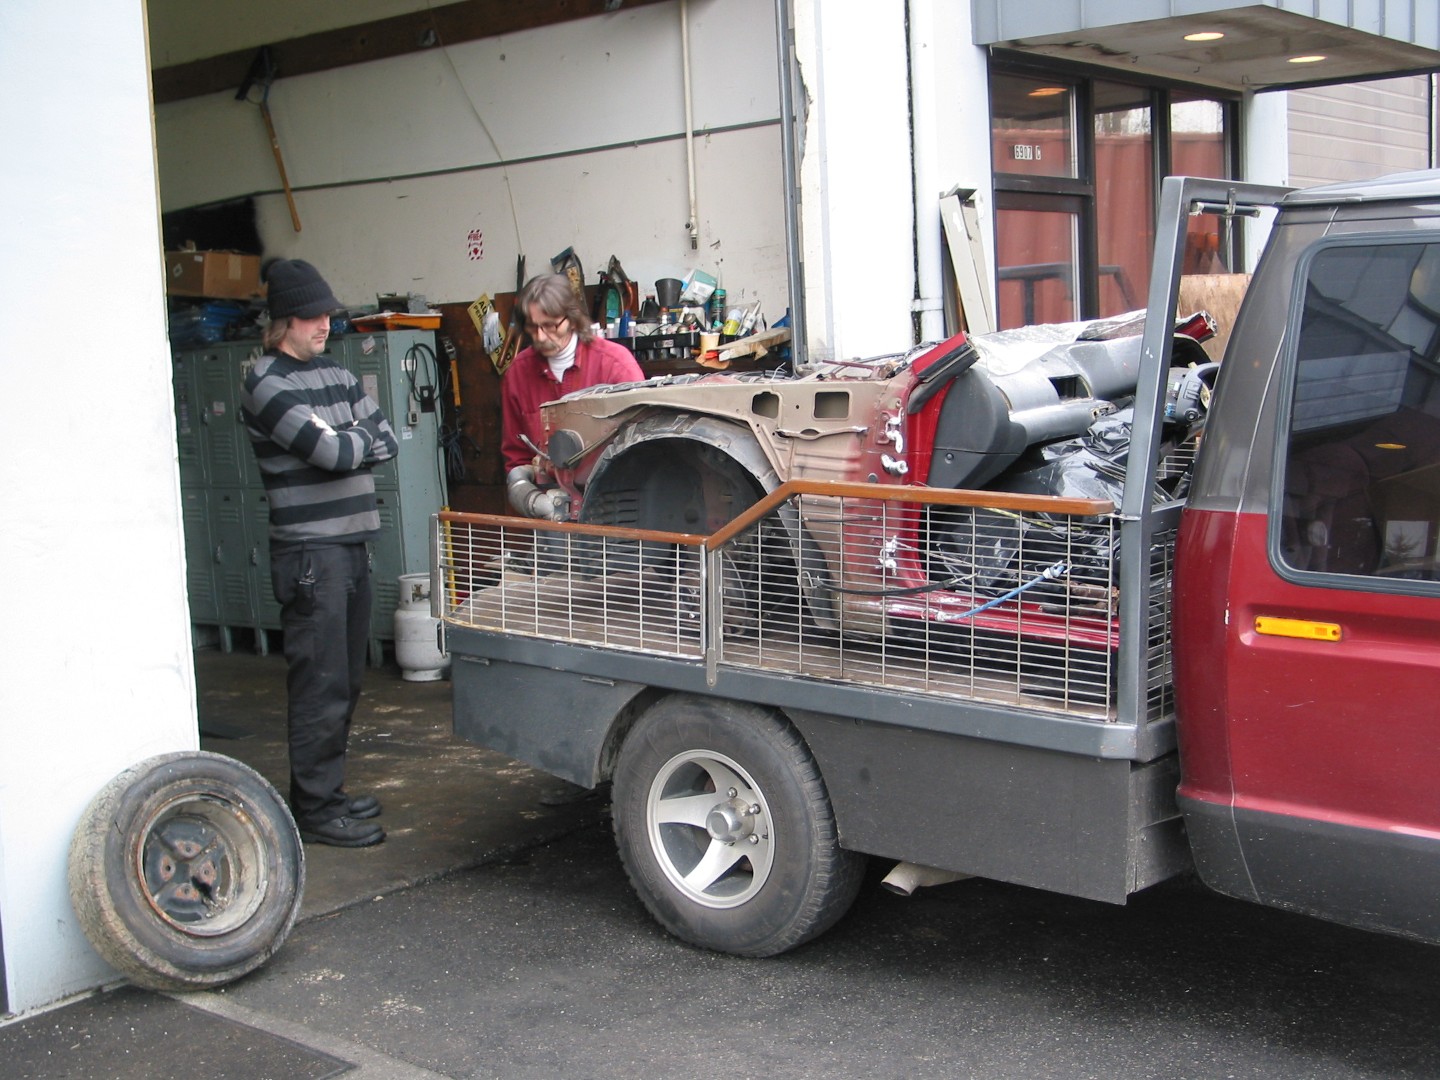
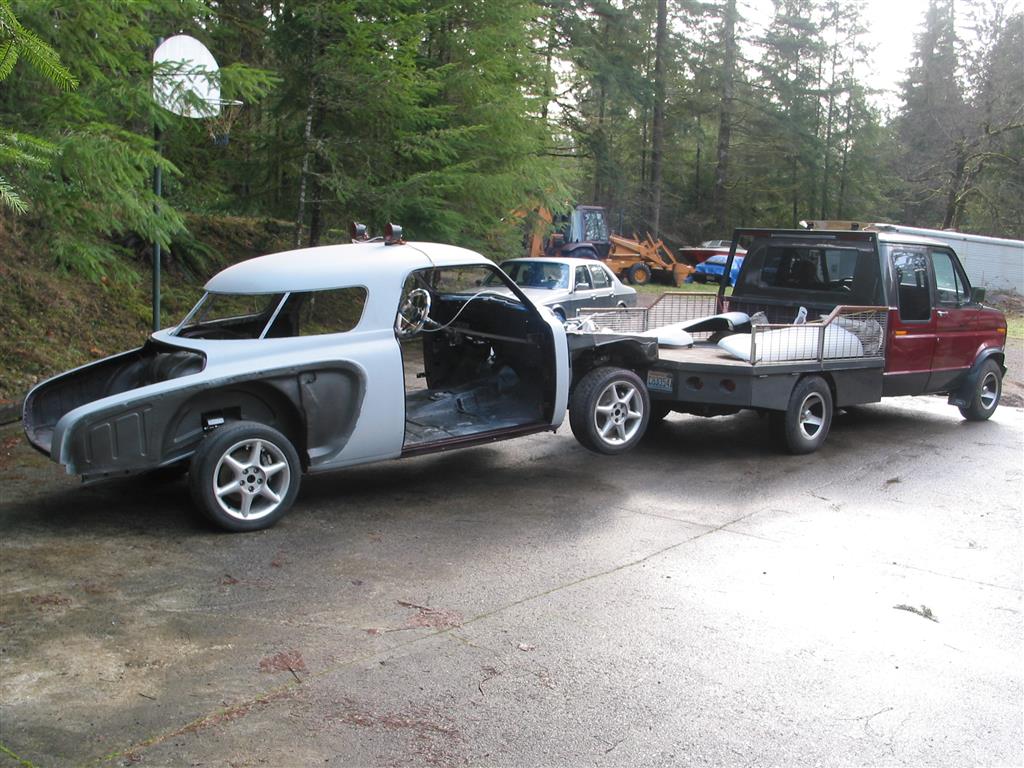
After driving my Skyline powered RX-7 for a year, I decided that I really like the RB20 turbo motor, and would consider doing another project using the same motor. I have always done European or Japanese car projects, but never an American car except for my Ford truck. I went to Foreign Engines Inc in Lynnwood, Washington, north of Seattle and bought another R32 Skyline front clip, this one with only 35,000 miles. I wanted a fairly small, light car, and quickly settled on a 1947-49 Studebaker Champion. Of course I wanted the Starlight Coupe with the unique wrap-around back window, which is an iconic Studebaker design. The 1950-51 bullet nose cars are more sought after, but I preferred the more conventional front end. After some searching I found a 1948 about 150 miles away. It looked good from a distance, but close examination showed it had some sloppy bodywork and a poor paint job. The interior and dash had been redone and were in nice condition. My intention was to replace all the drivetrain and suspension. I brought the car home and drove it a couple of times, ran great, drove down the highway fairly well, but the handling and braking were poor. We made a video to show how the engine looked and ran, posted it on the Studebaker forum and sold the engine, overdrive 3-speed trans, front and rear suspension and miscellaneous parts immediately.
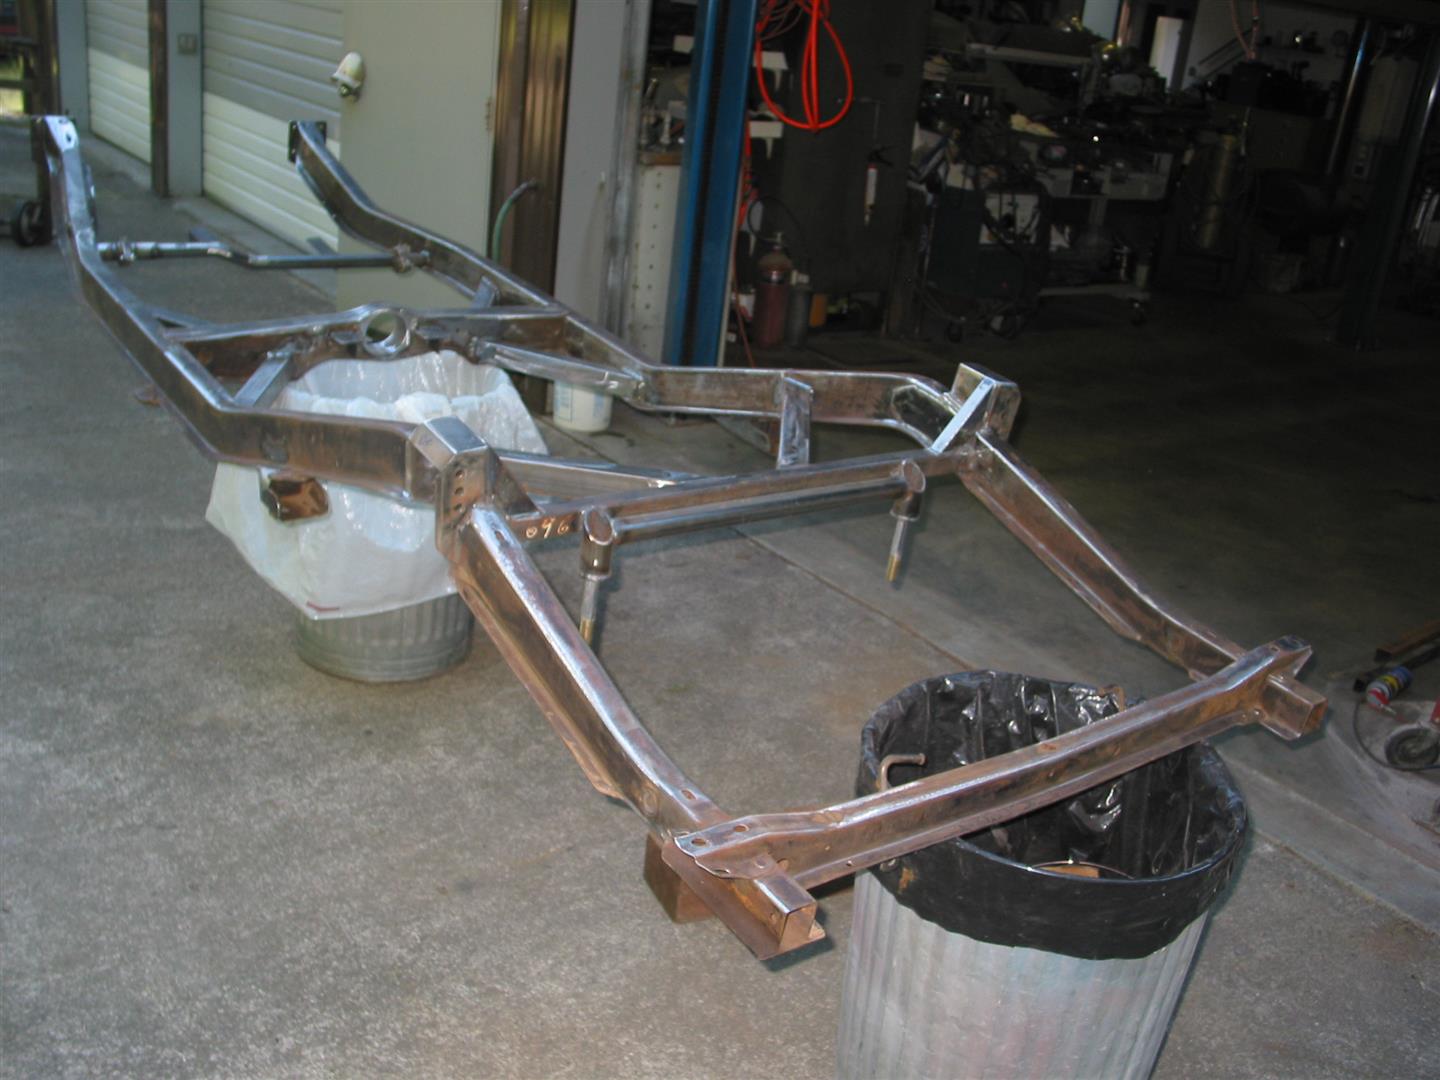
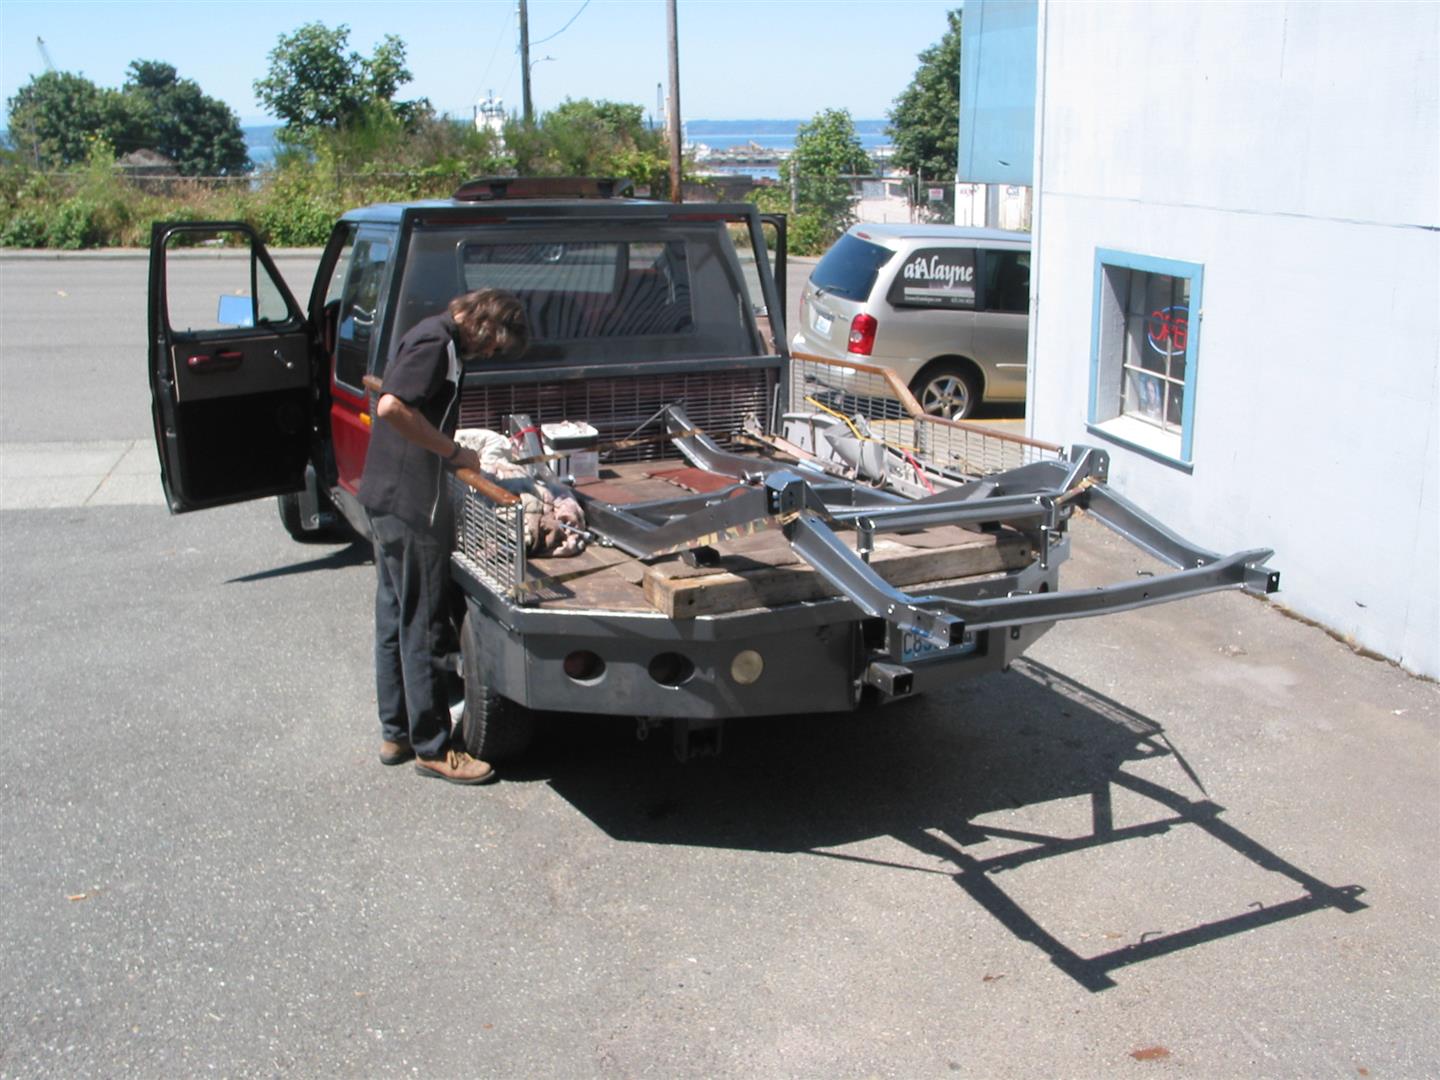
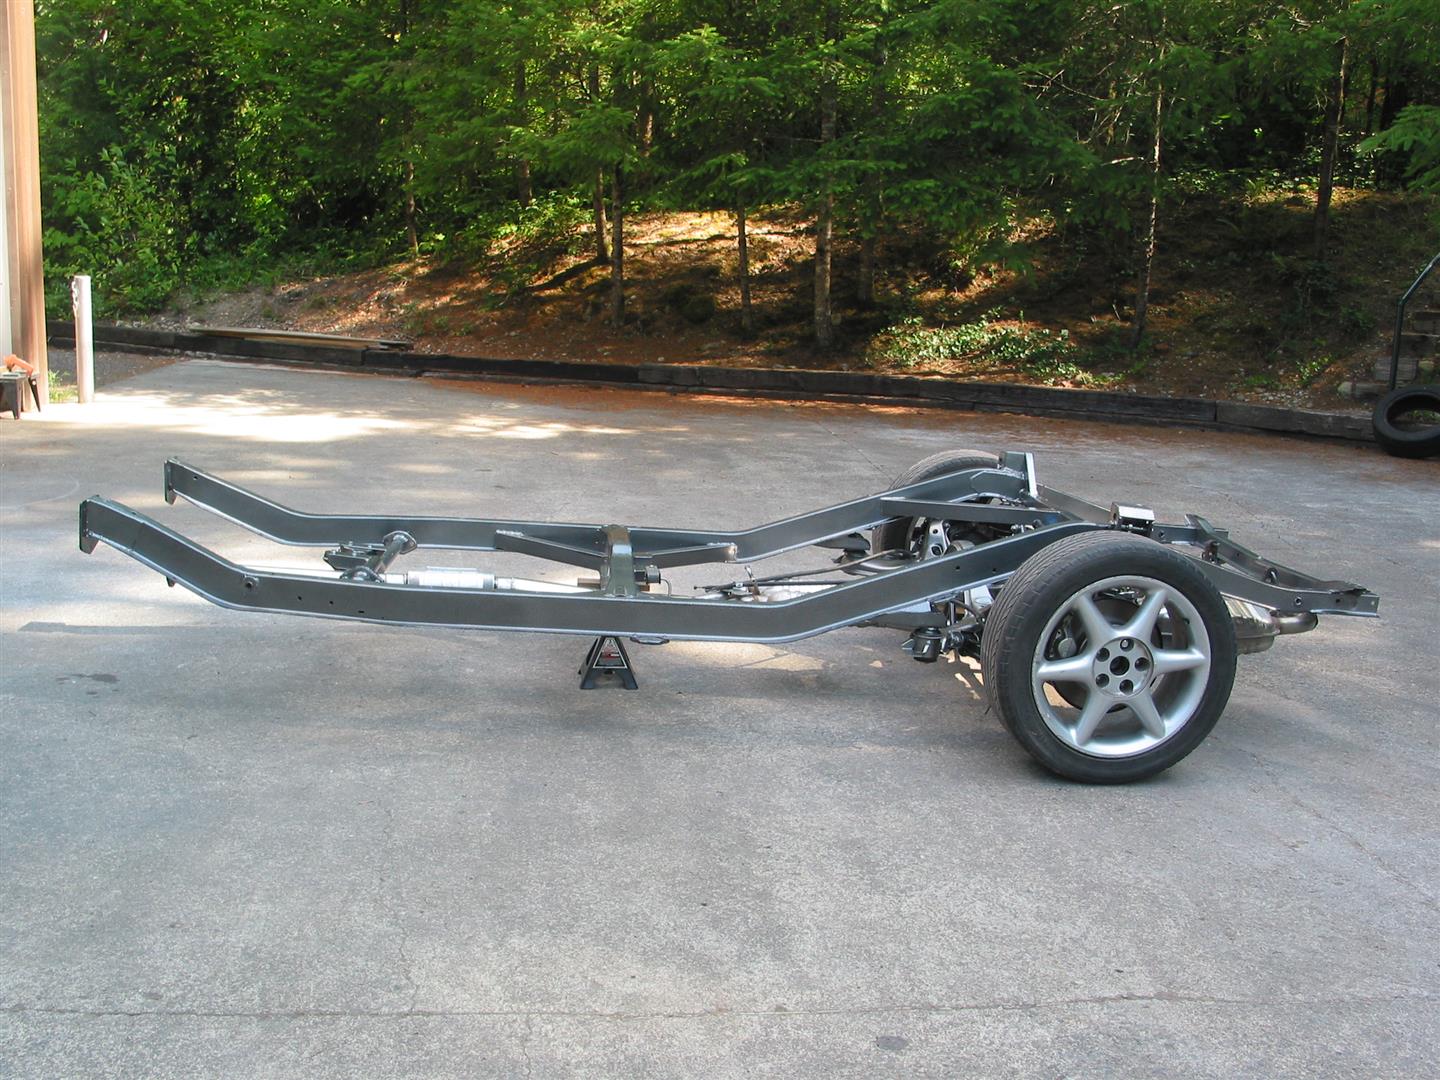
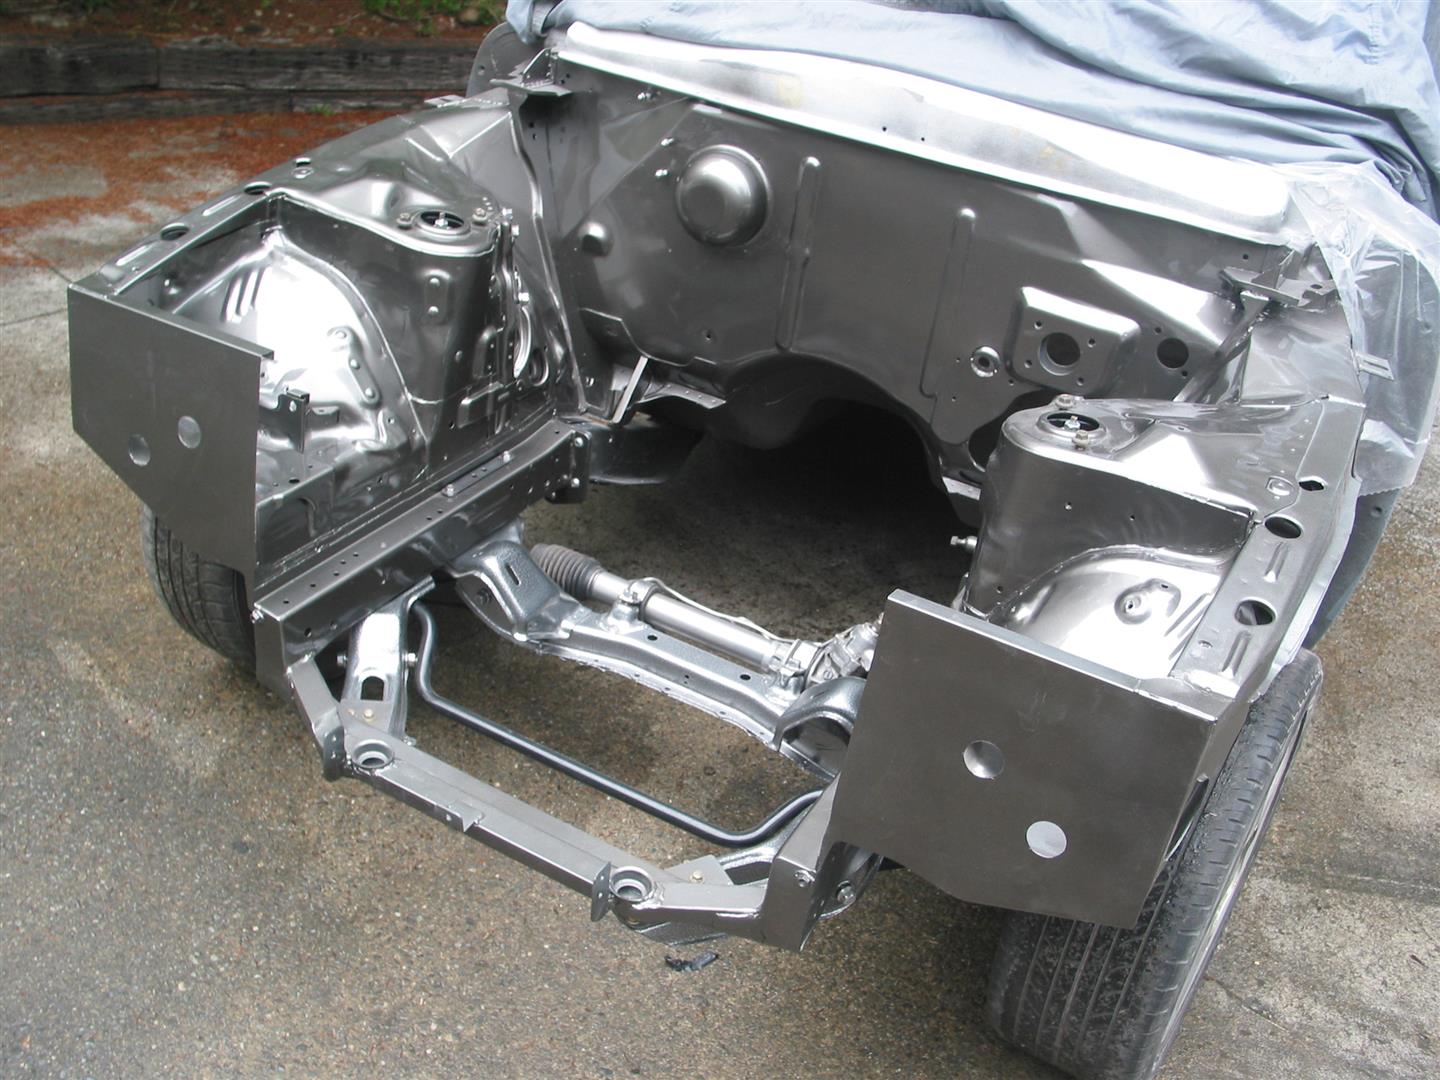
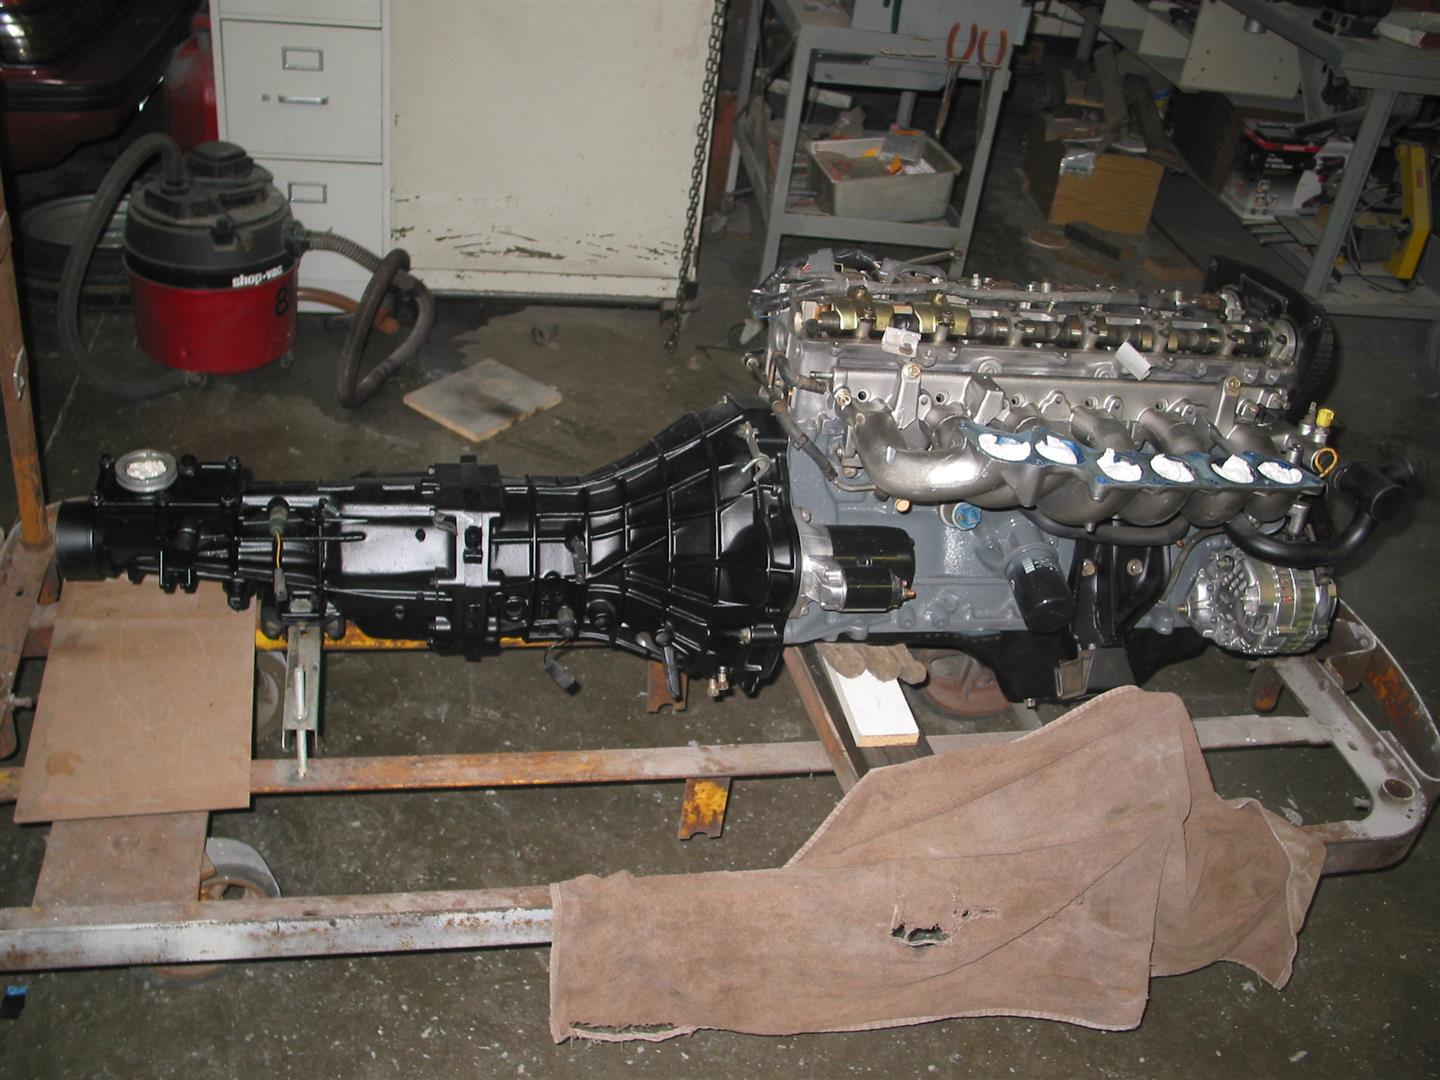
My fabricator friend Sean O’Brienwas talking about building a tube chassis from the firewall forward, which is what he has often done when building street rods and drag cars. But I suggested we just graft the whole front clip of the Skyline onto the Studebaker firewall. A few quick measurements showed that the Skyline front end would fit within the Studebaker bodywork. For those who may not know, the Studebaker is a body-on-frame car, whereas the Skyline is unibody, meaning the sheet metal is welded to the frame rails. The Studebaker frame sloped up and narrowed just ahead of the firewall, so Sean chose just the right point to cut off the frame and mate with the Skyline frame rails to get the ride height we wanted, which is one inch lower than the stock Studebaker. Sean spent a whole day measuring, trimming and adjusting until it fit perfectly.
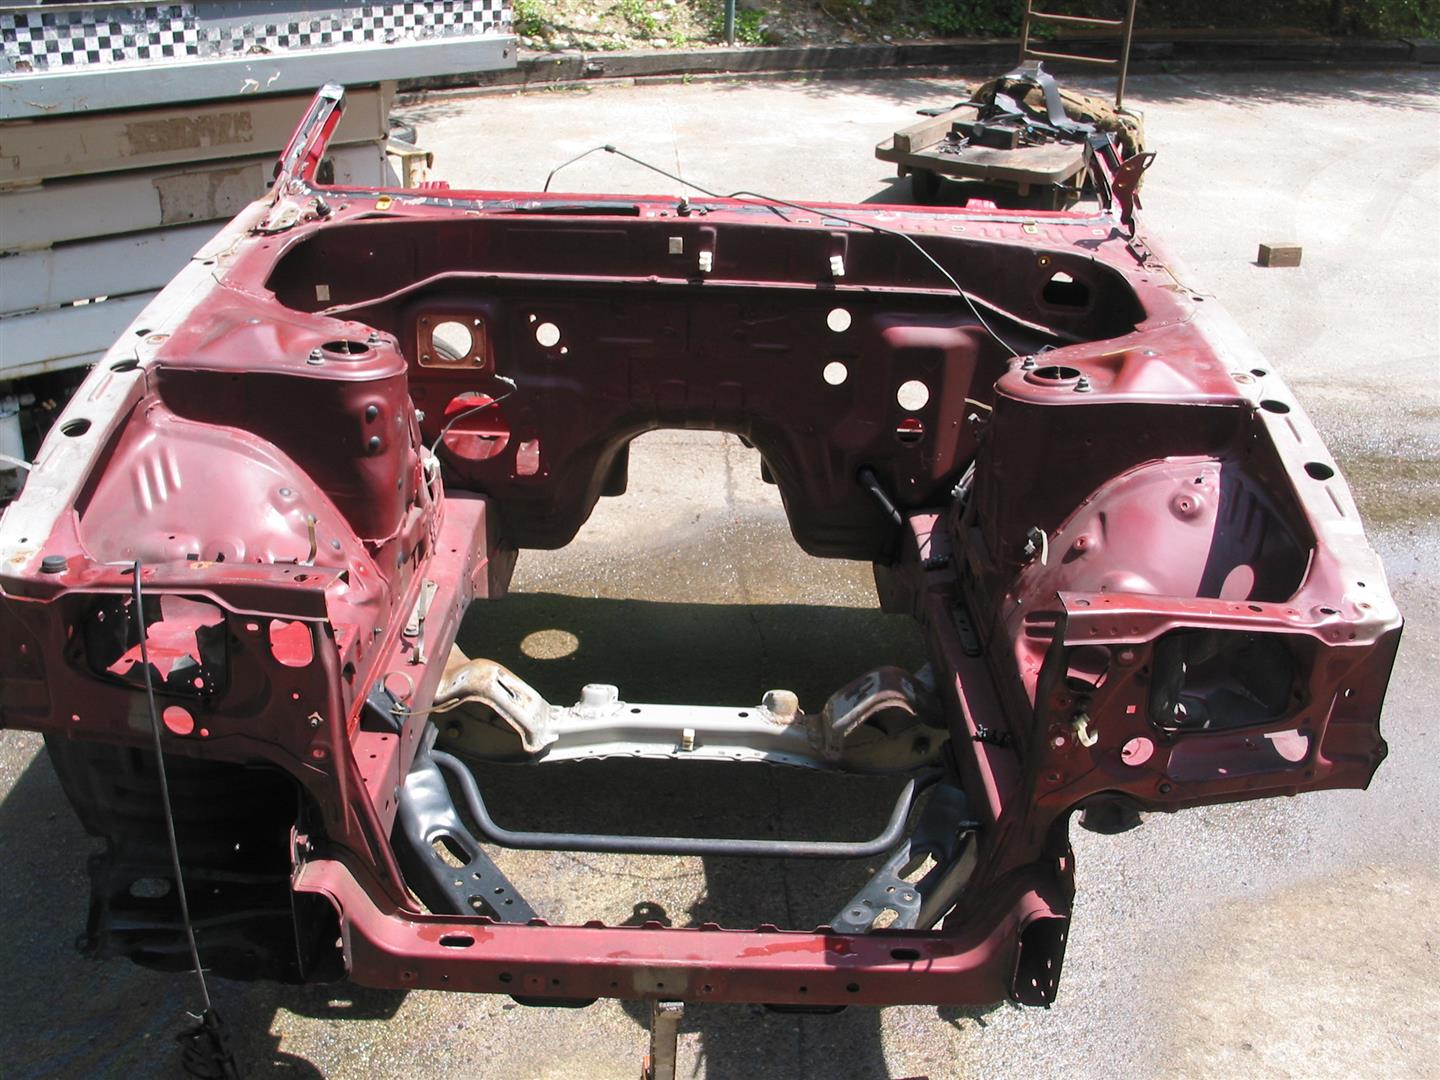
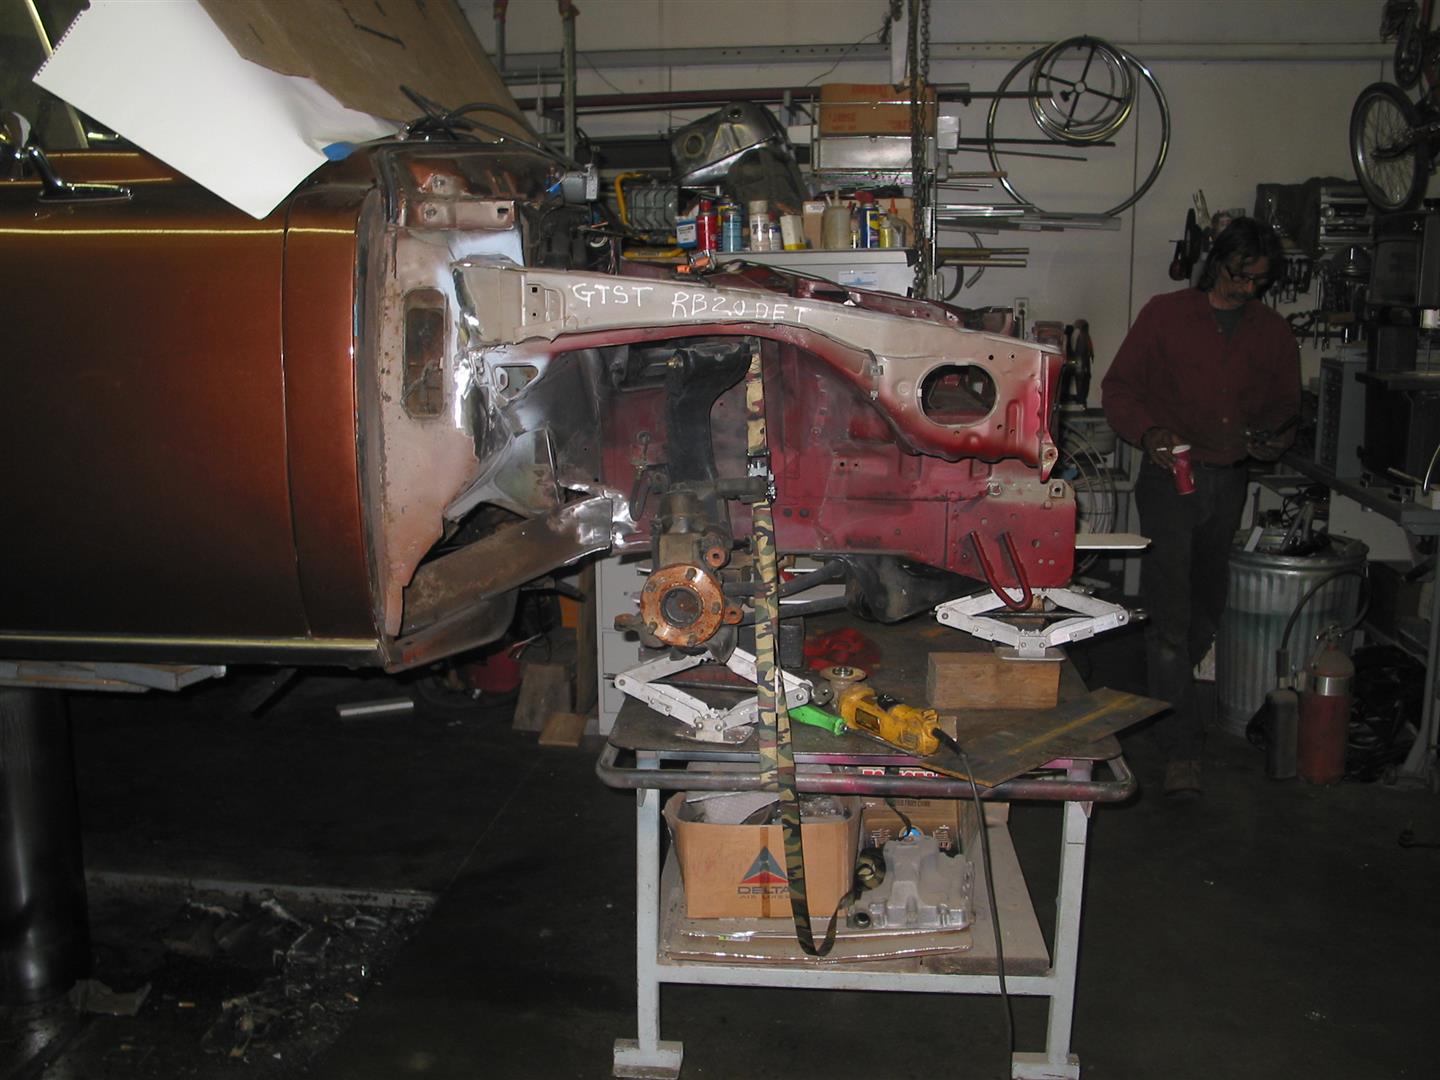
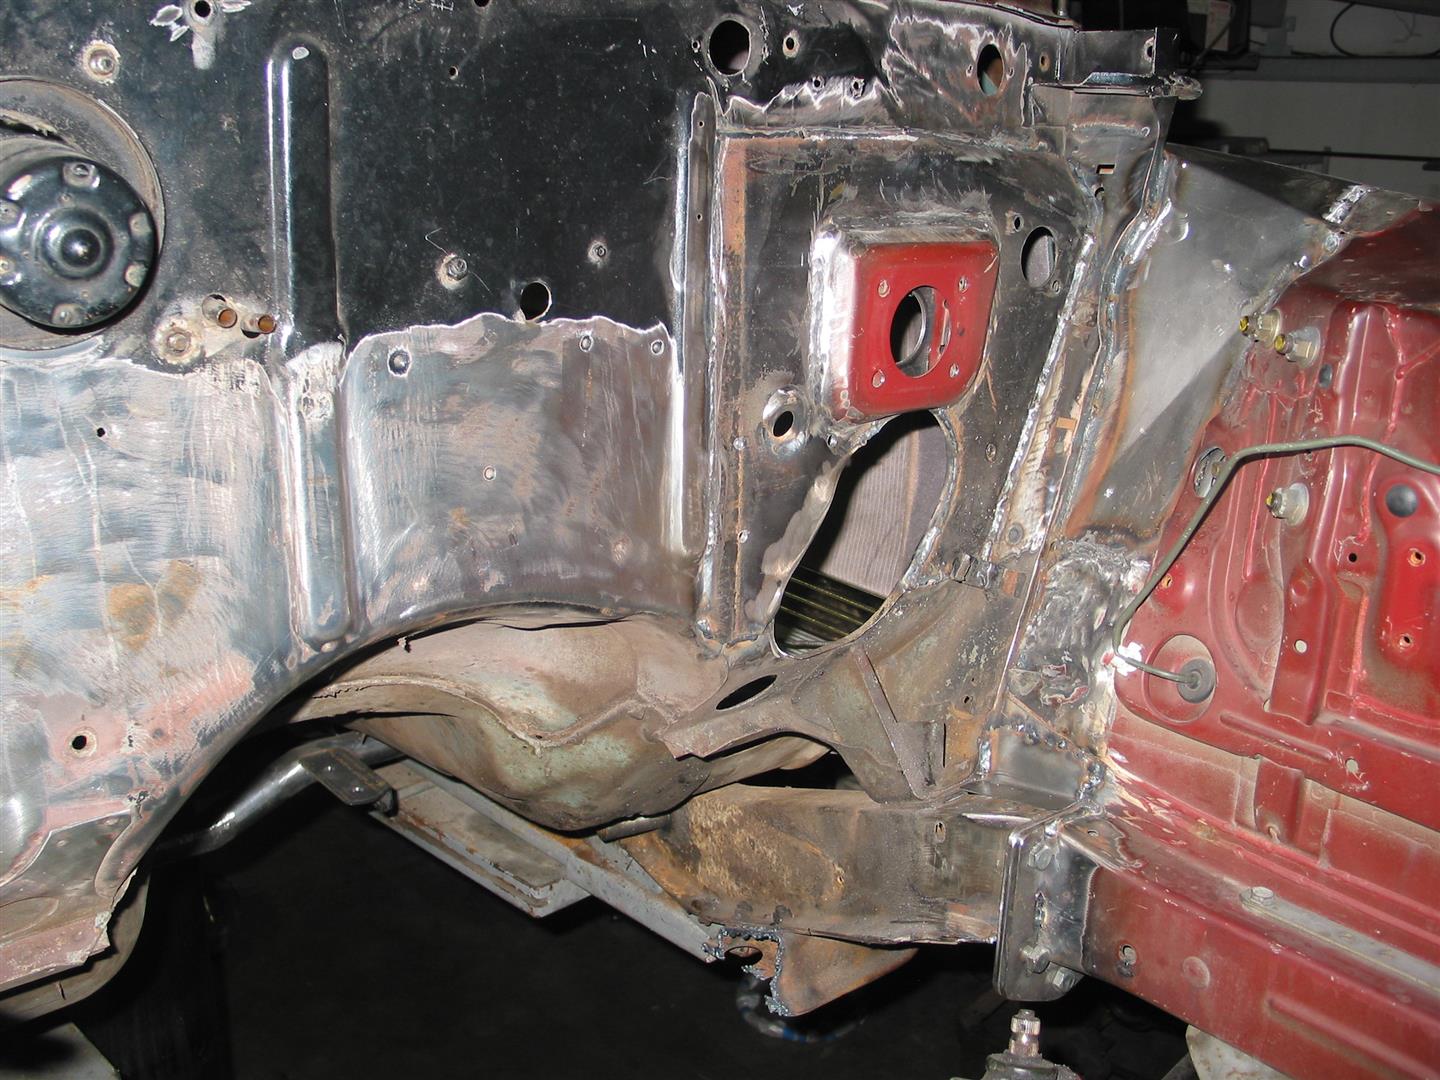
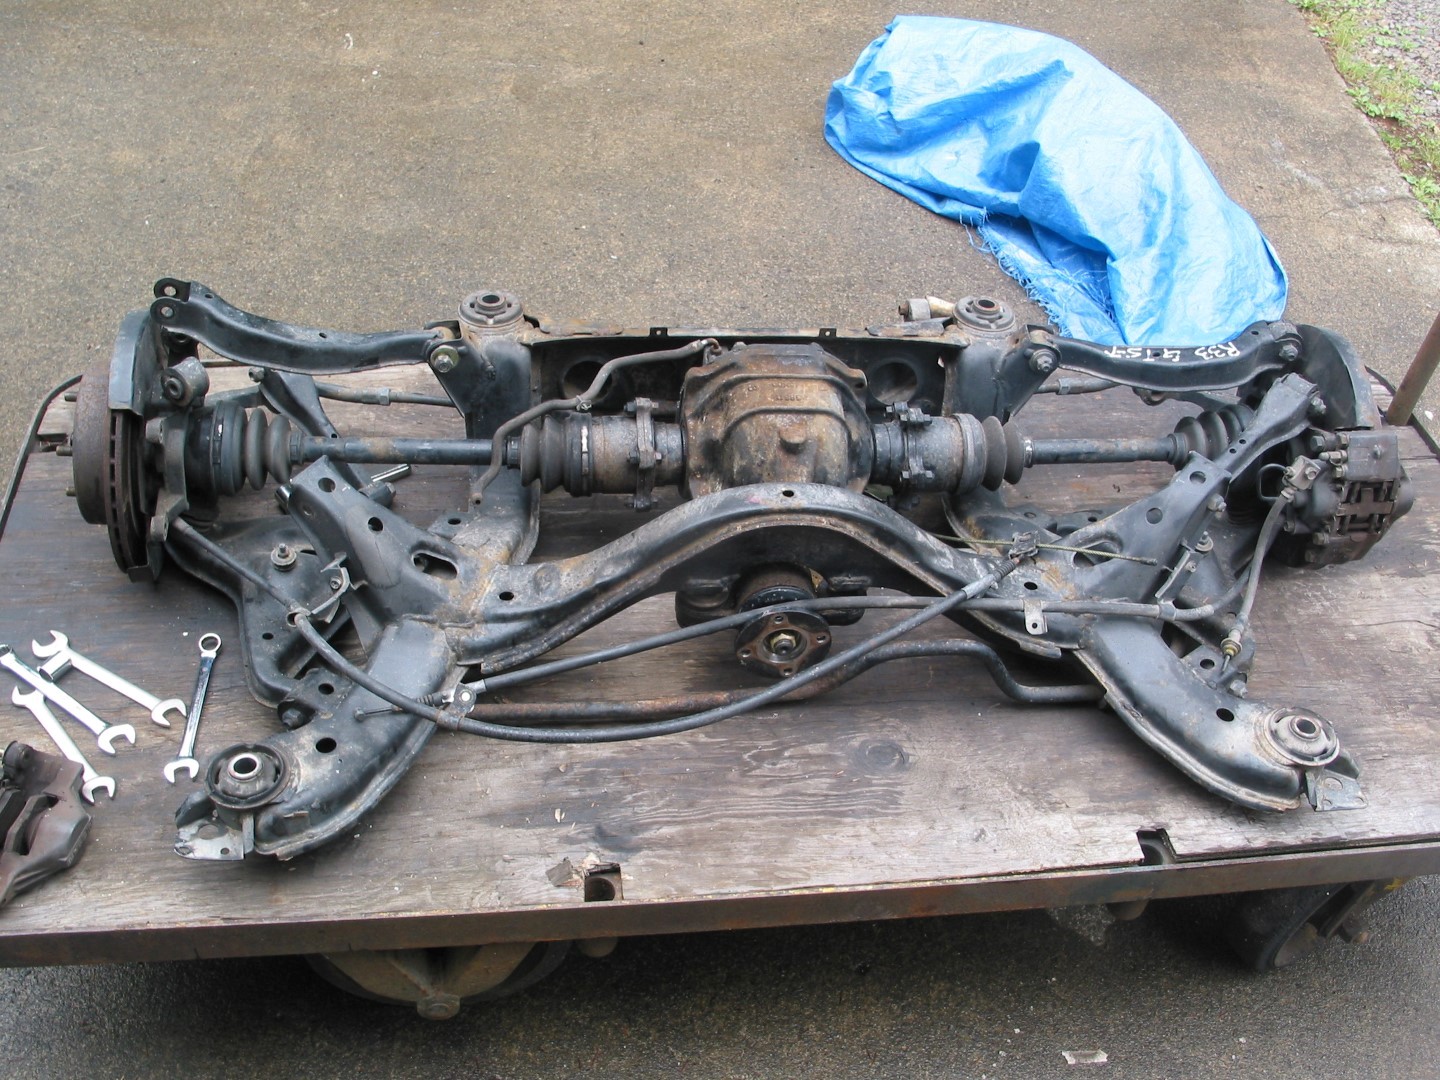
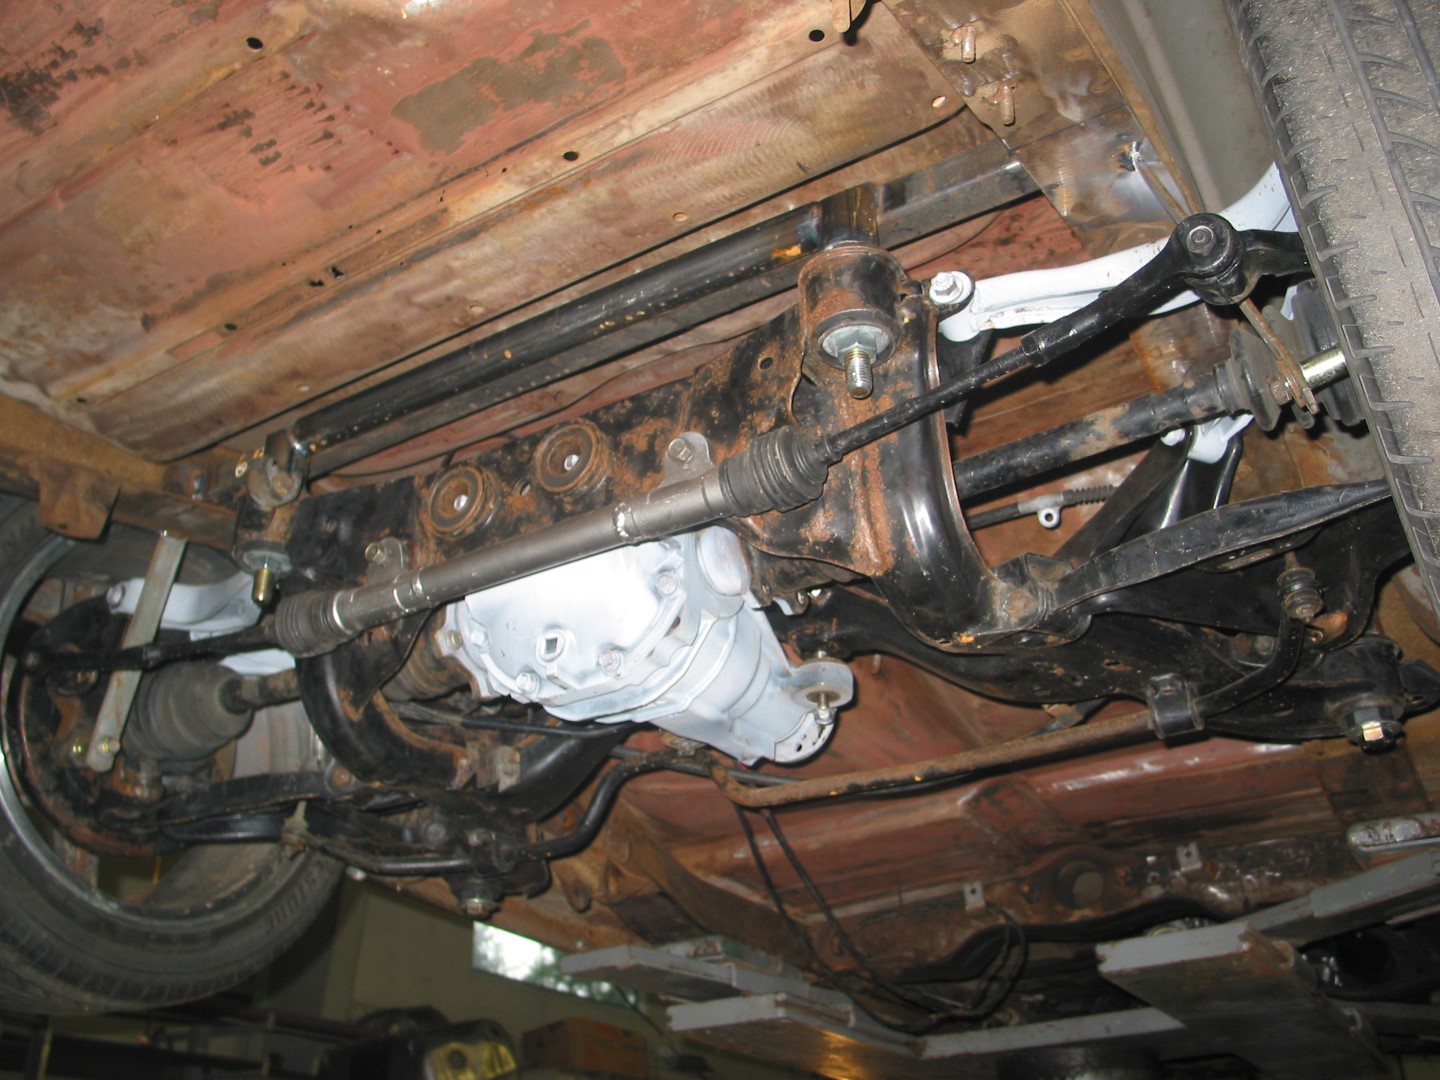
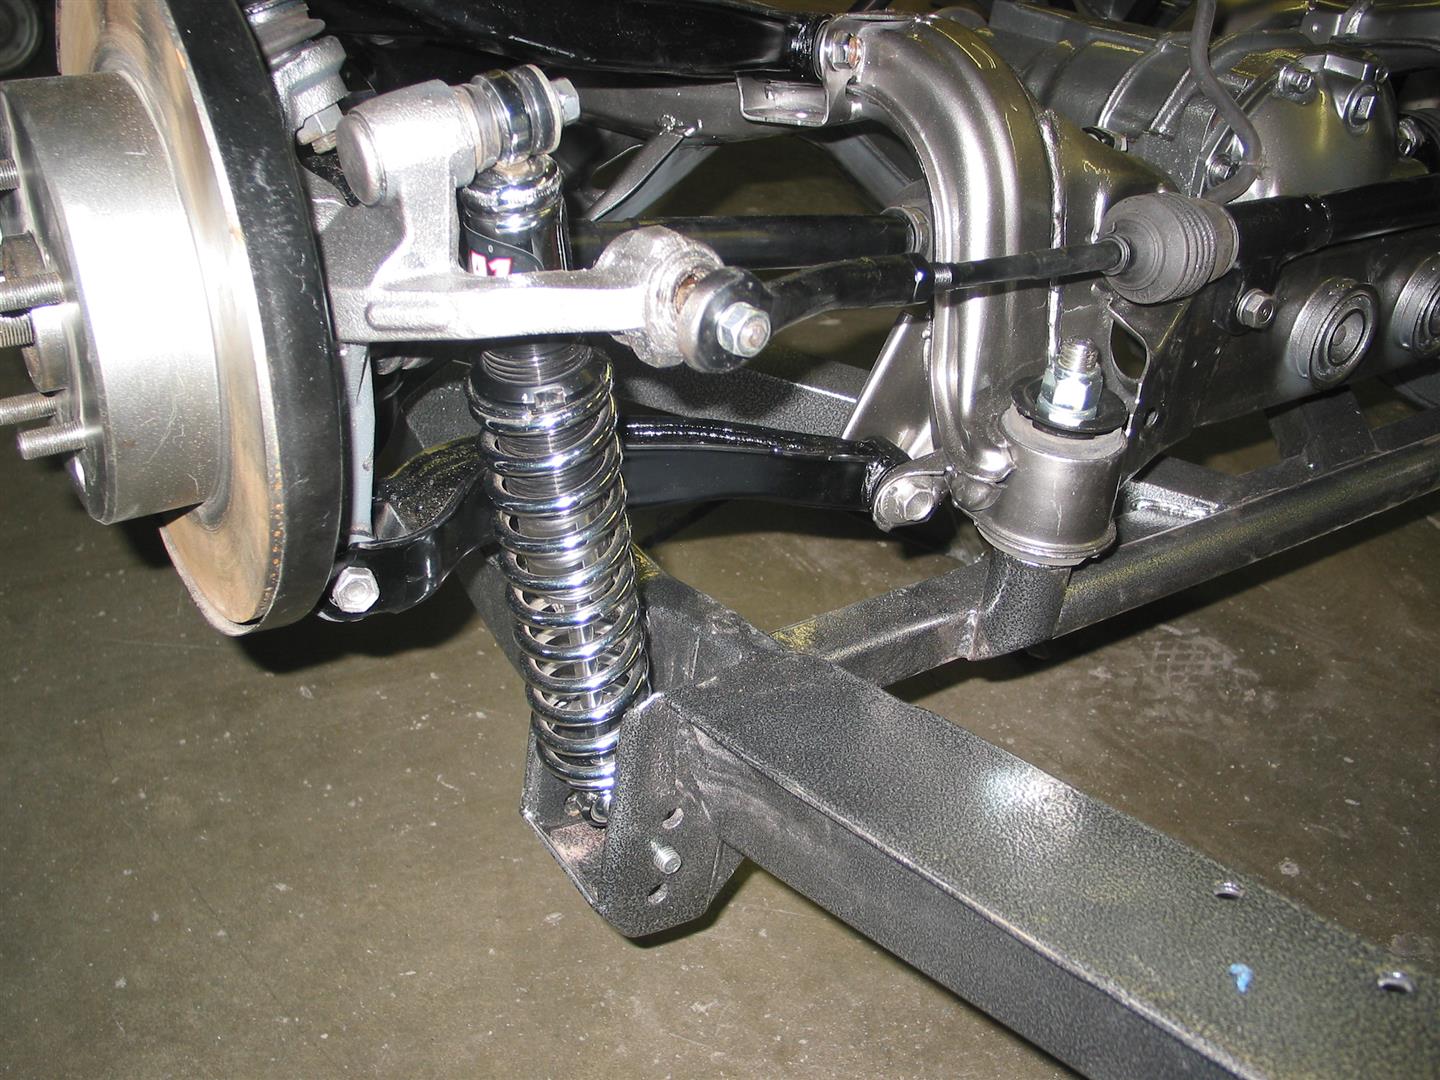
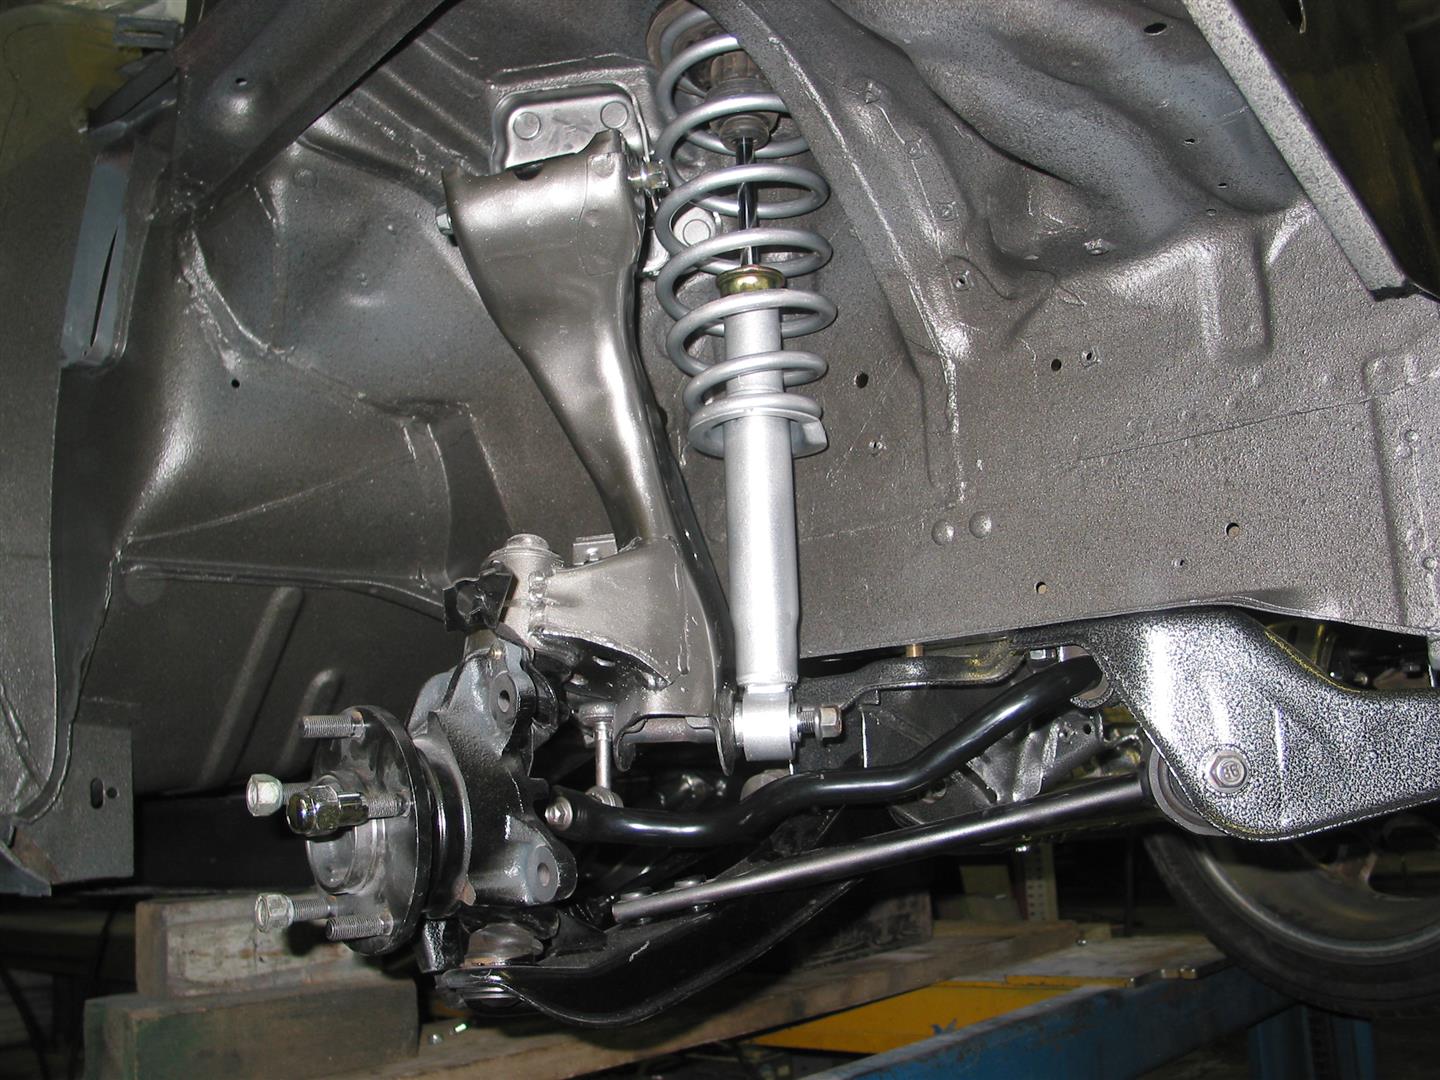
The Skyline is a Japan only car, right hand drive, so we got a Nissan 240SX rack and pinion which bolted right in. The Studebaker clutch and brake pedals went down through the floor, and the firewall was thin sheet metal. We reinforced the firewall on the left side with a piece of 1/8 inch plate, and added the raised area from the Skyline firewall for the brake booster. We decided to use the Skyline steering column, throttle, clutch and brake pedals. Sean added about four inches to the steering shaft to mate with the rack and pinion. The engine and trans were installed to check for clearance between the turbo and the steering, and Sean built the rear transmission crossmember.

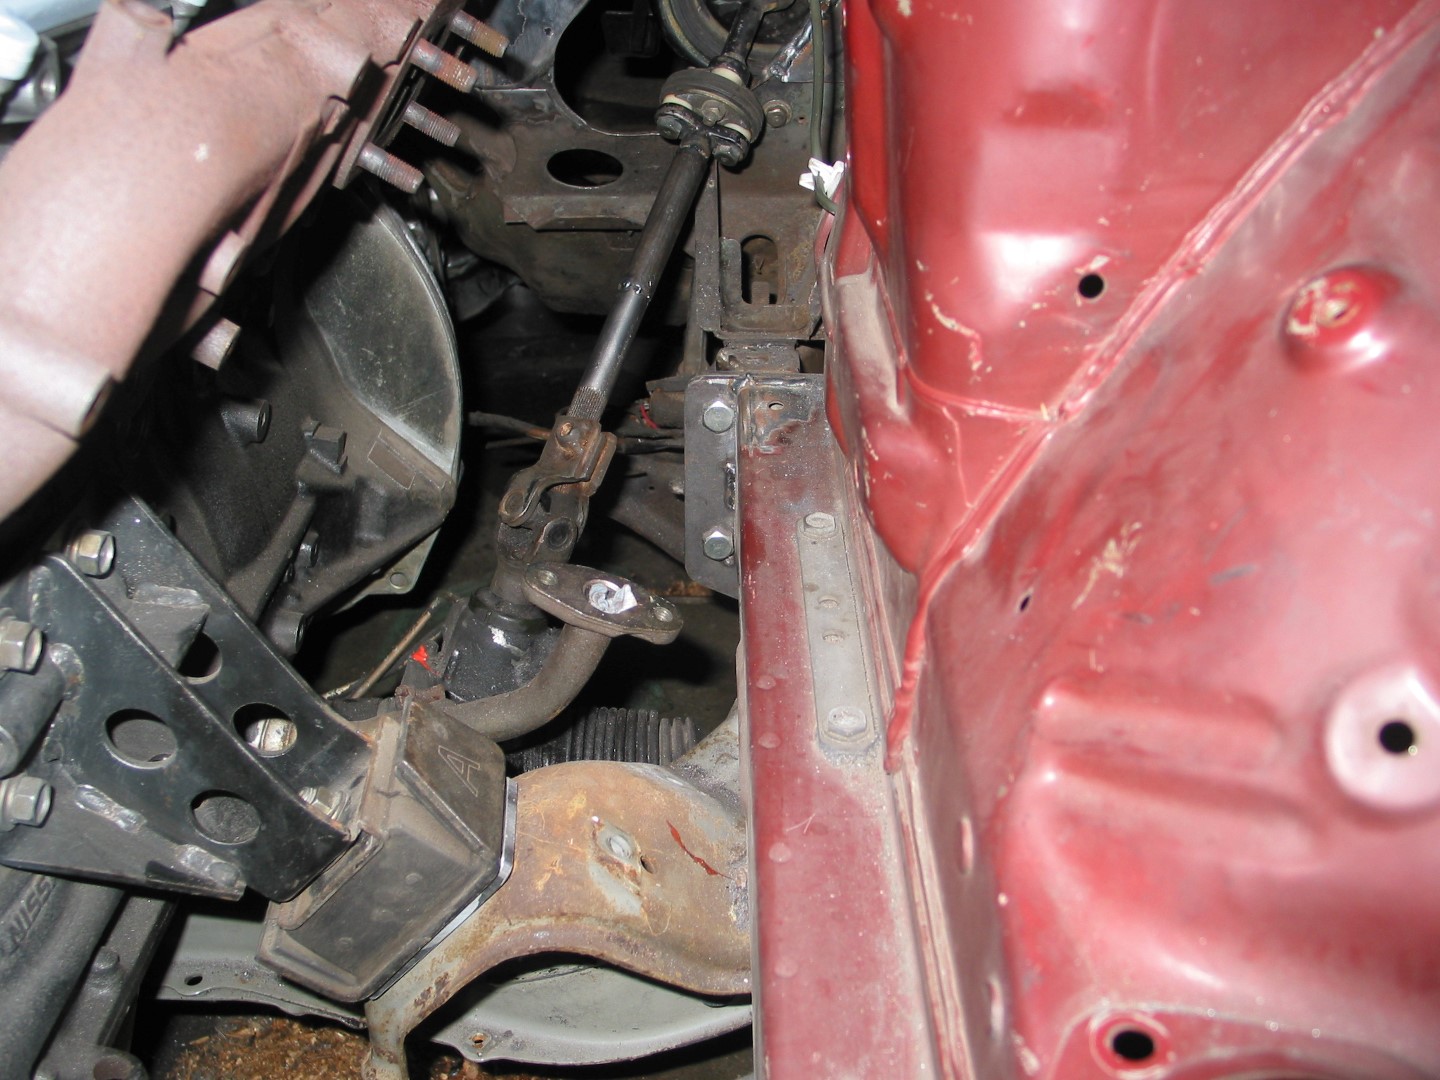
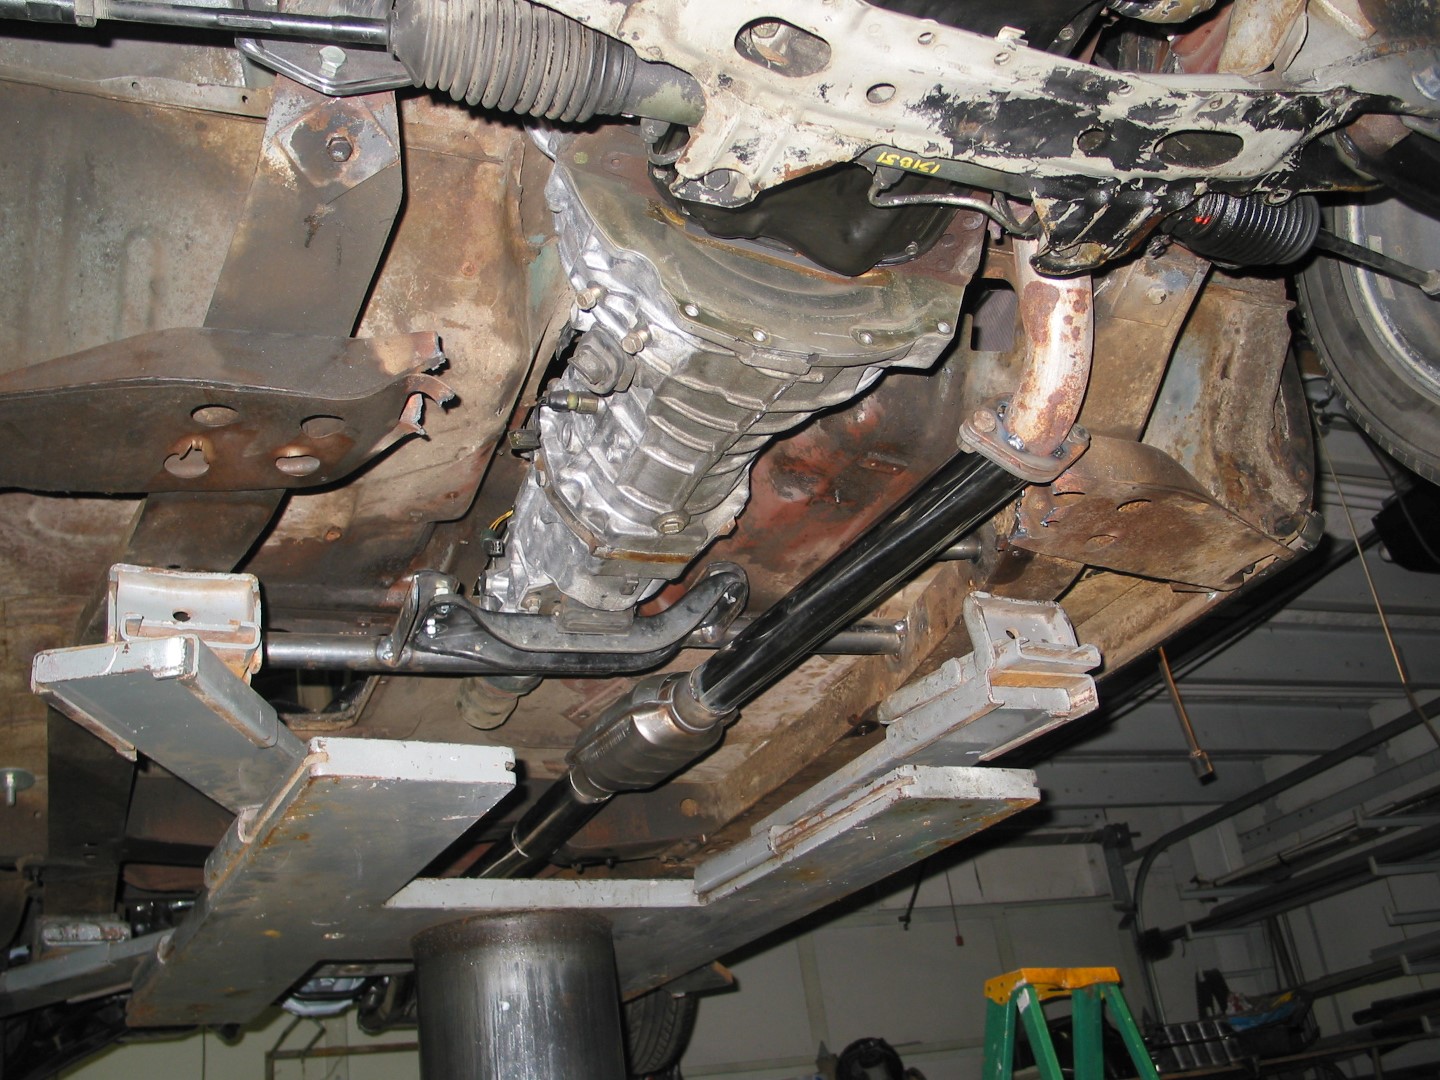
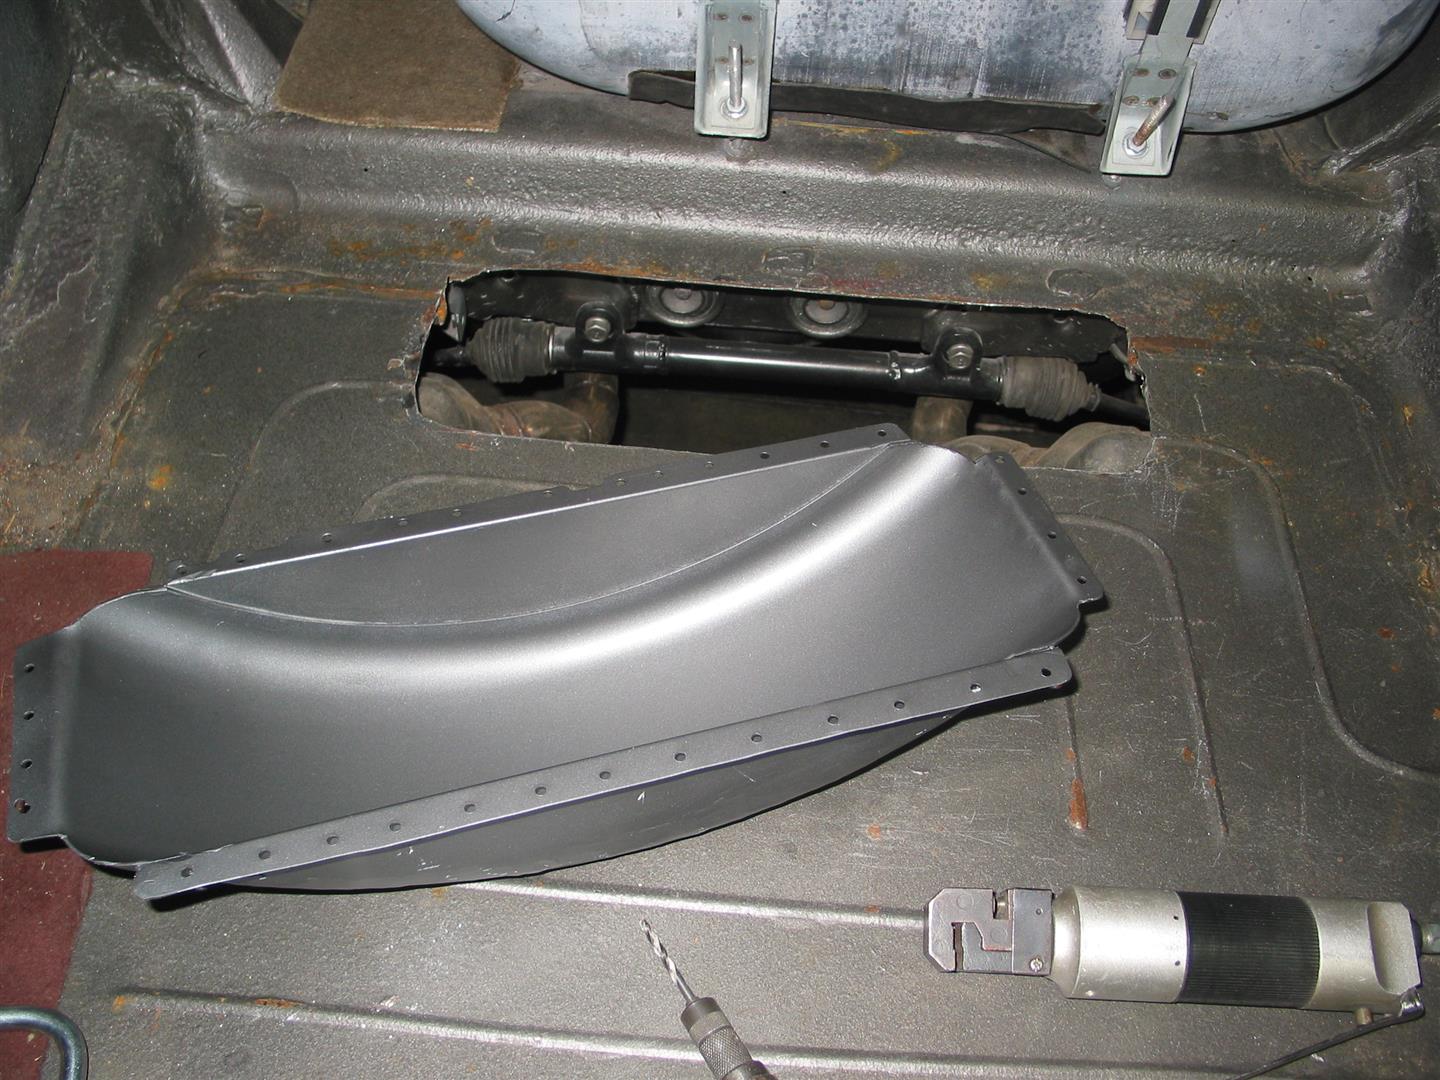
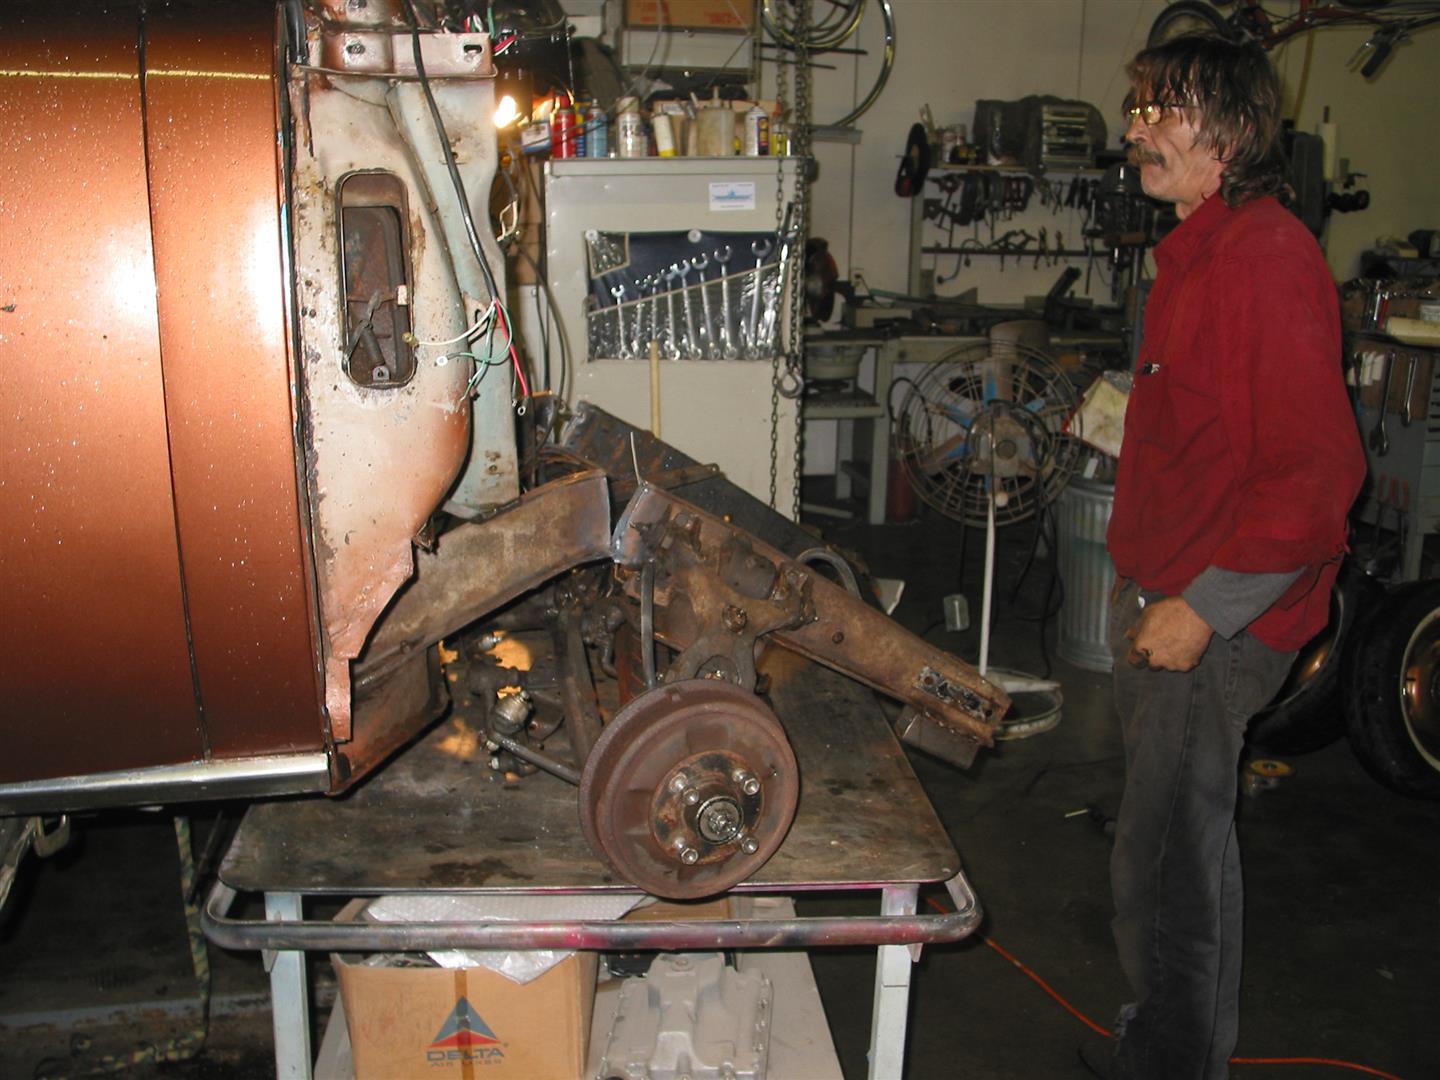
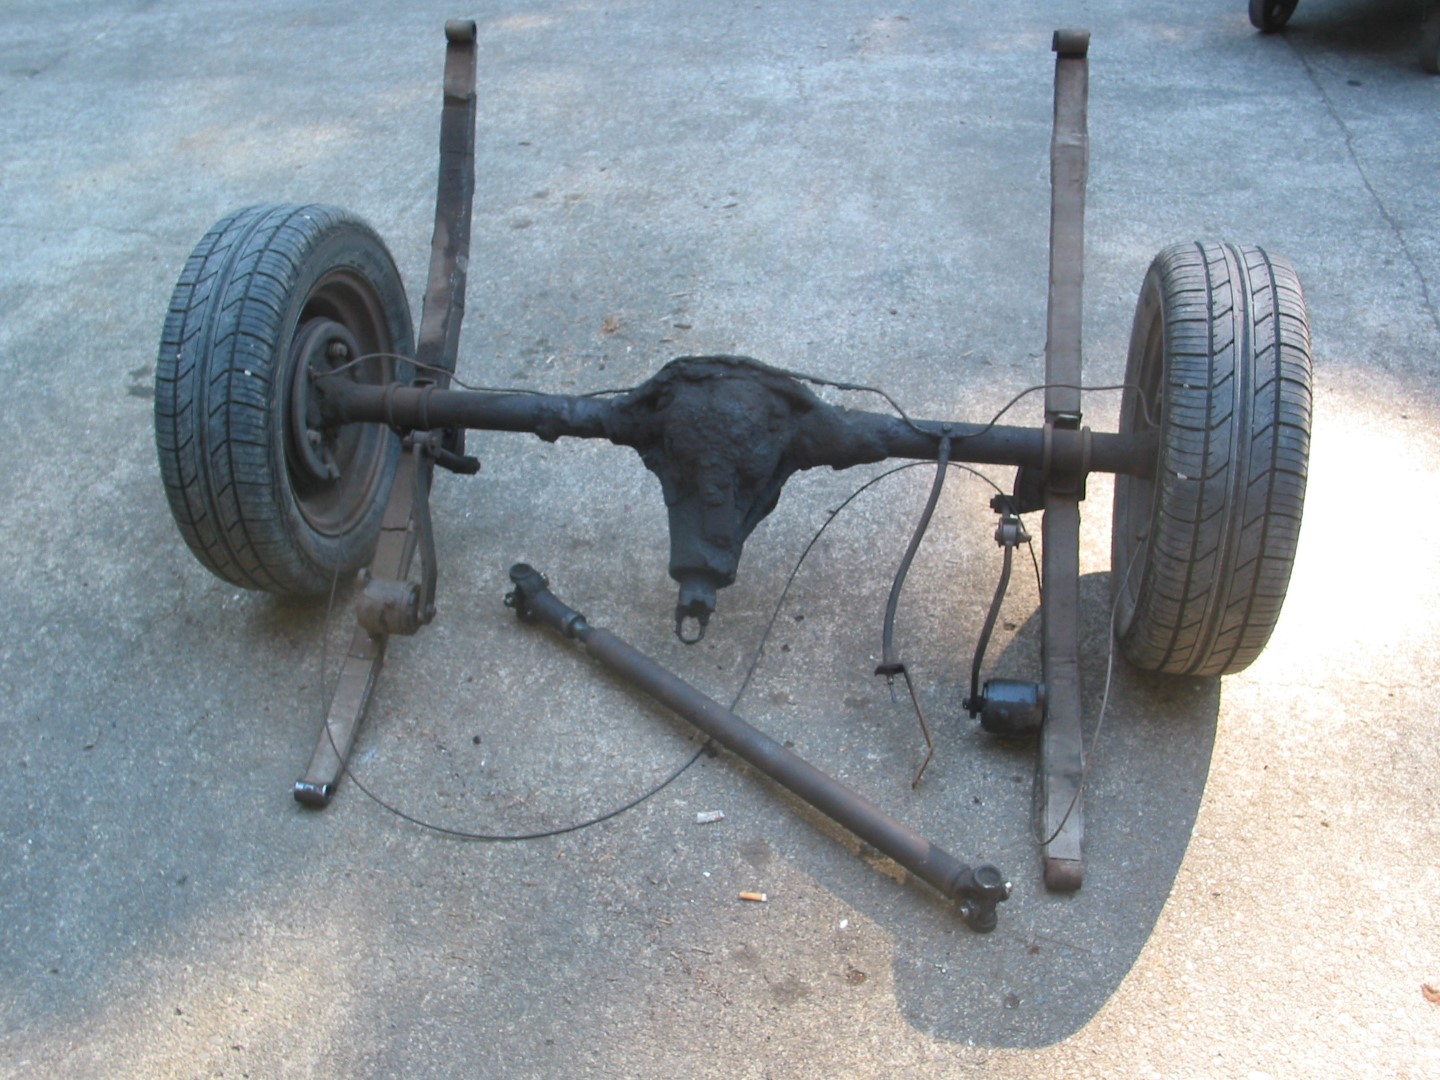
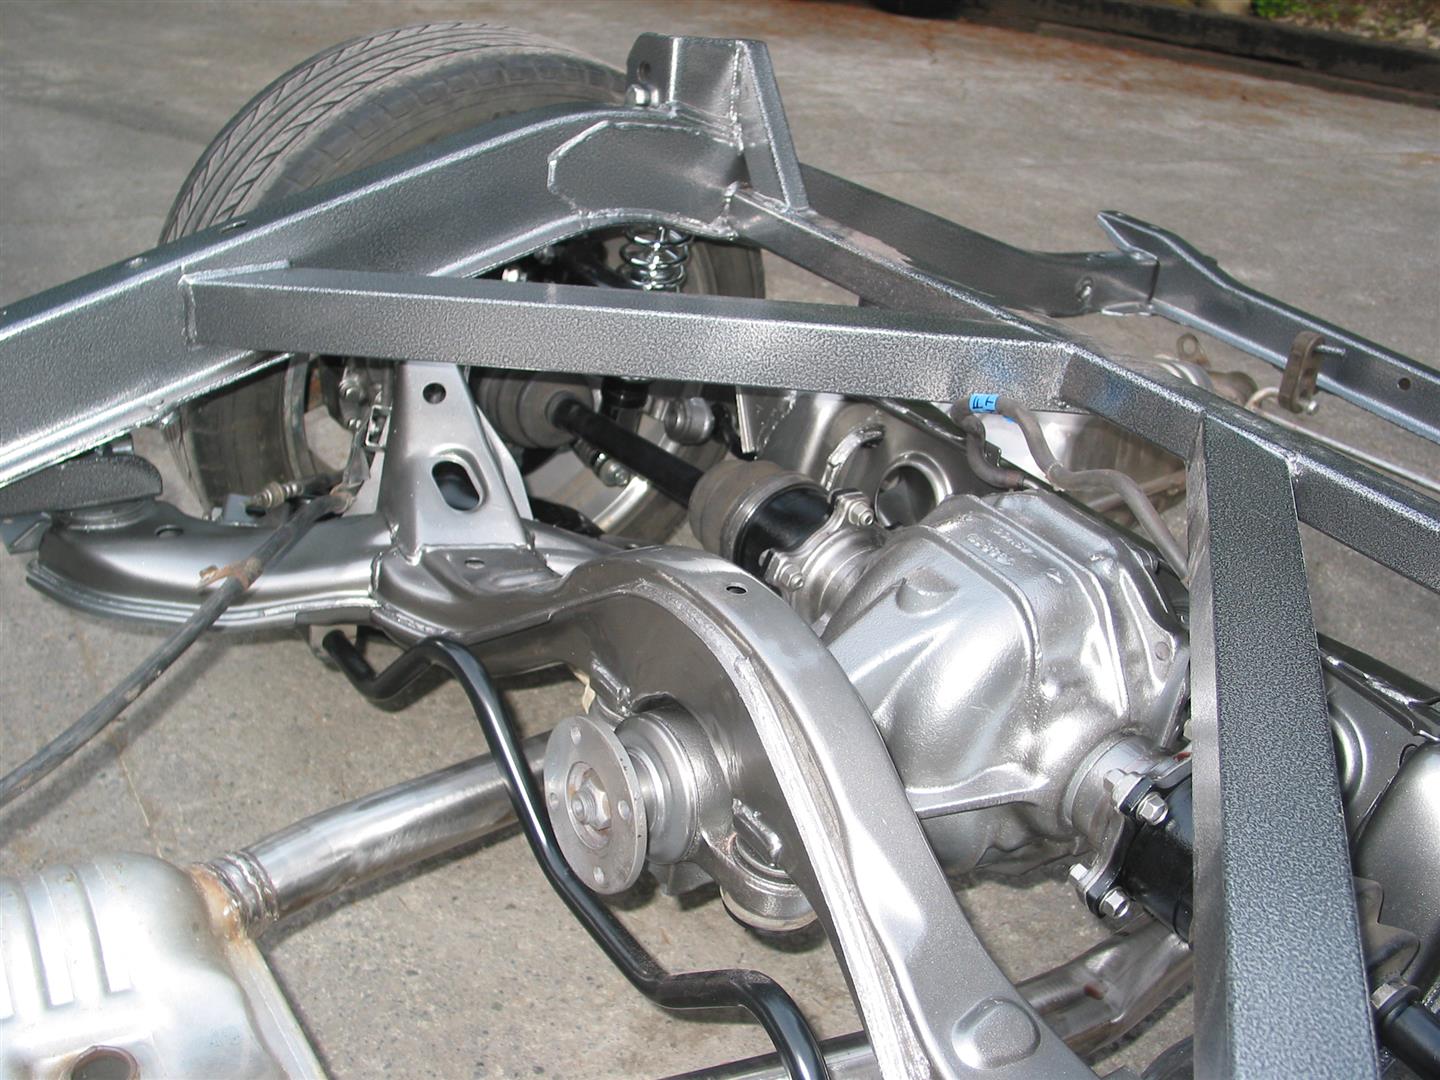
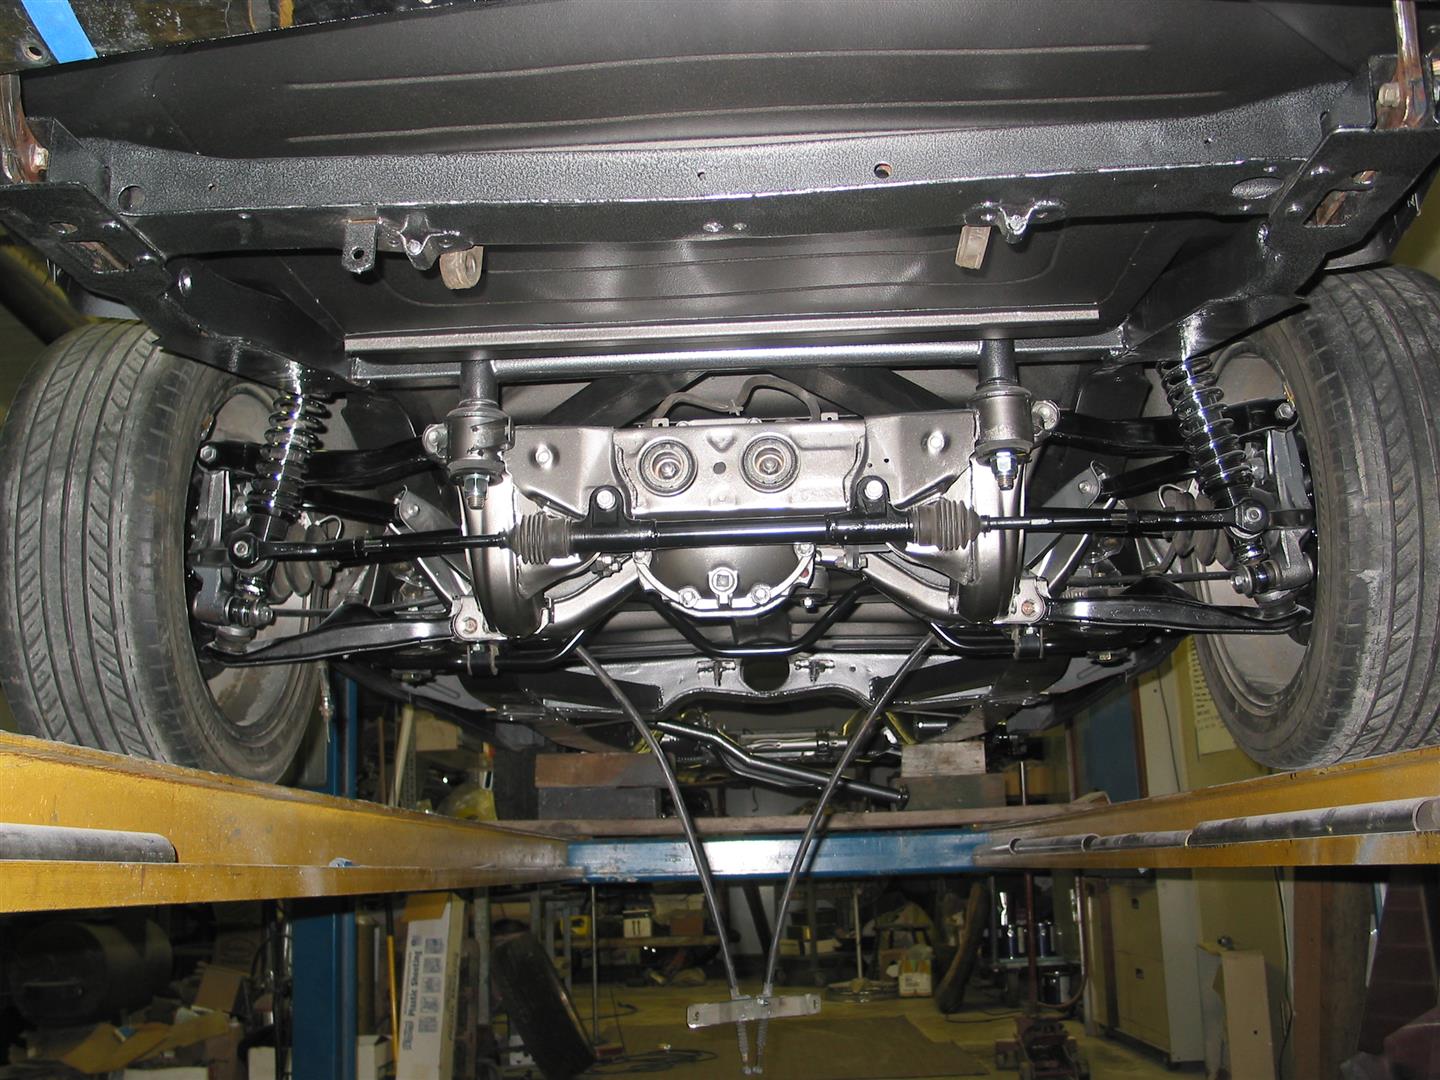
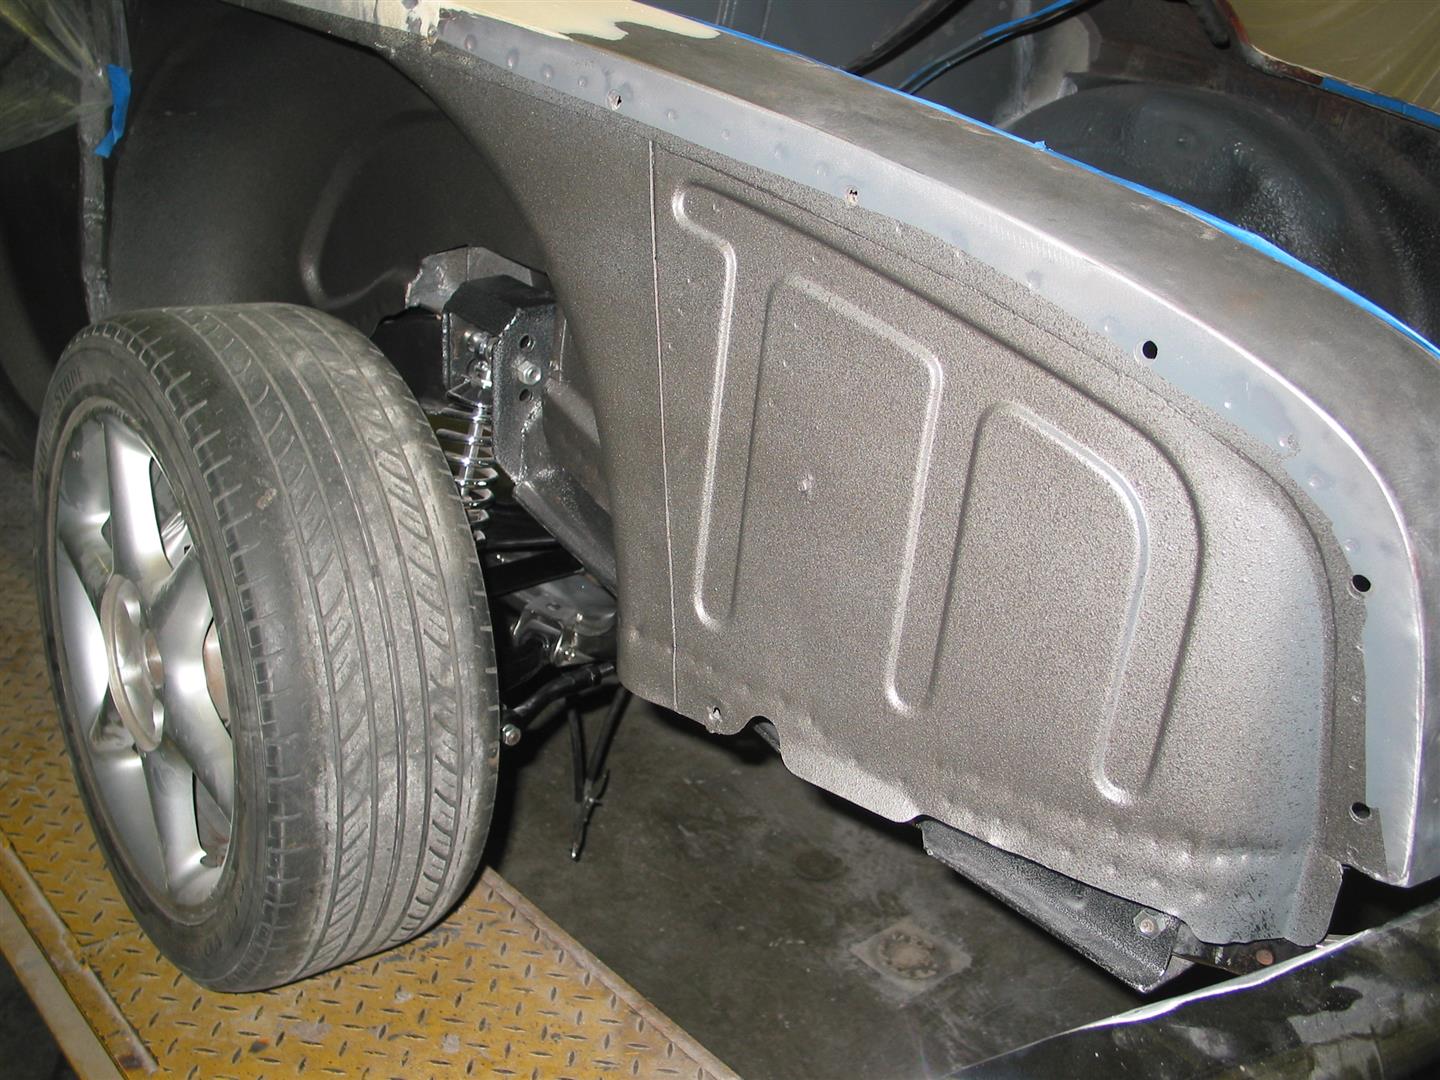
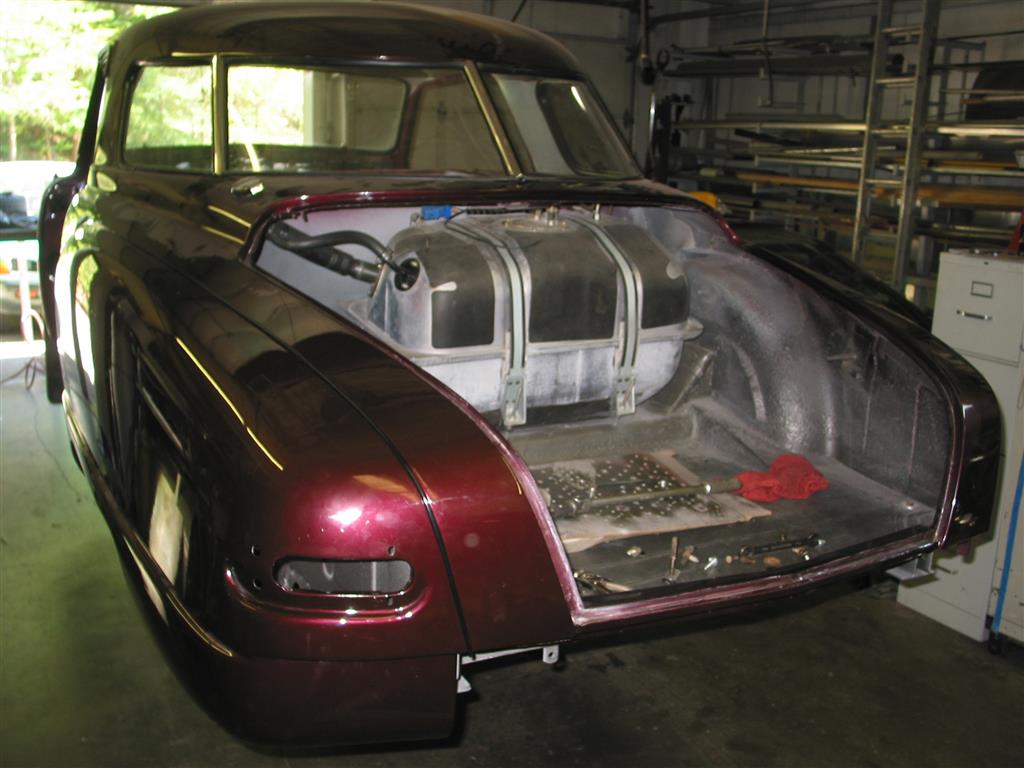
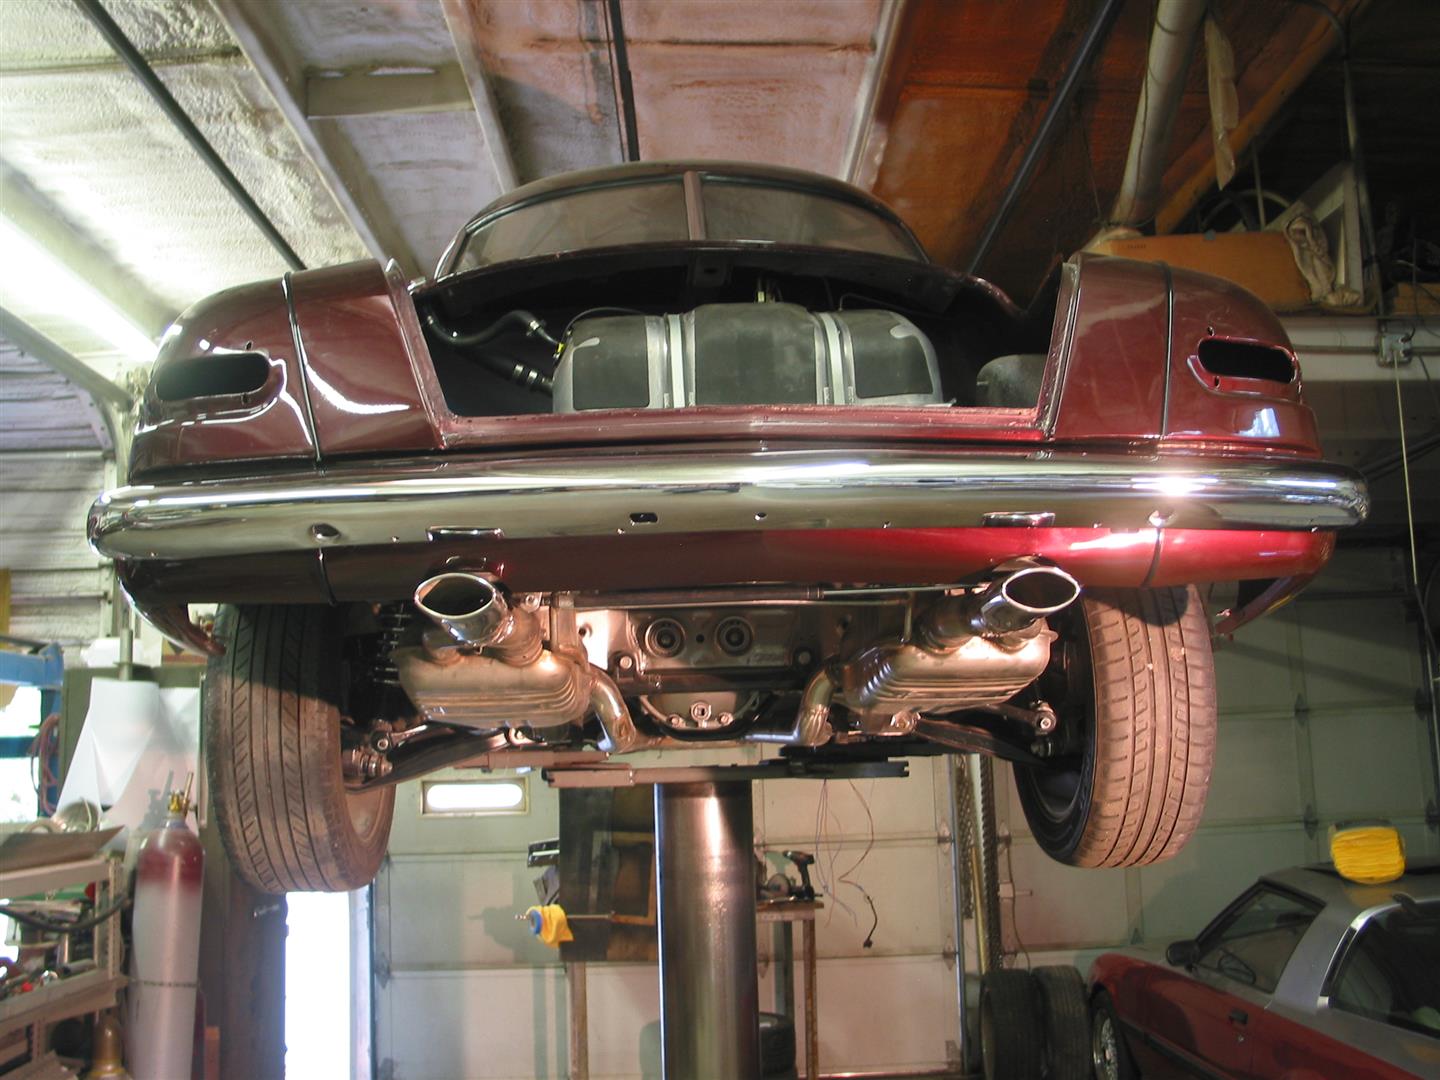
The rear axle and leaf sprigs were removed, along with the fuel tank. We had purchased a Skyline R33 rear suspension from Foreign Engines, complete with the viscous limited slip differential and disc brakes. Measurements showed that this rear suspension would fit under the Studebaker frame with no trimming, even with the ride height lowered 1 inch. Sean had the suspension mounted in one day, except for the springs/shocks. The Skyline rear struts were much too long, and there was not room for the large diameter springs. We purchased some Carrera small body shocks and chrome plated springs which just fit with the wheels we are using. The rear steer mechanism was removed and replaced with a piece of tubing, so the actuator is now just a rear toe adjustment.
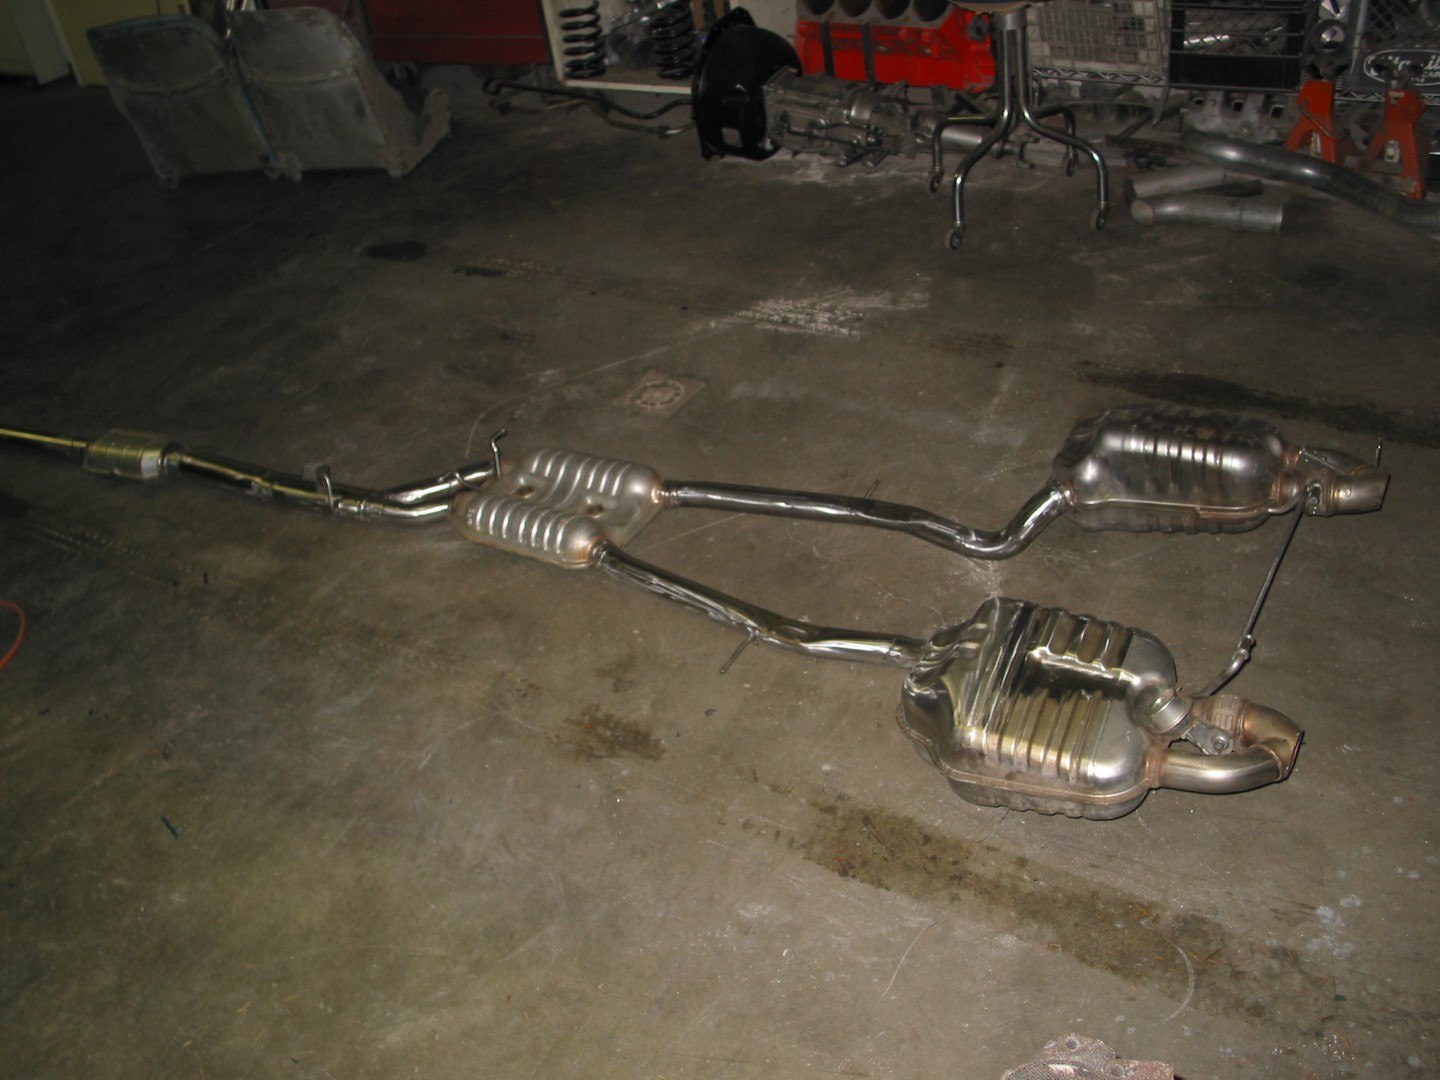
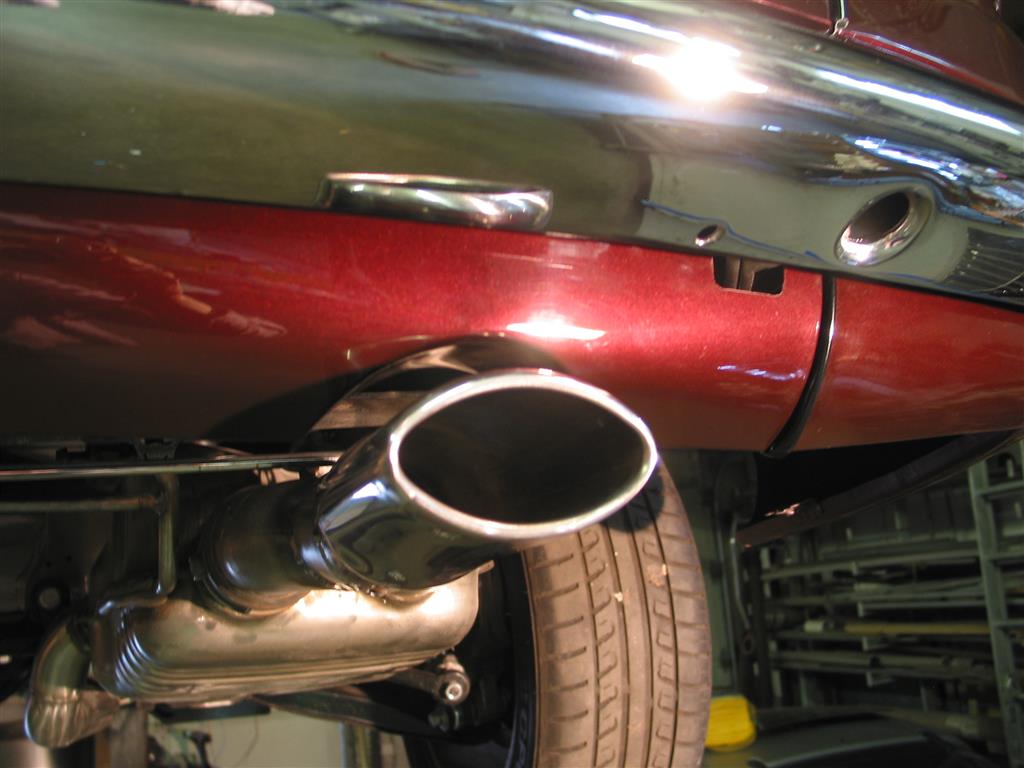
A friend gave us an almost new exhaust system from an Audi S4 turbo, and it was very easily adapted for our needs. Even the presilencer was dished out in the middle to make room for the drive shaft. The mufflers are dual path, so I wired the valves open for the straight through mode – still very quiet.
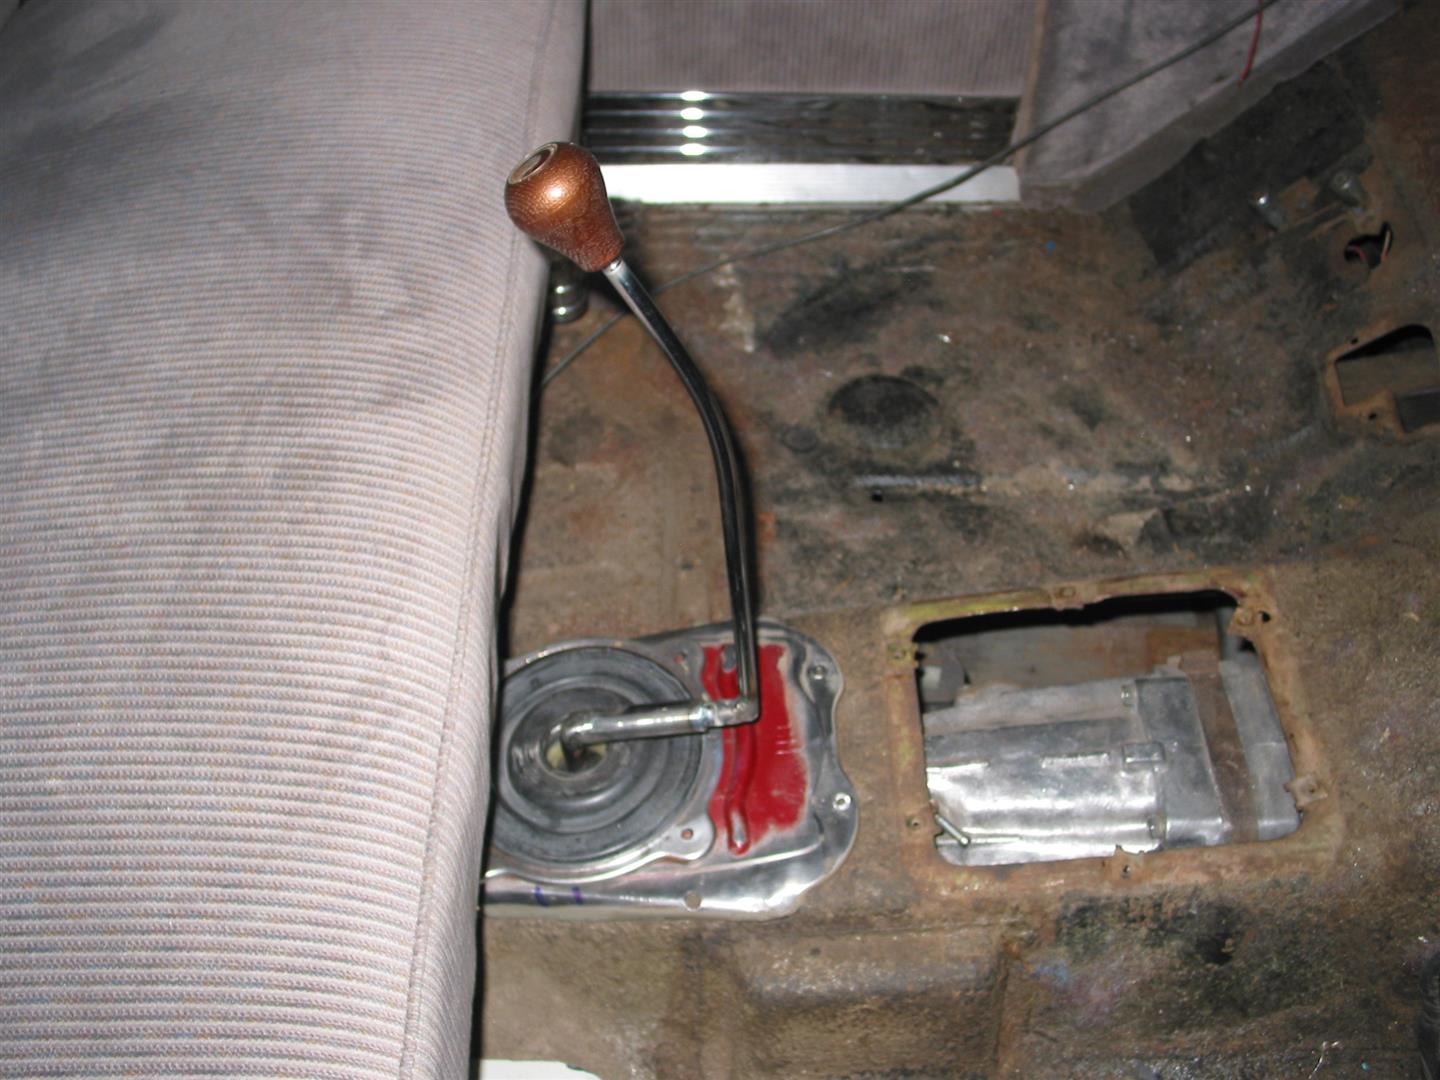
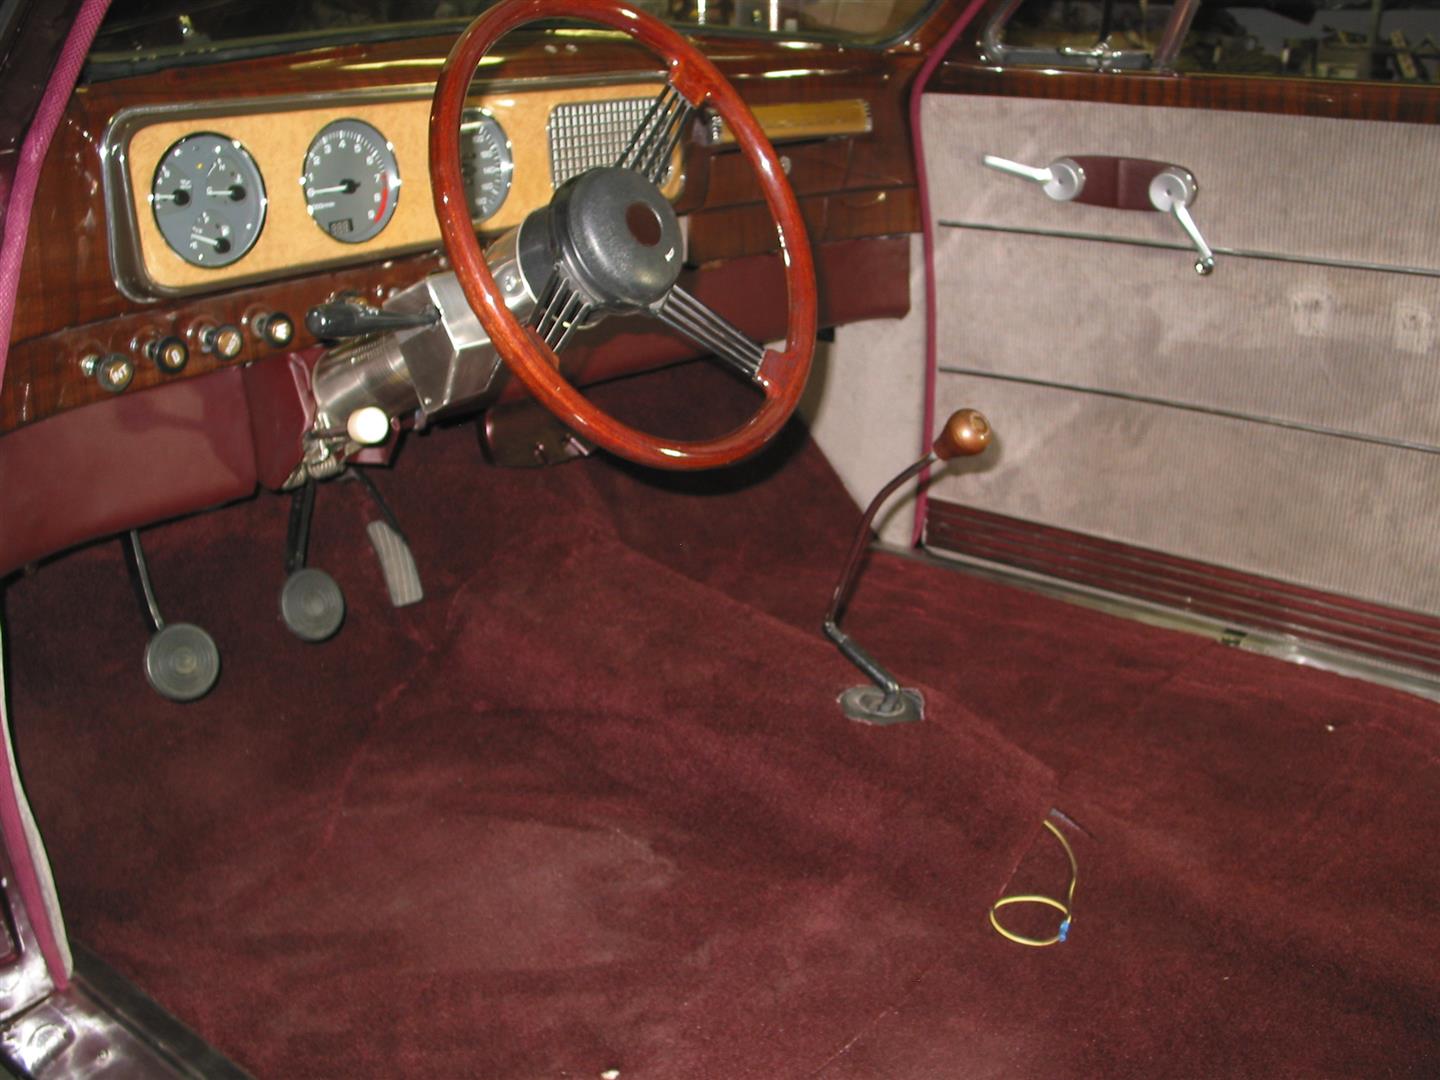
The Skyline 5 speed transmission is longer than the original Studebaker 3 speed, and the shifter was coming up under the bench seat except when it as moved all the way aft. I know someone shorter than I will want to drive it, so we made a “dog leg” shift lever that will clear when the seat is moved forward. I cut a panel out of the Skyline floor tunnel so I could use the stock Skyline inner shift boot.
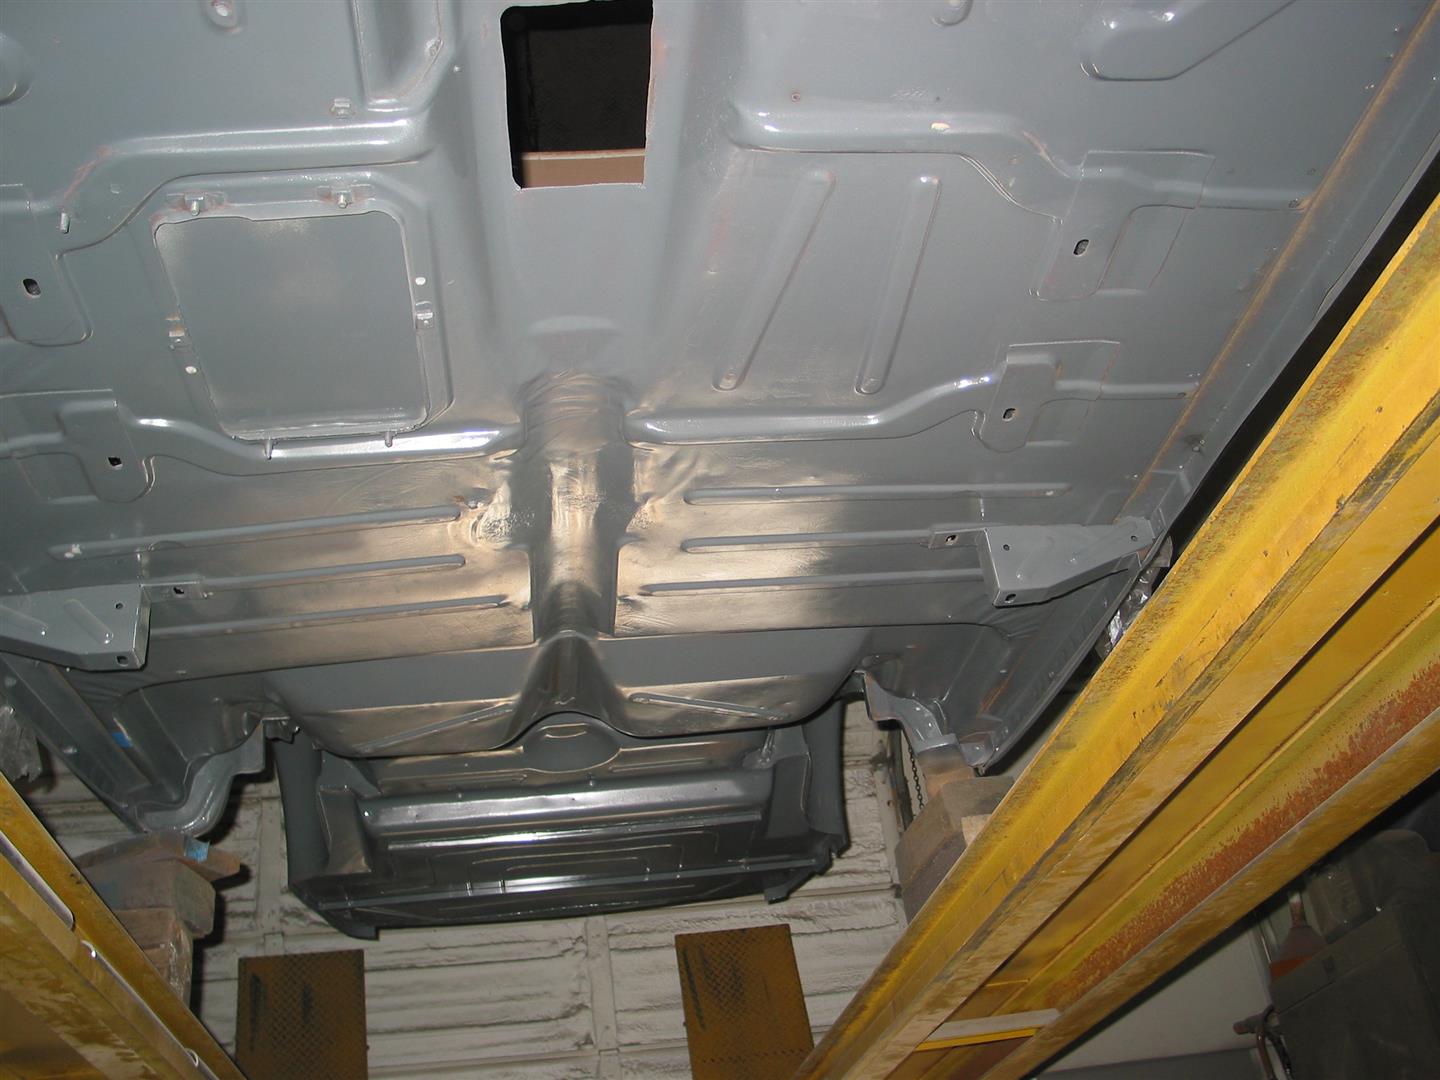
There was no serious rust on the body except for the trunk floor which was rusted through in a couple of places. Sean just made a new trunk floor and installed it.
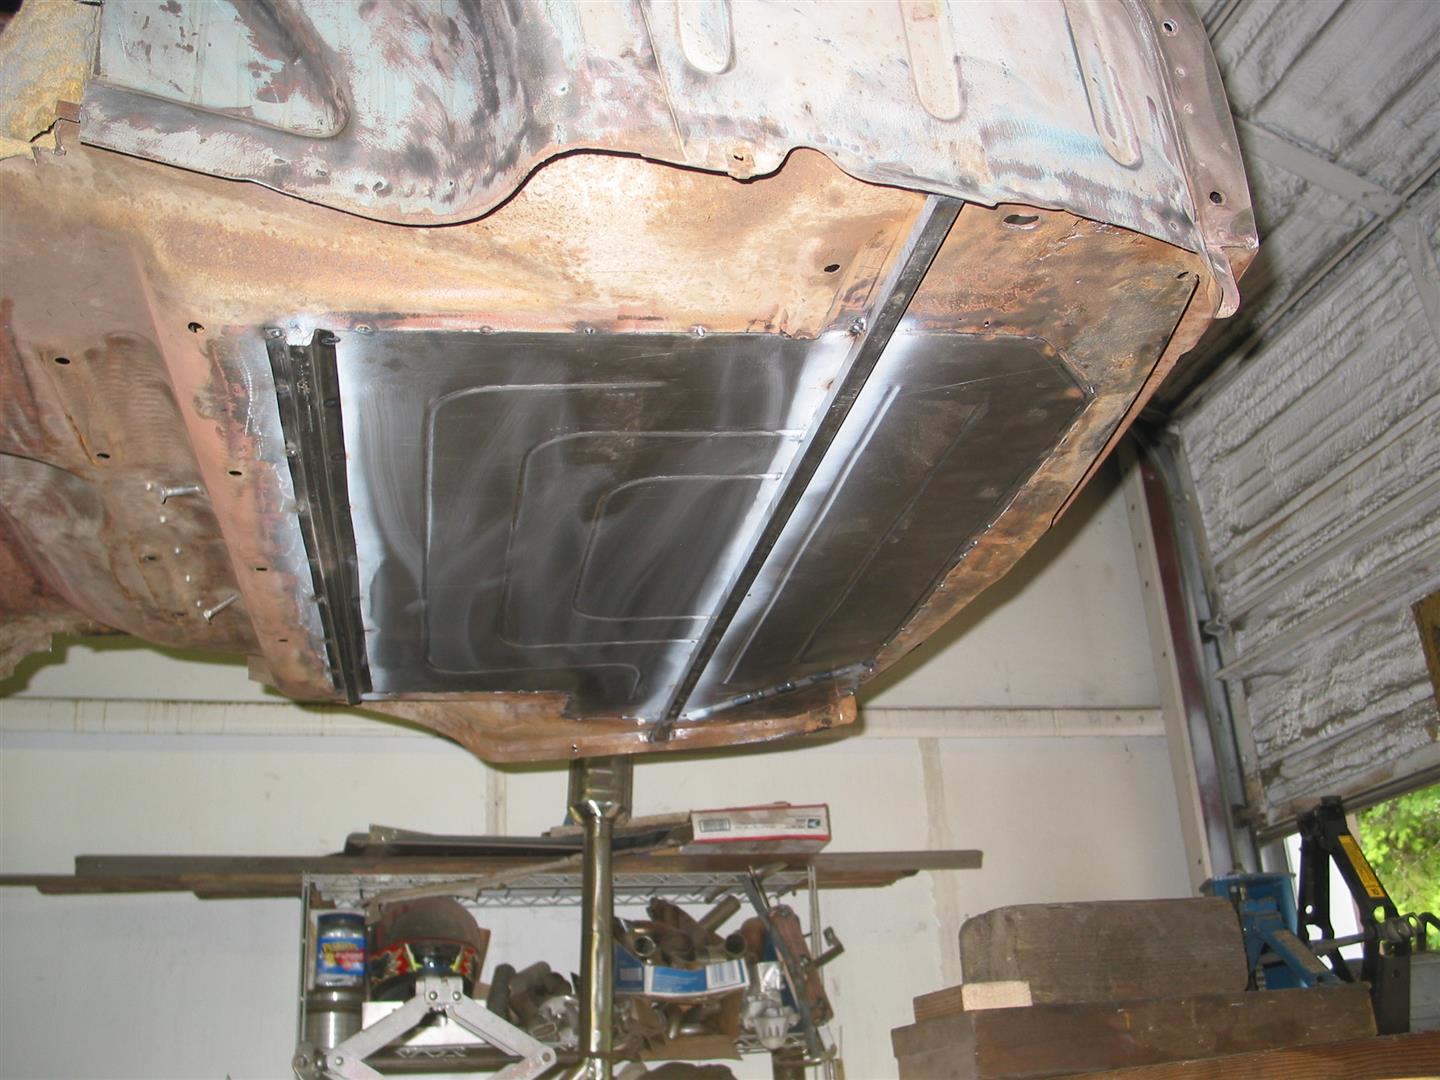
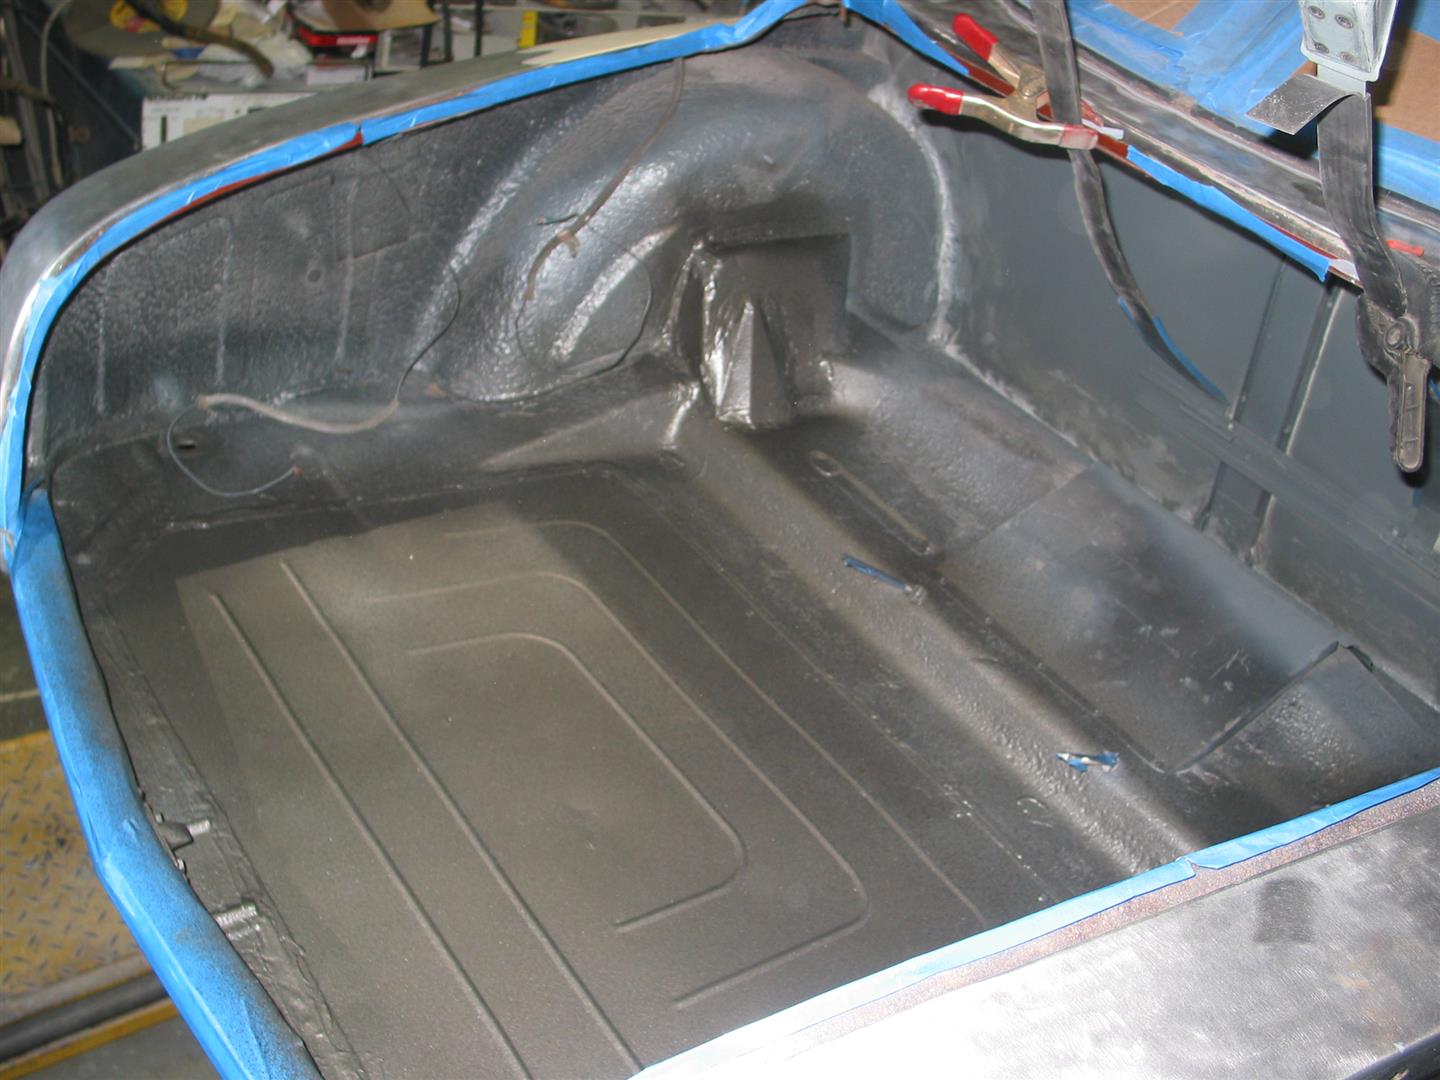
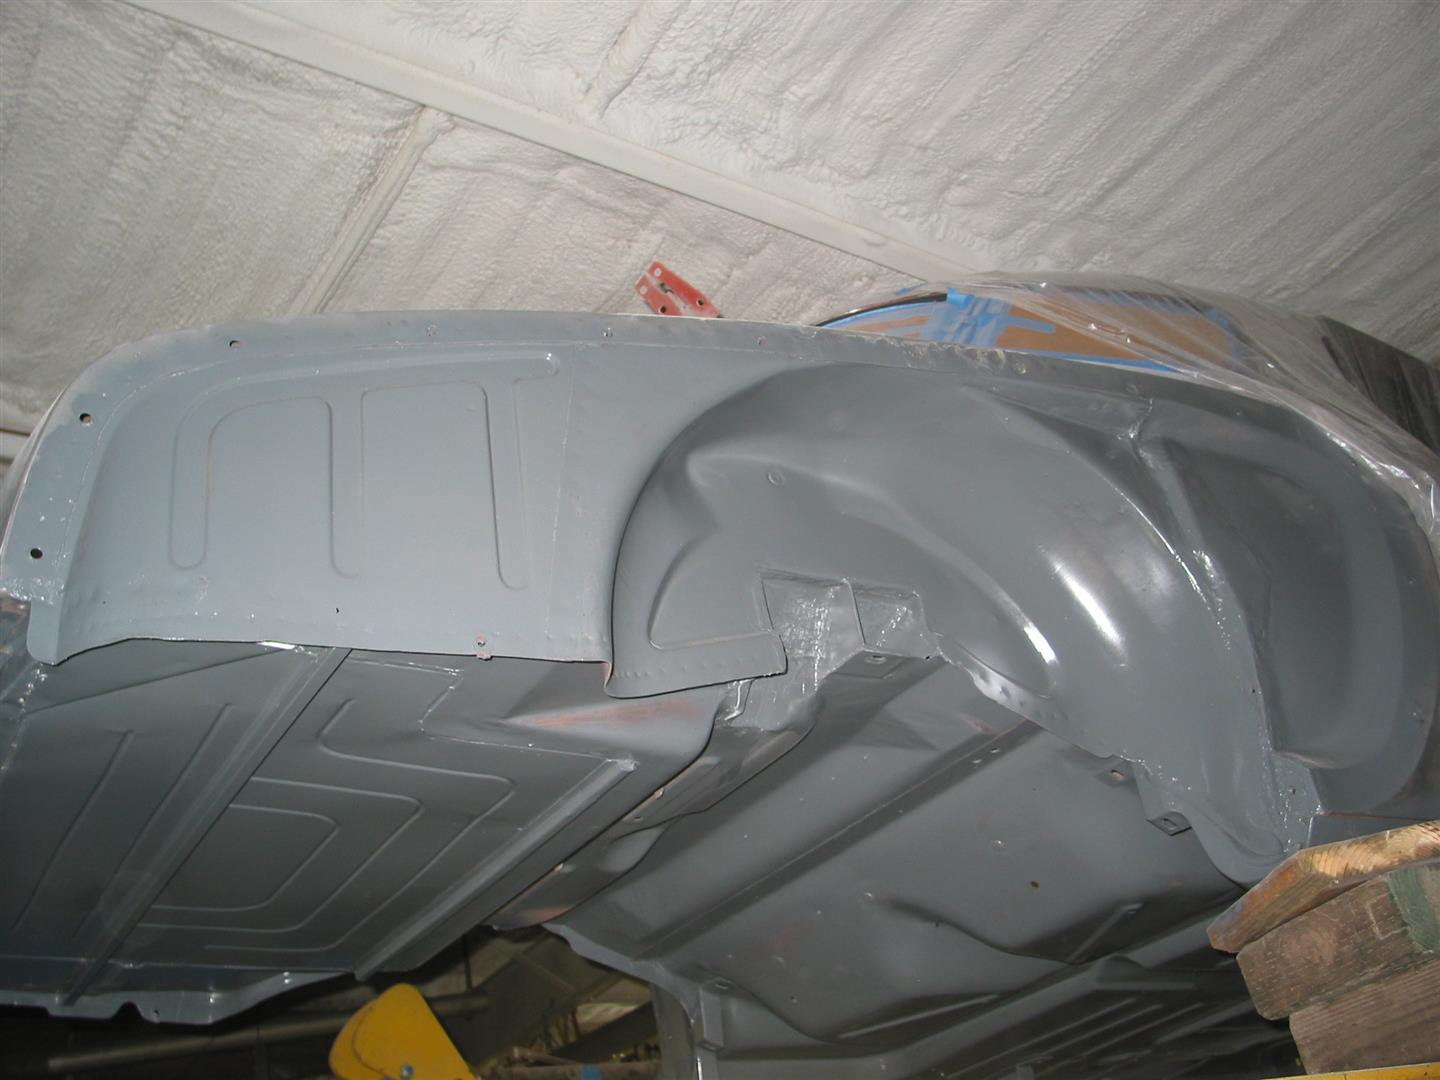
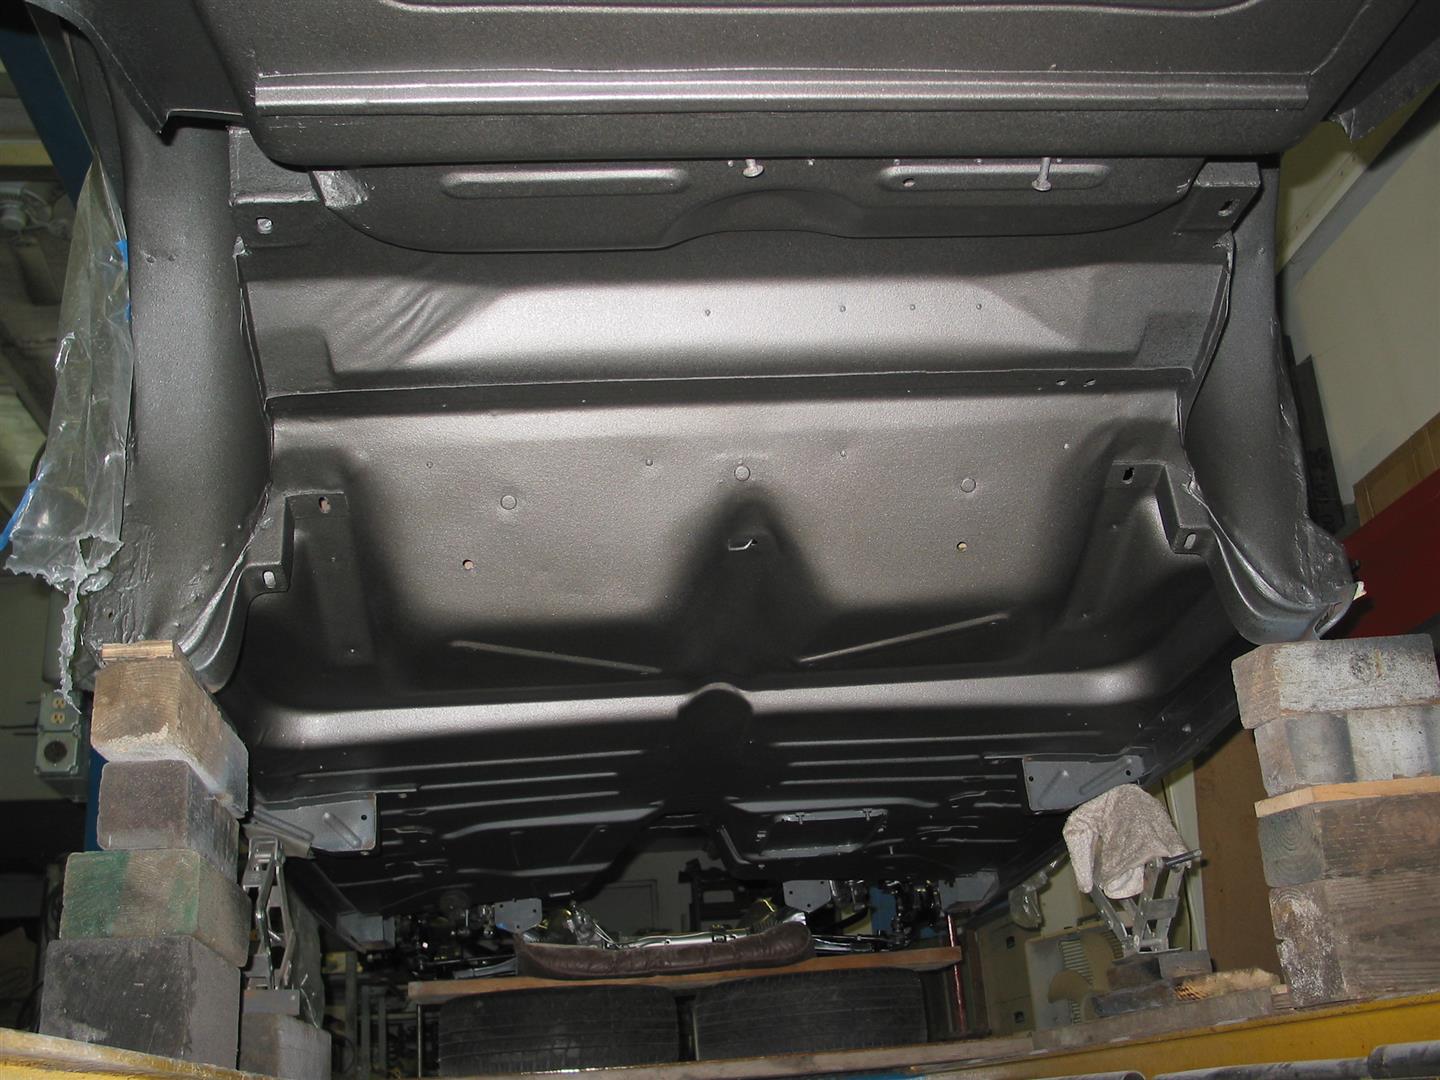
The vent door area of the left front fender was badly rusted, apparently a common problem with these cars. I bought a patch panel from Classic Enterprises and welded it in. We cleaned up the body underside and primed it with epoxy primer. I then painted the entire underside and wheel wells with a urethane bedliner material, brand name U-Pol Raptor. I bought the clear and tinted it with the same silver grey paint I used in the engine compartment.

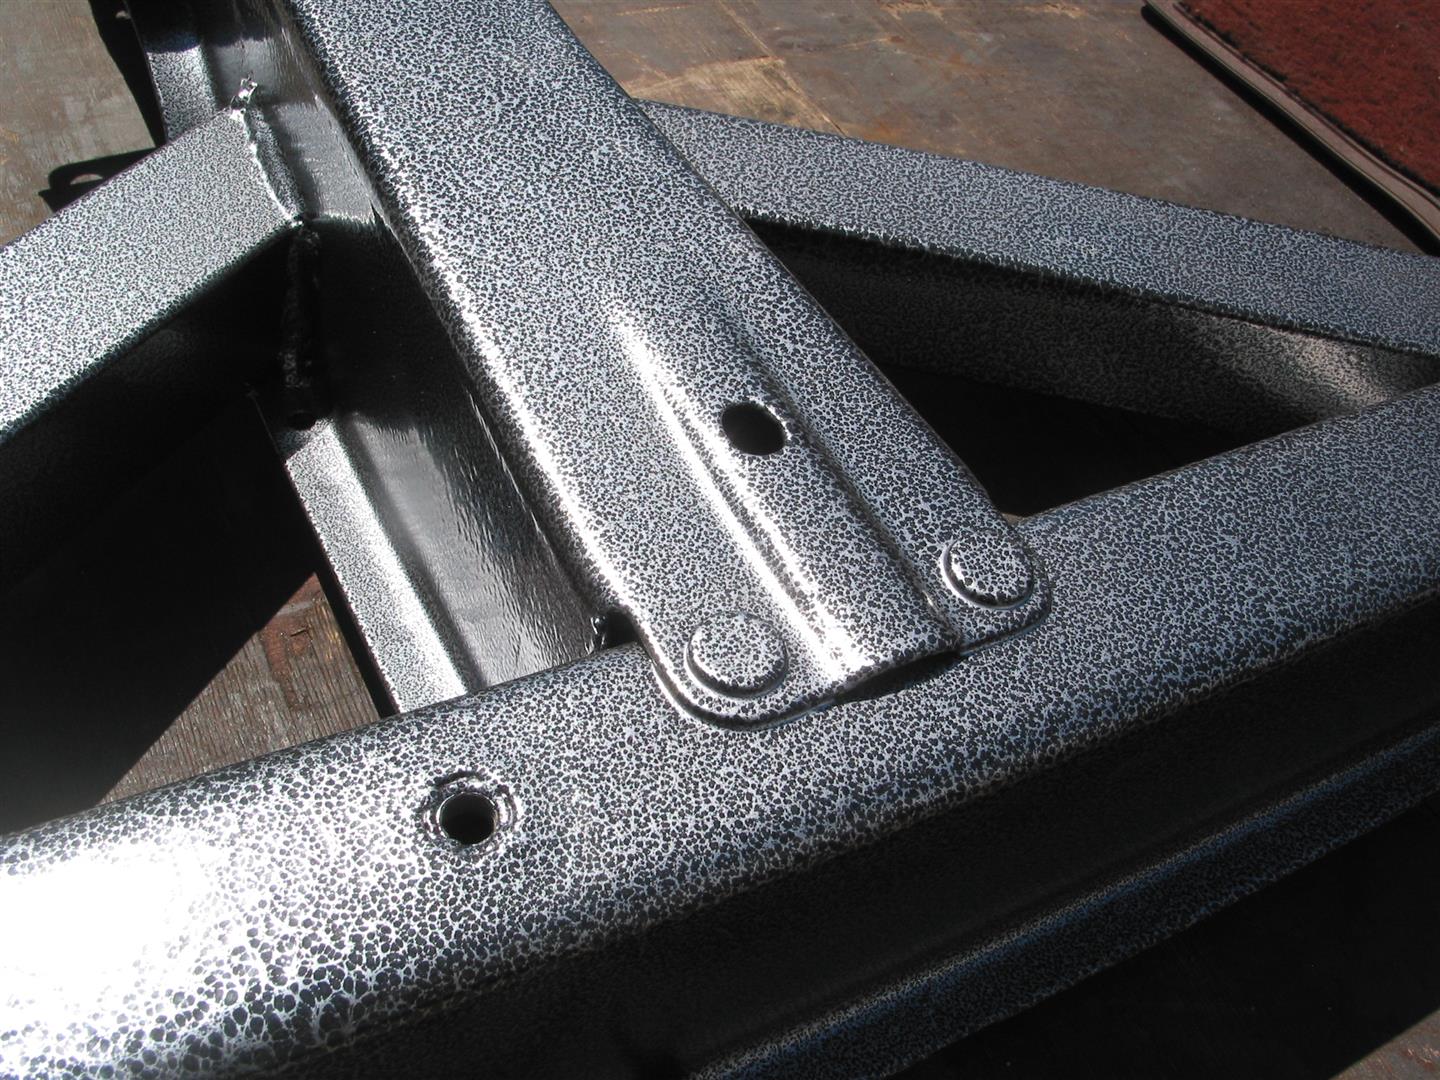
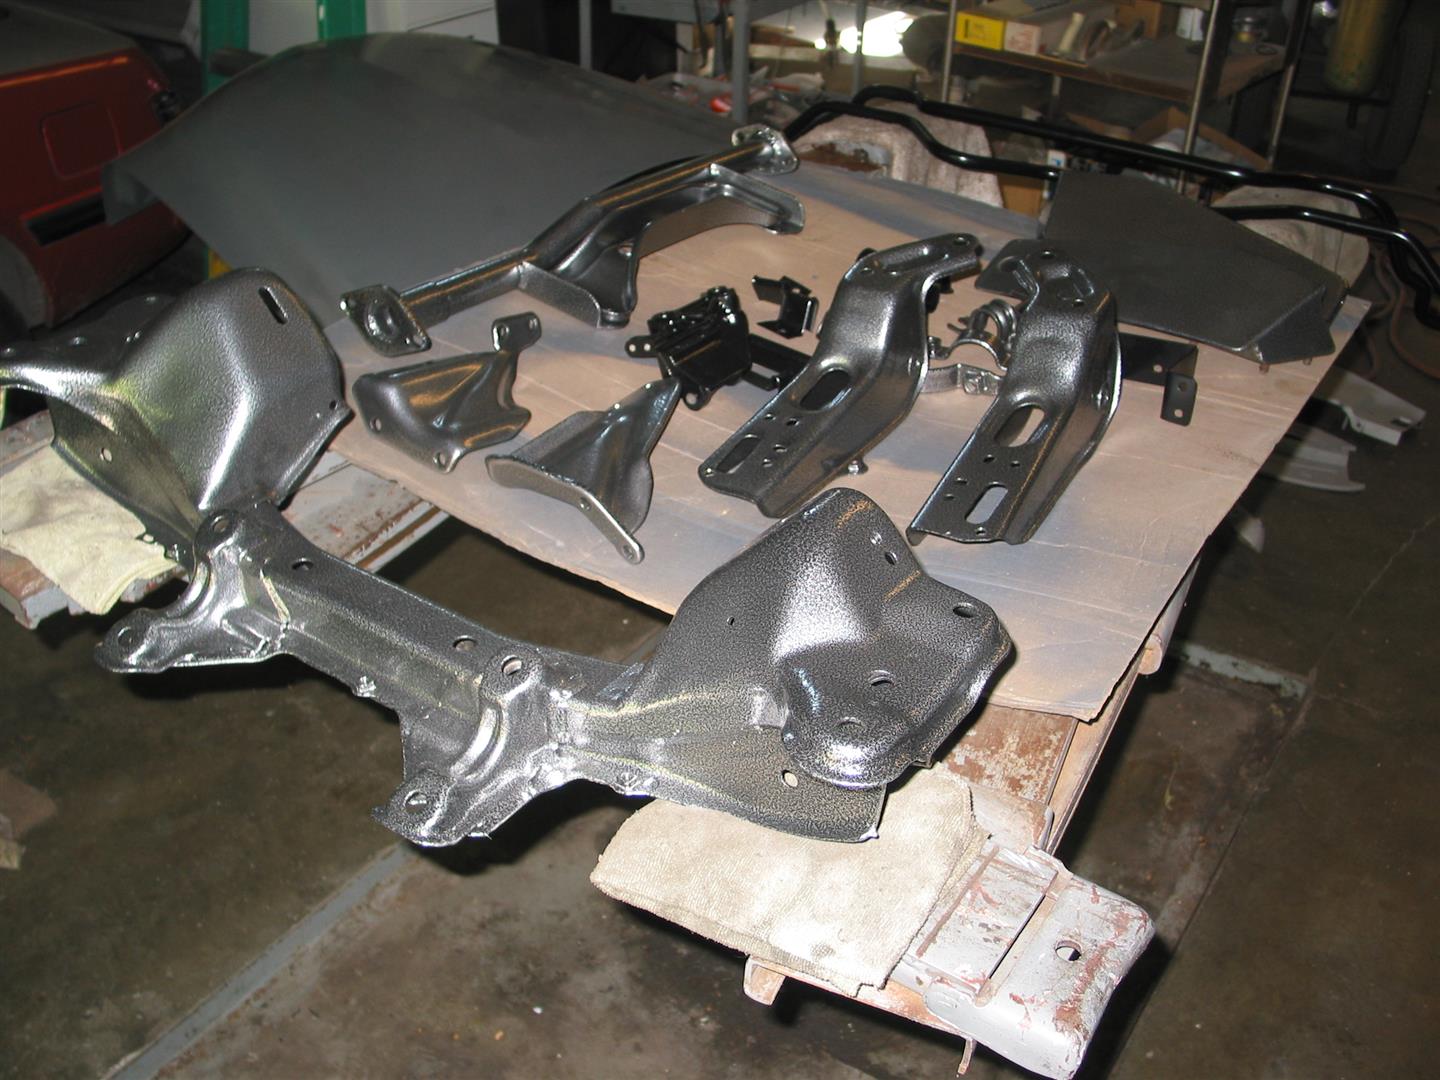
Sean added some diagonal bracing and other reinforcements to the frame and we took it away for sandblasting and powdercoat, along with some other parts. The powdercoat is called “Silver Vein”. Front and rear sway bars and few brackets are powdercoated semigloss black.
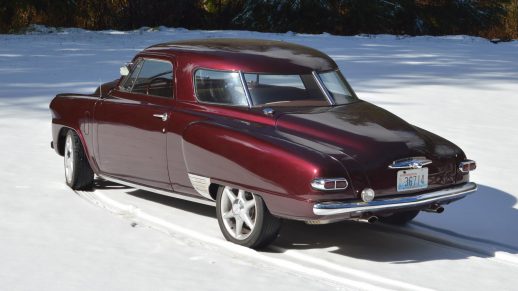
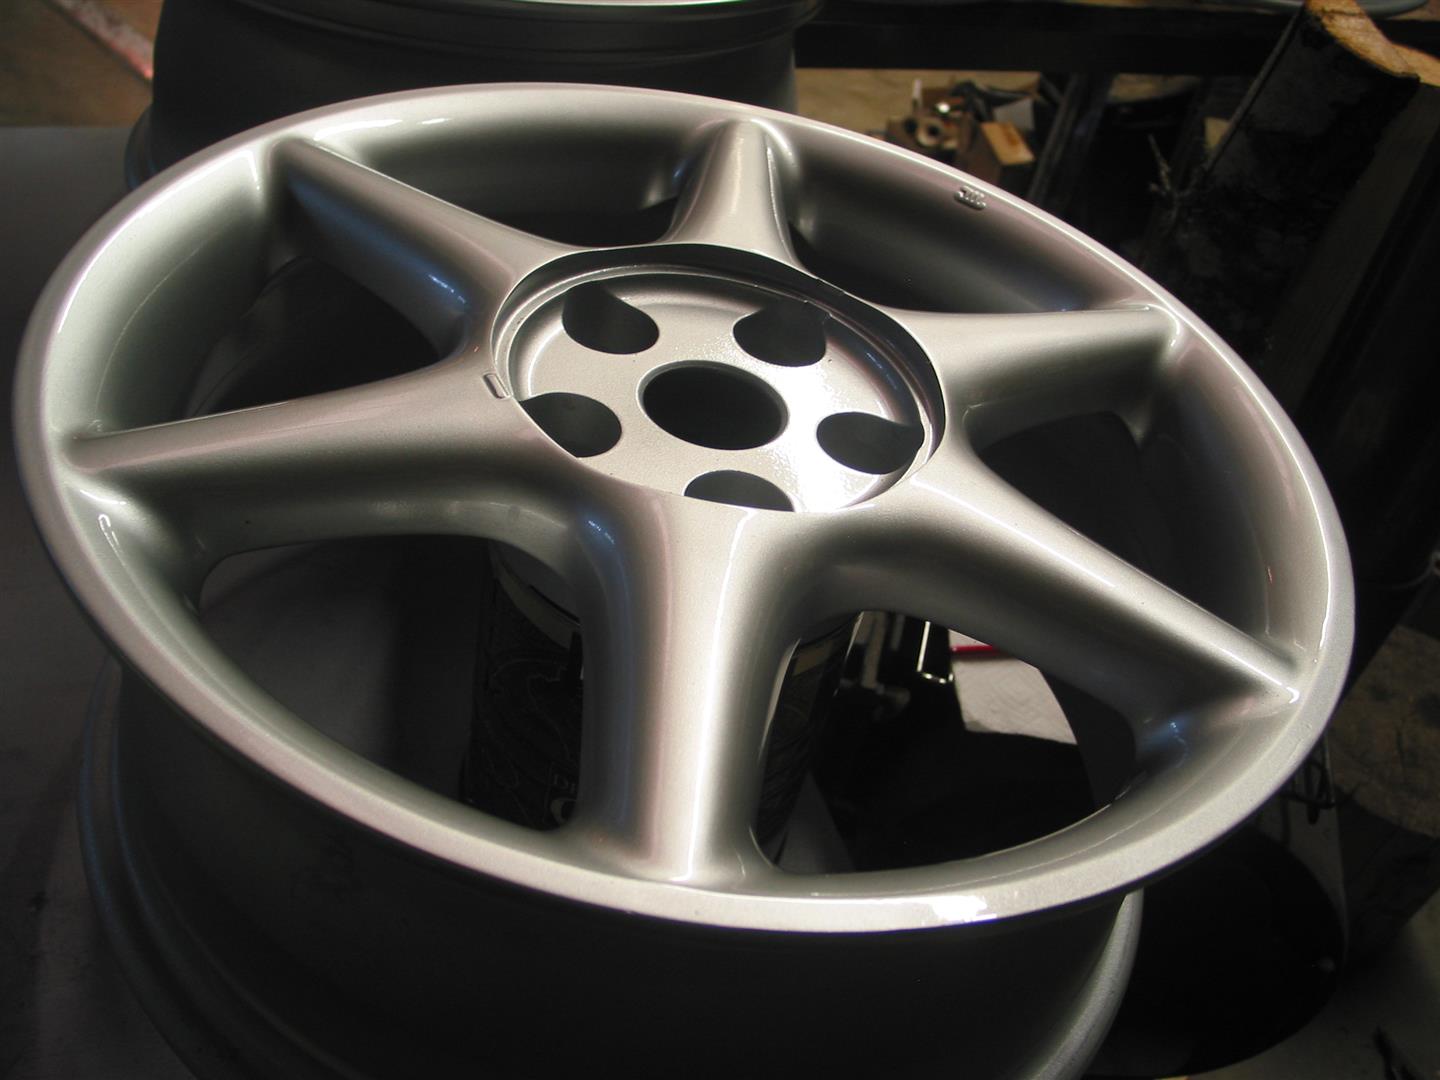
The rear suspension was most easily assembled with the chassis inverted. The people at Foreign Engines Inc sold us two sets of these 17×7 alloy wheels with tires for a very reasonable price. I painted the four best wheels and installed the four best tires, plenty of rubber left for initial driving. The double hump sway bar is from an Infiniti J30 rear suspension we had, and fit the dual exhaust perfectly.
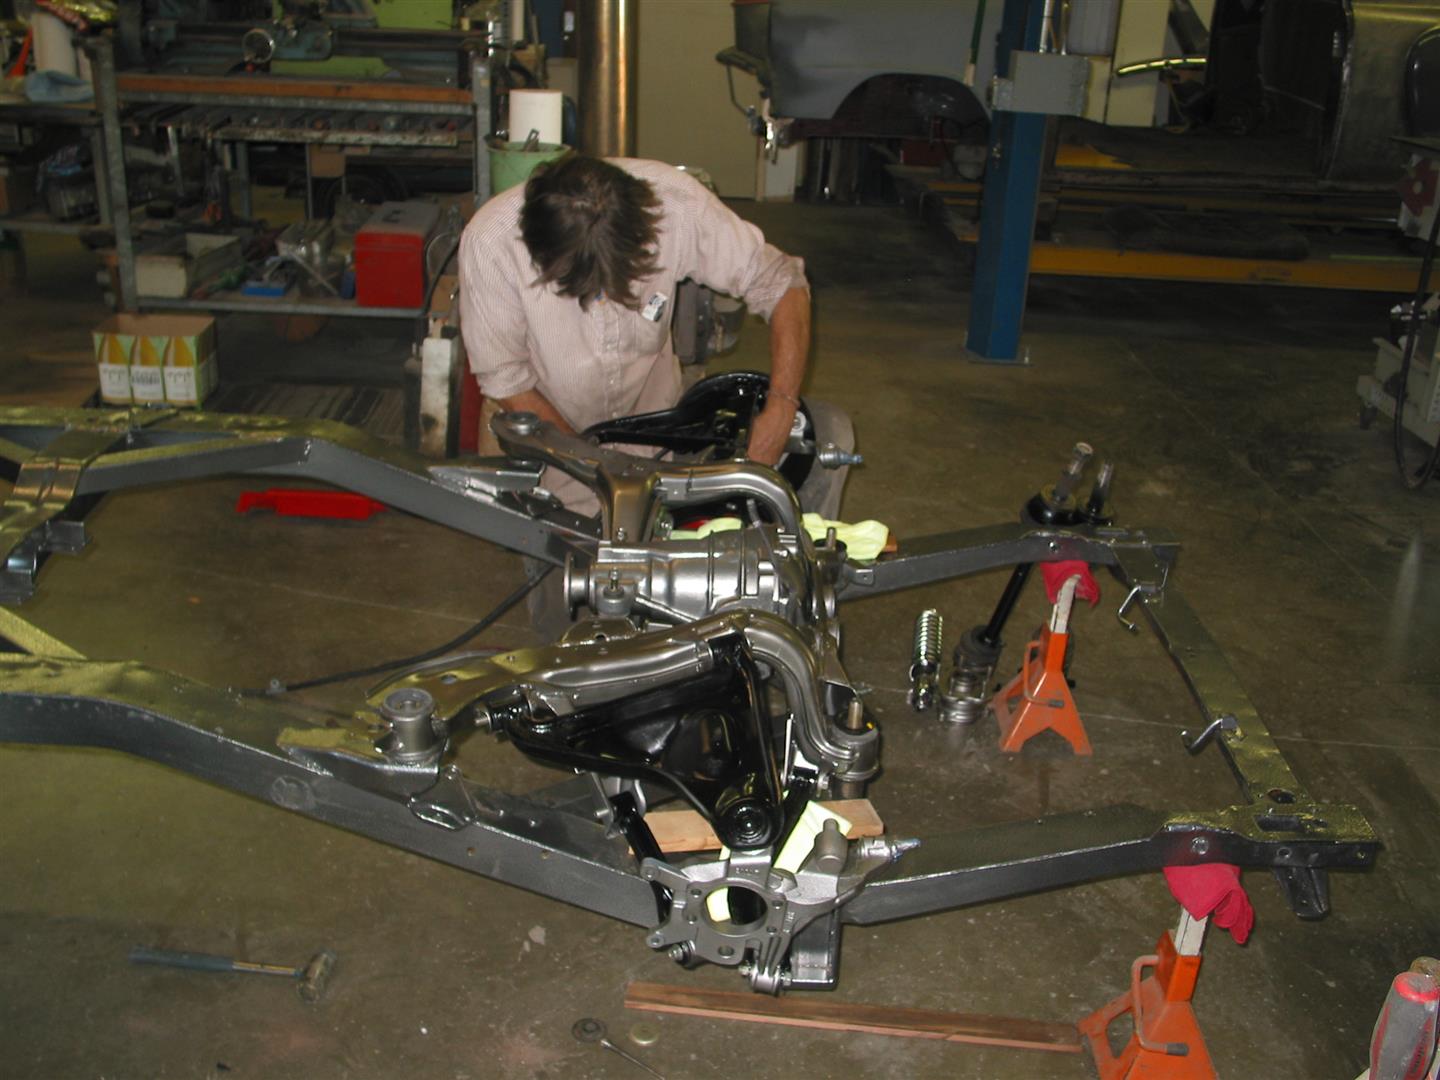
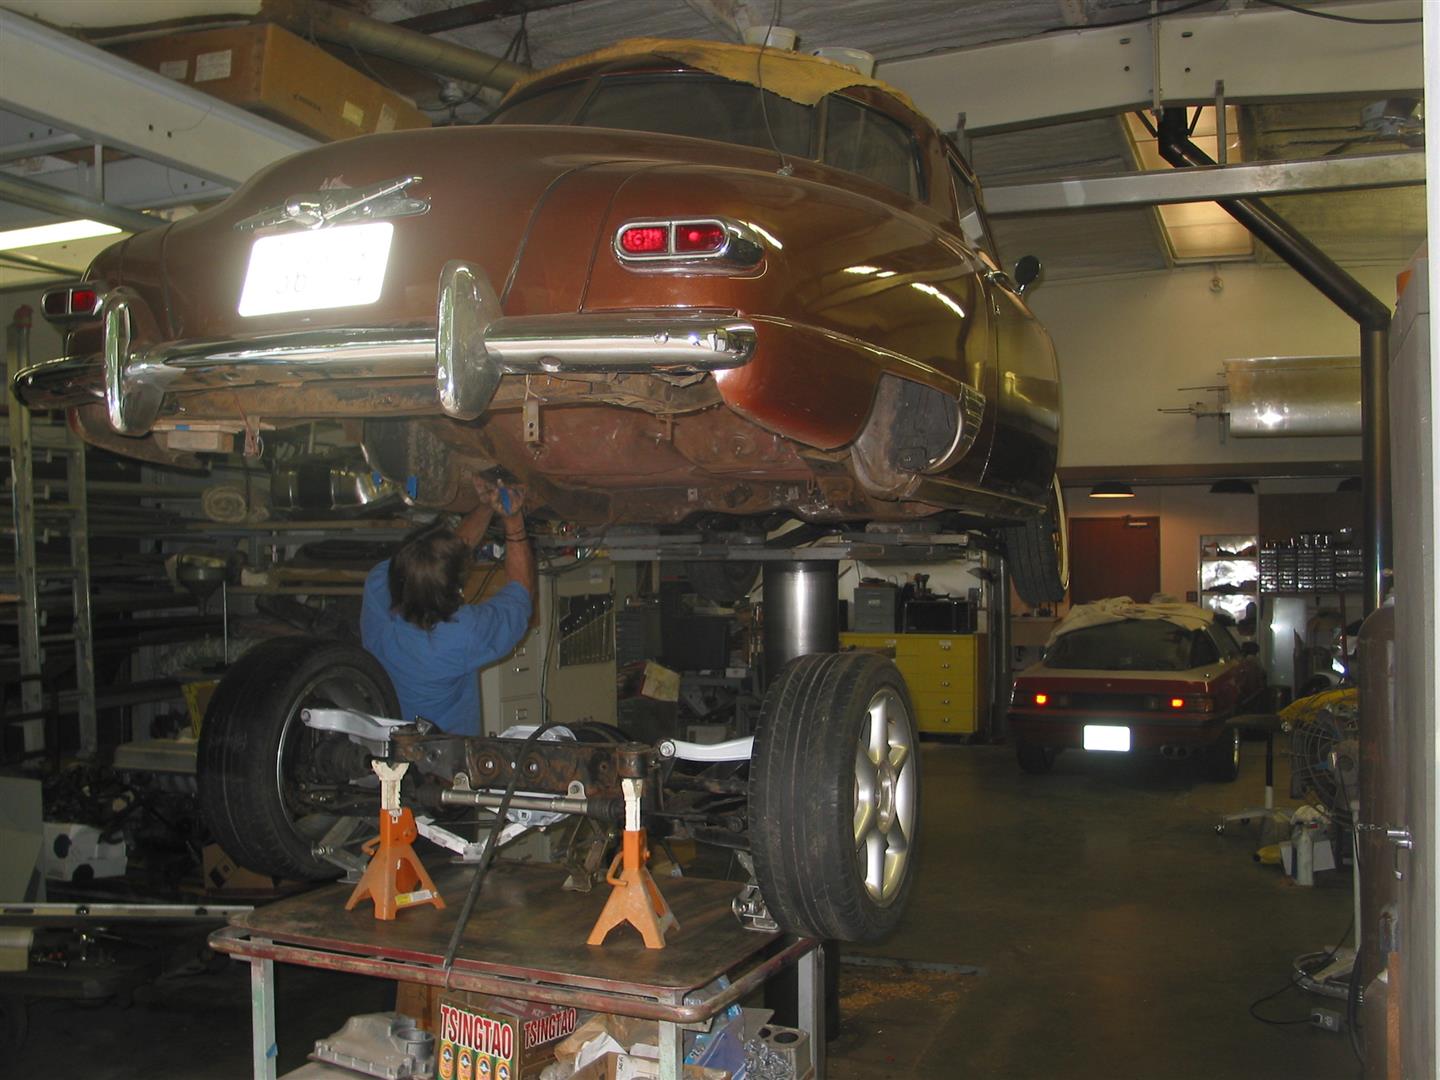
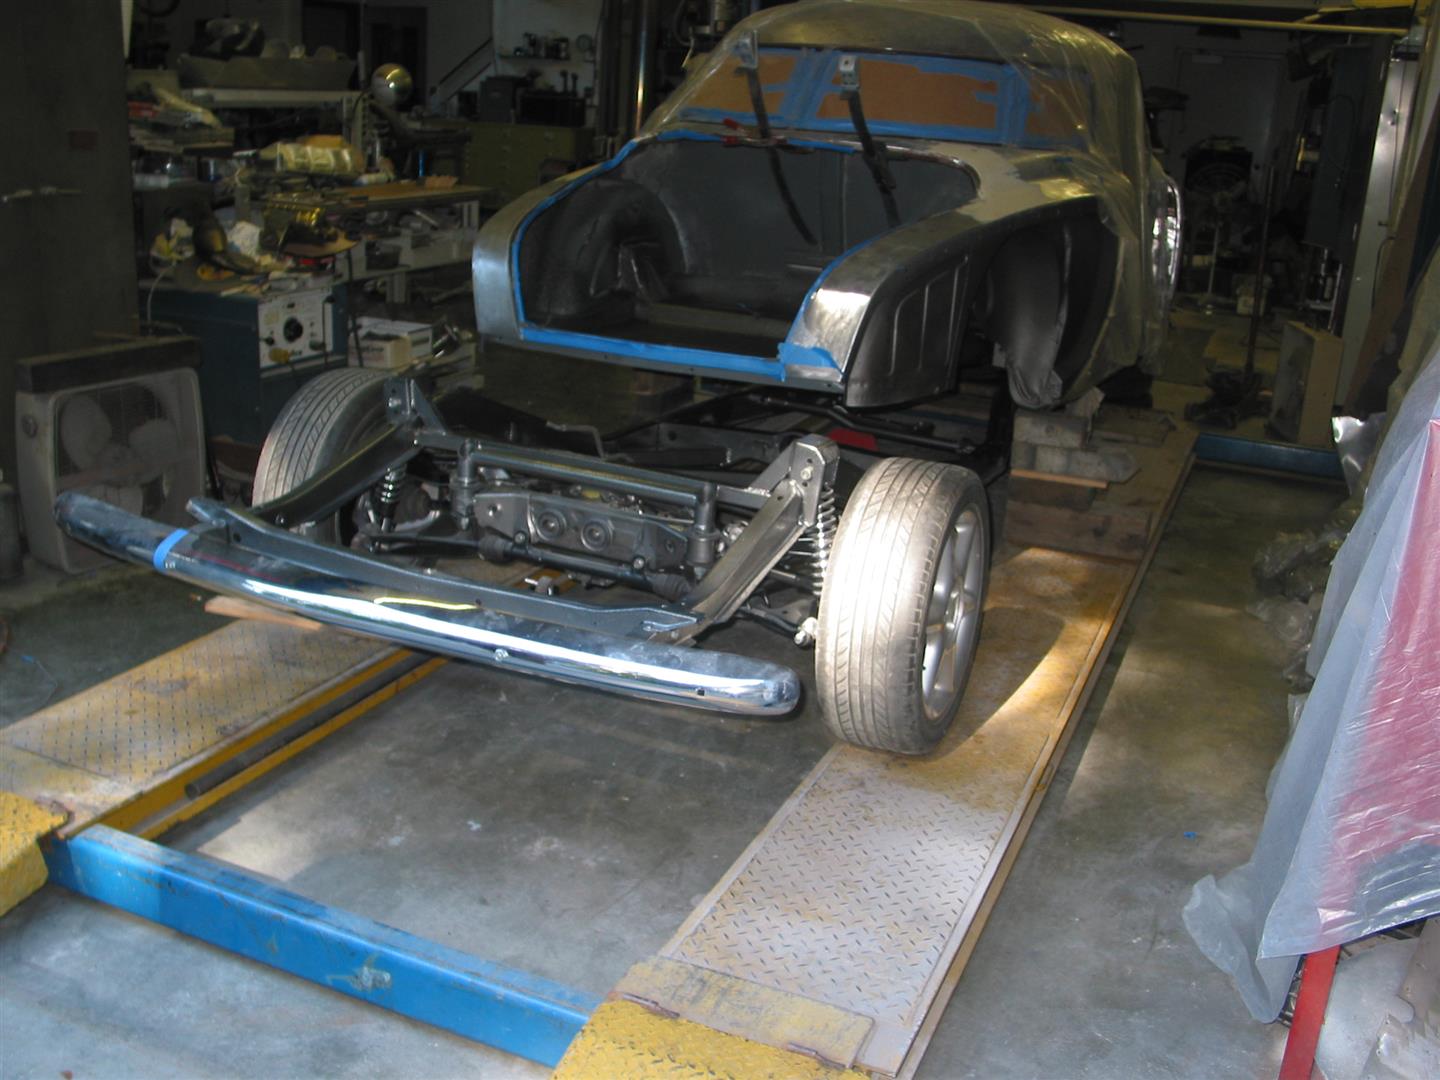
The chassis was rolled under the body and bolted in place using some rubber shims I made from an old conveyor belt.

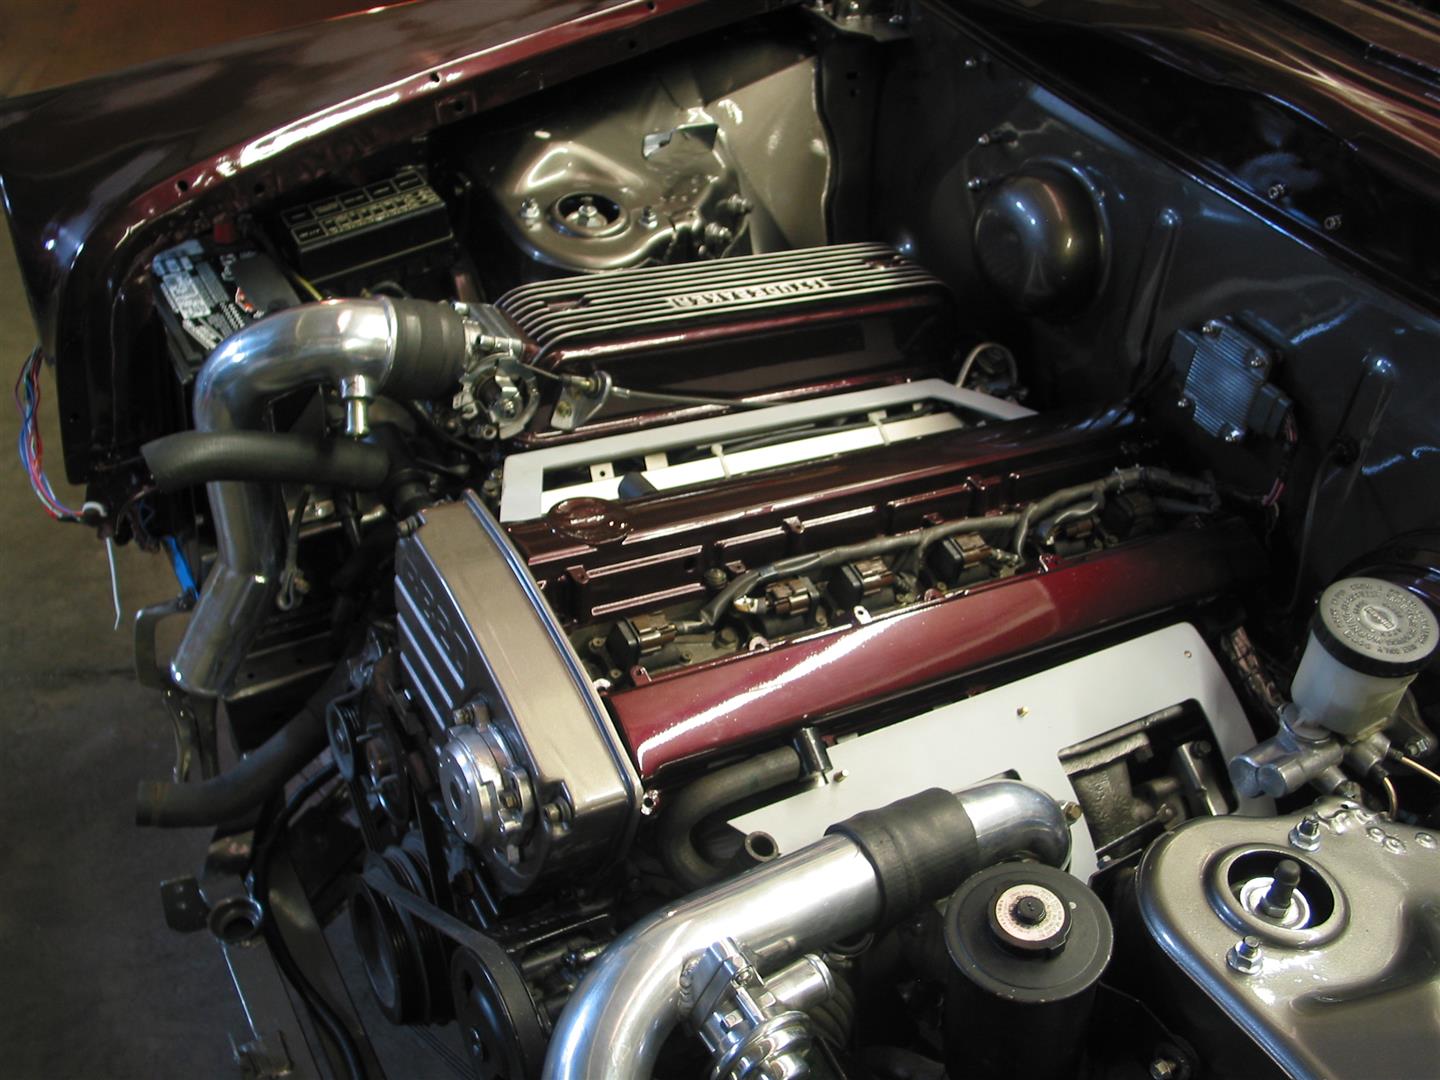
I painted the engine compartment with a silver grey urethane and urethane clearcoat. I used this same paint to tint the textured urethane on the underside of the body.
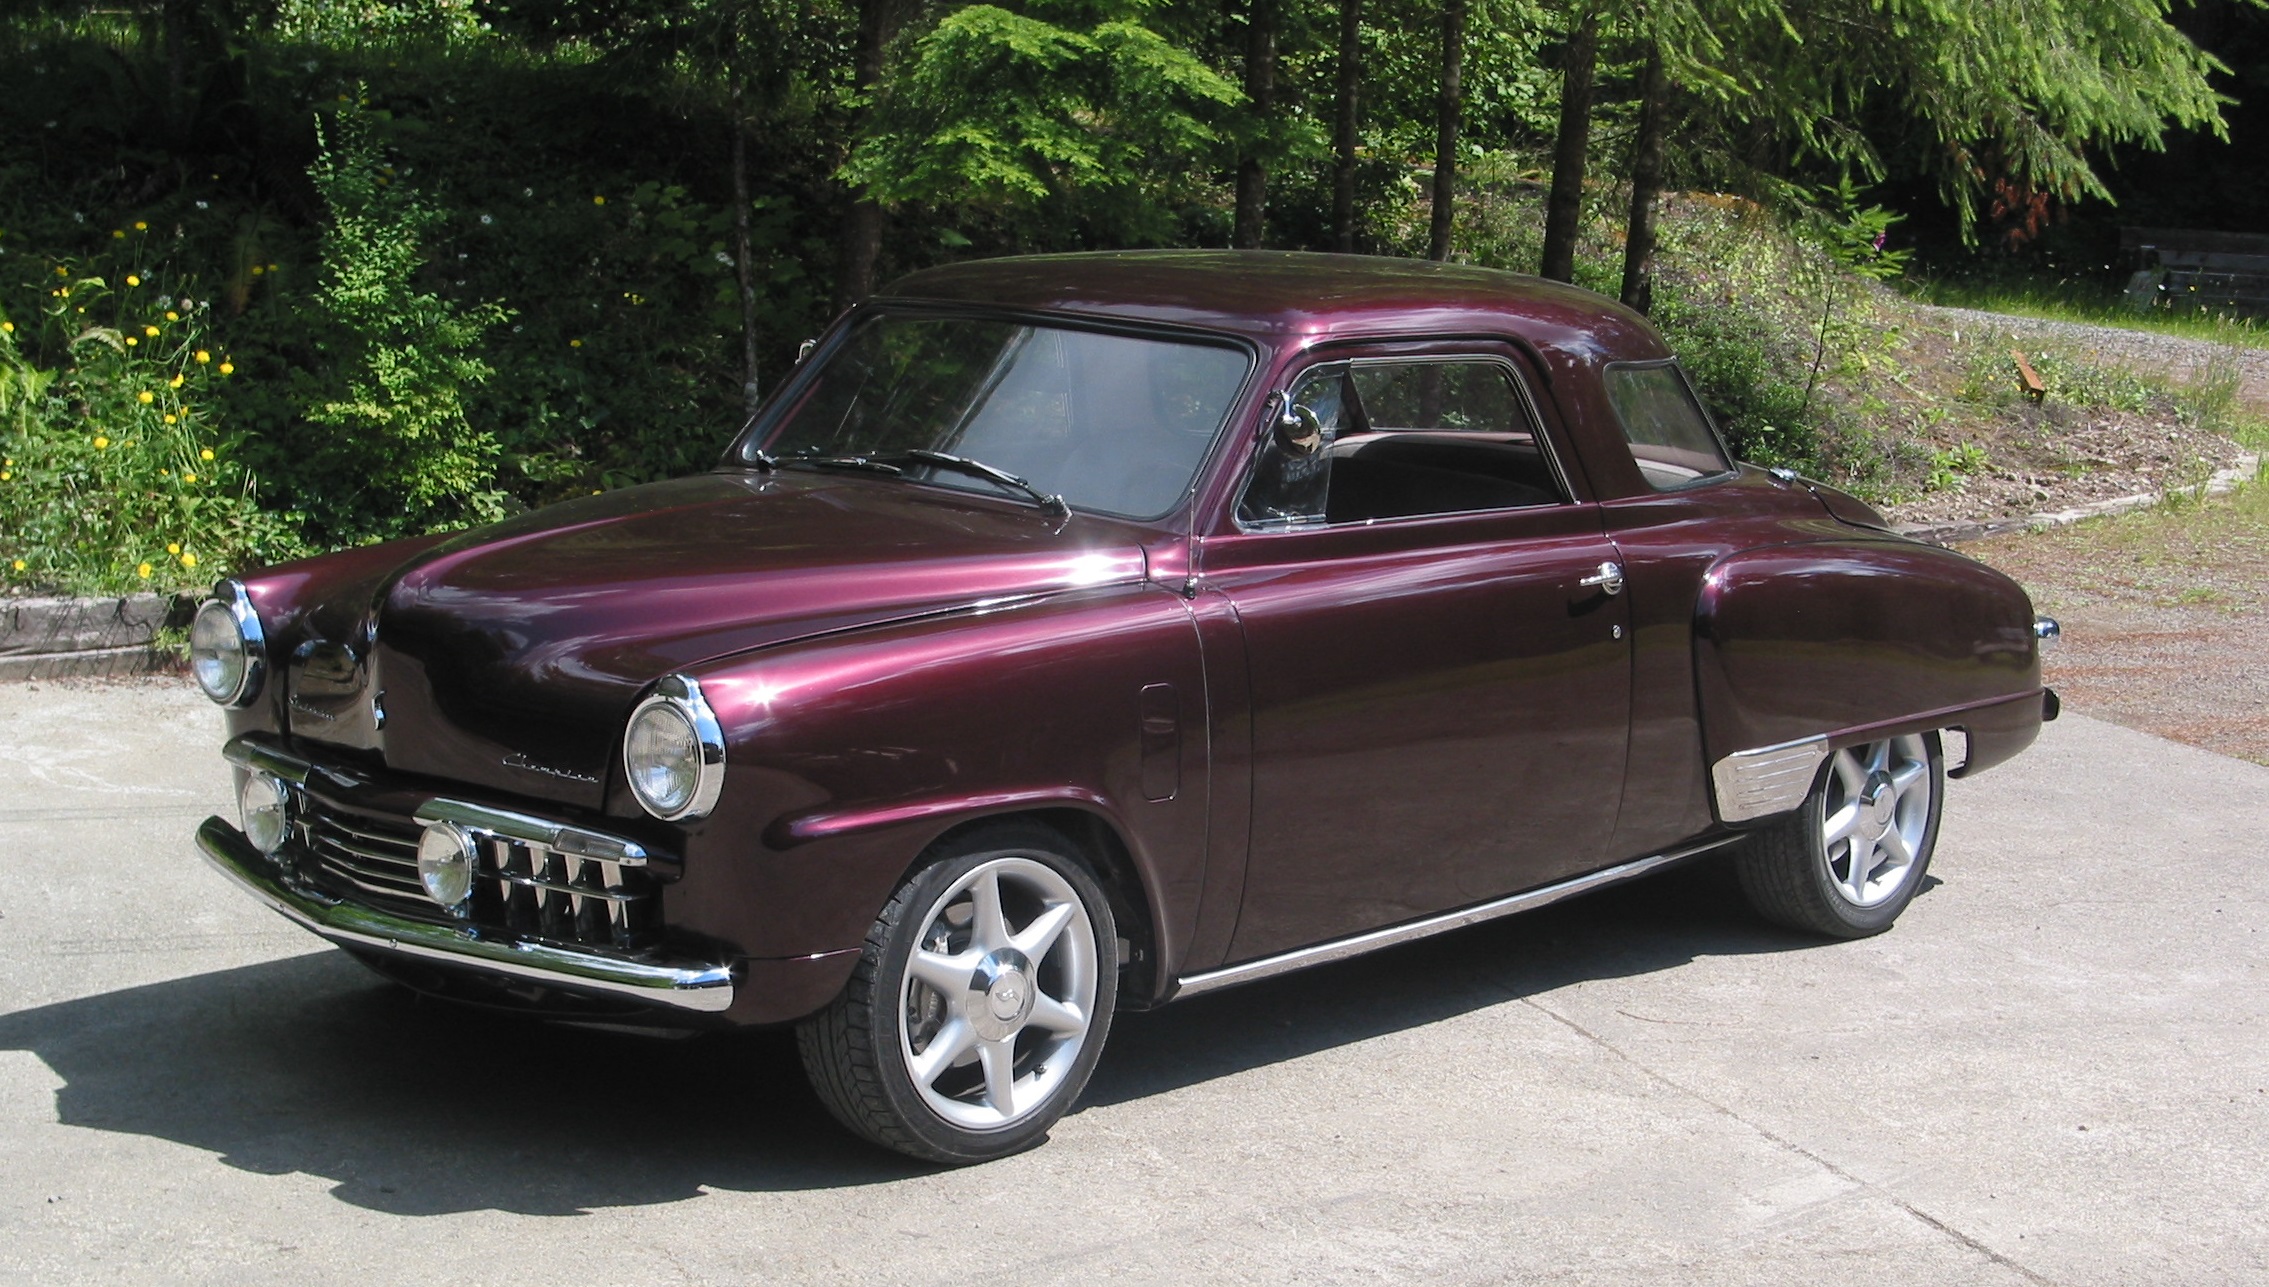
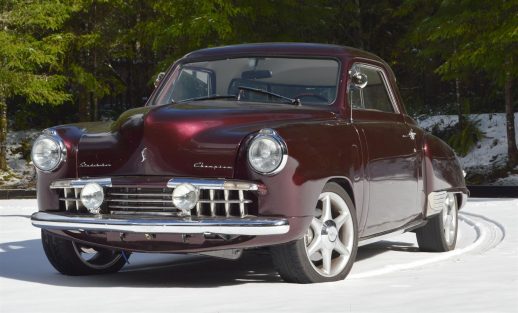
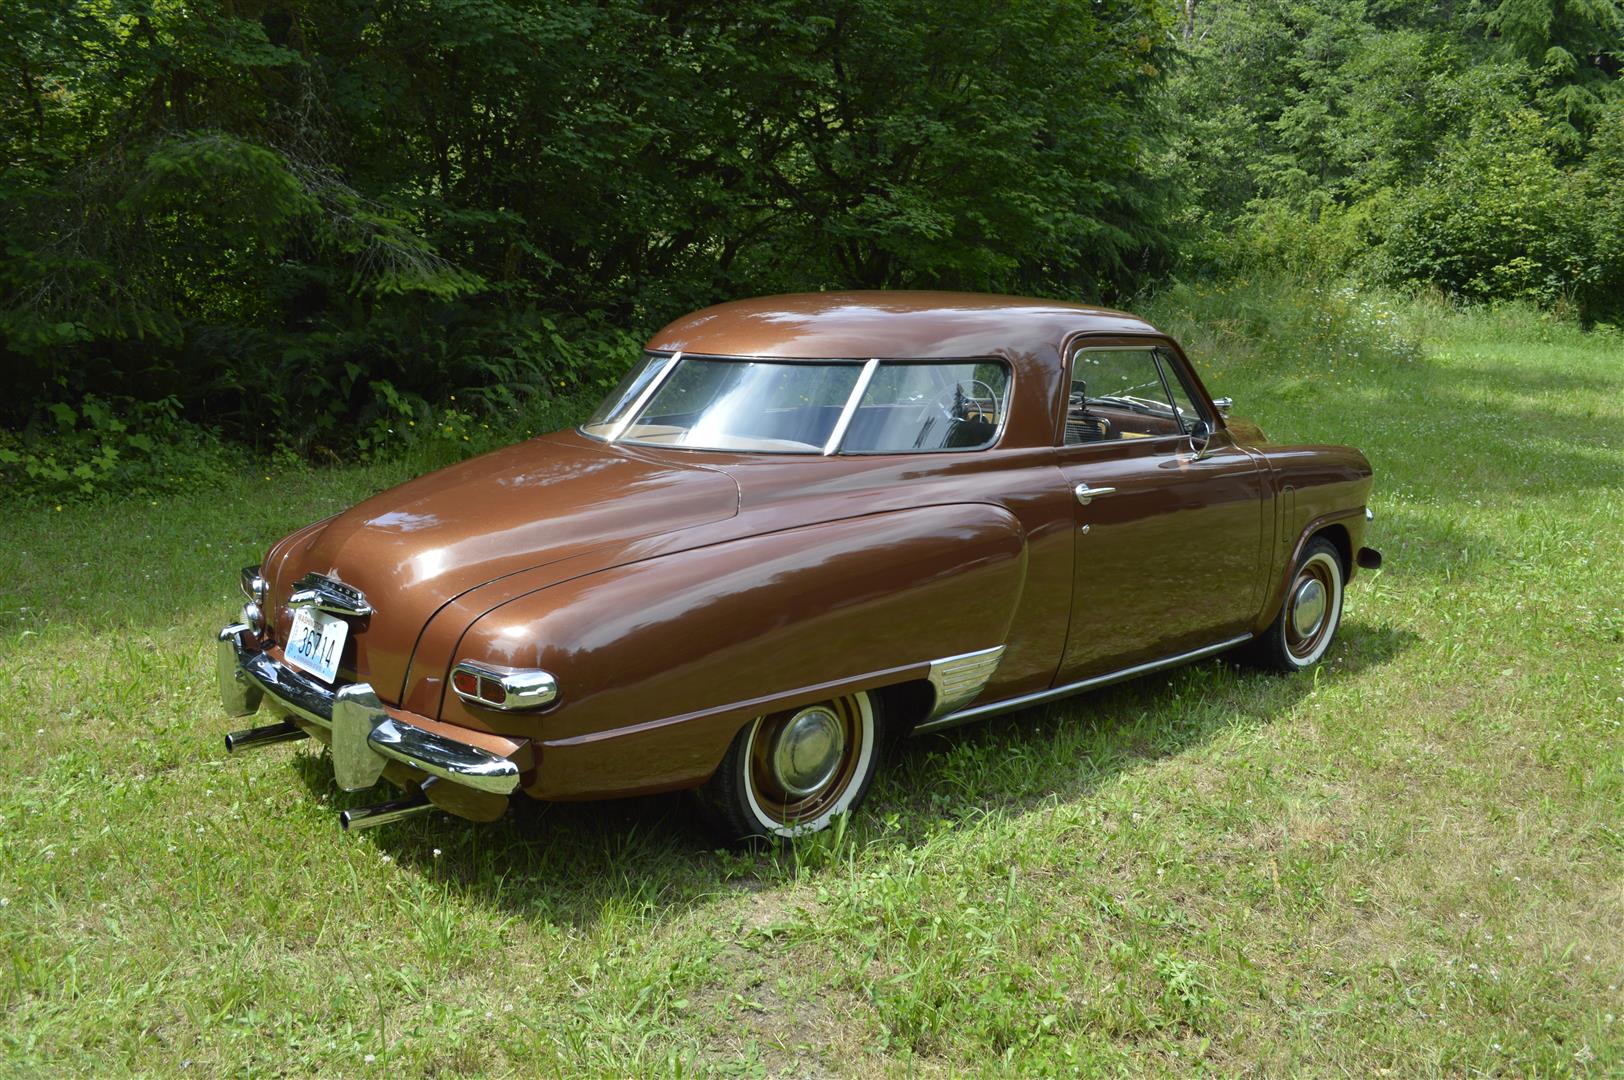
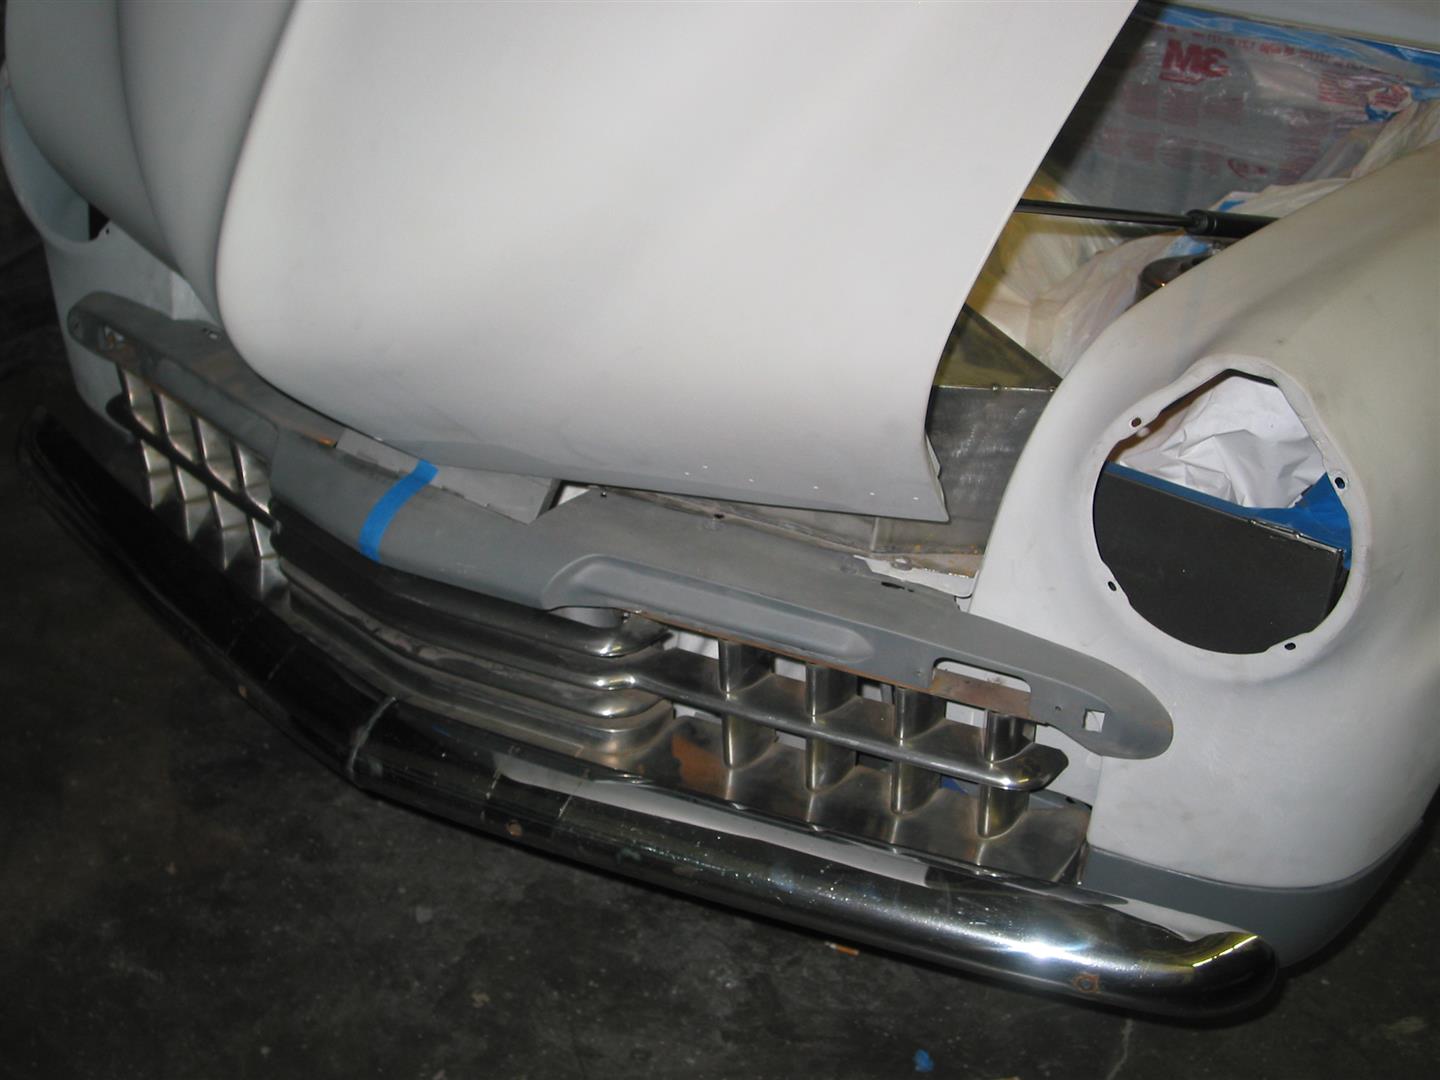
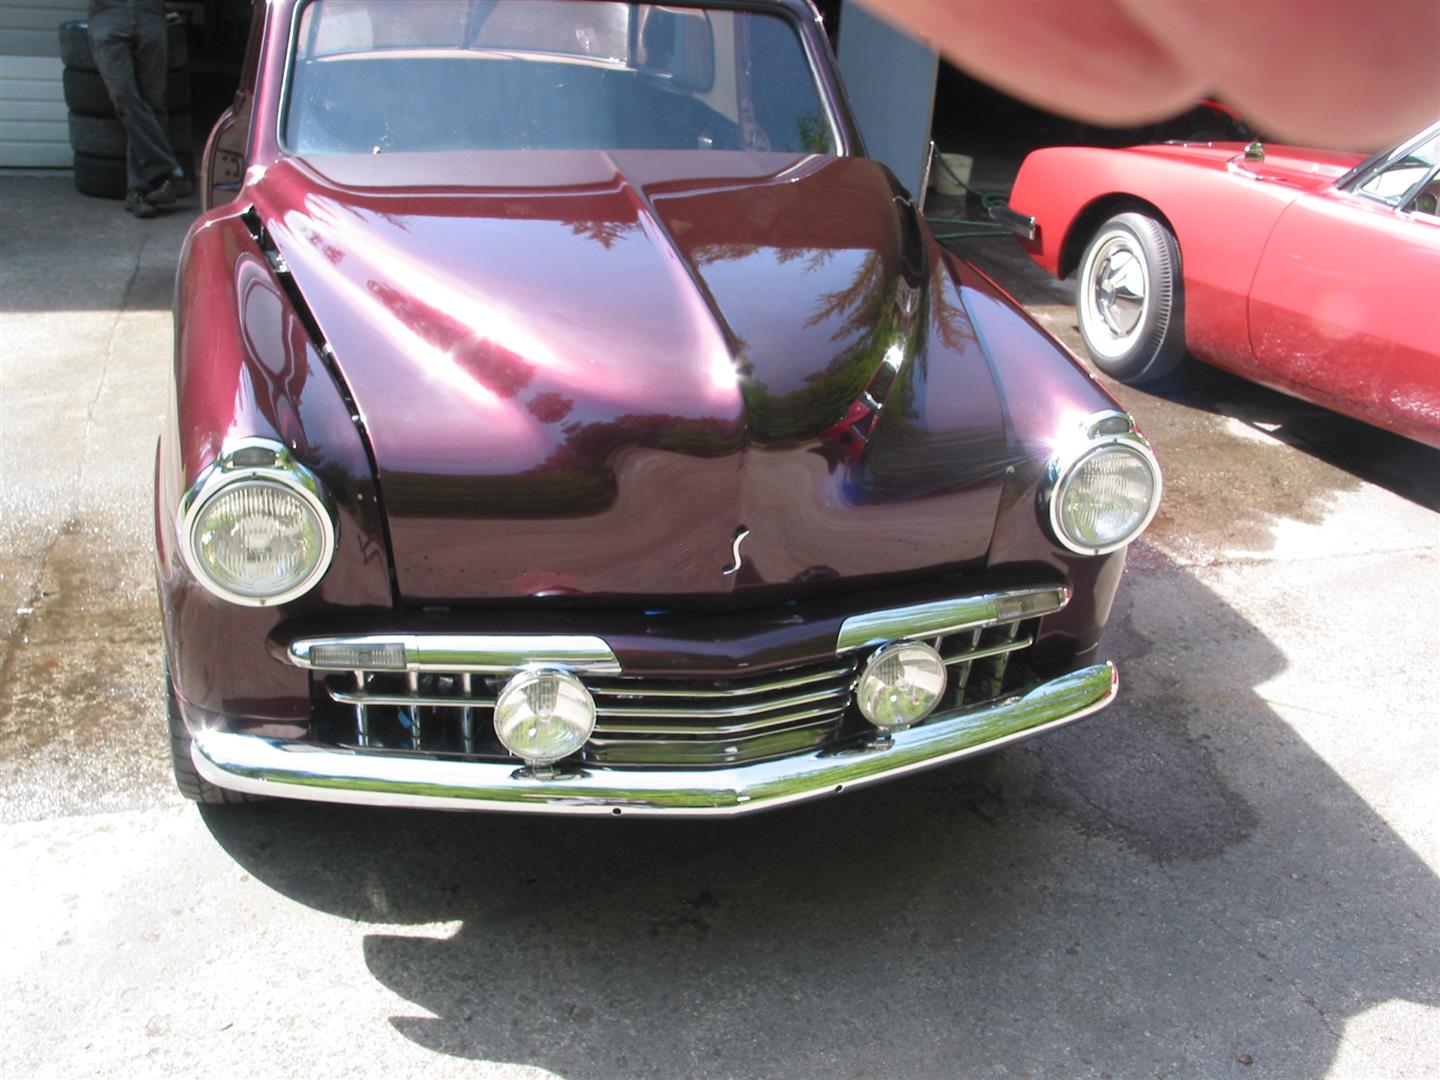
I decided in the beginning that I wanted this car to look like a 1948 Studebaker, but with a few subtle custom touches to suit my personal sense of the aesthetic. I think the hood is a very nice shape and should not be cluttered with that chrome rocket ship, jet engine or whatever it is supposed to represent. I also deleted the large emblem on the front of the hood except for the lazy S emblem. I did retain the Studebaker and Champion text emblems.
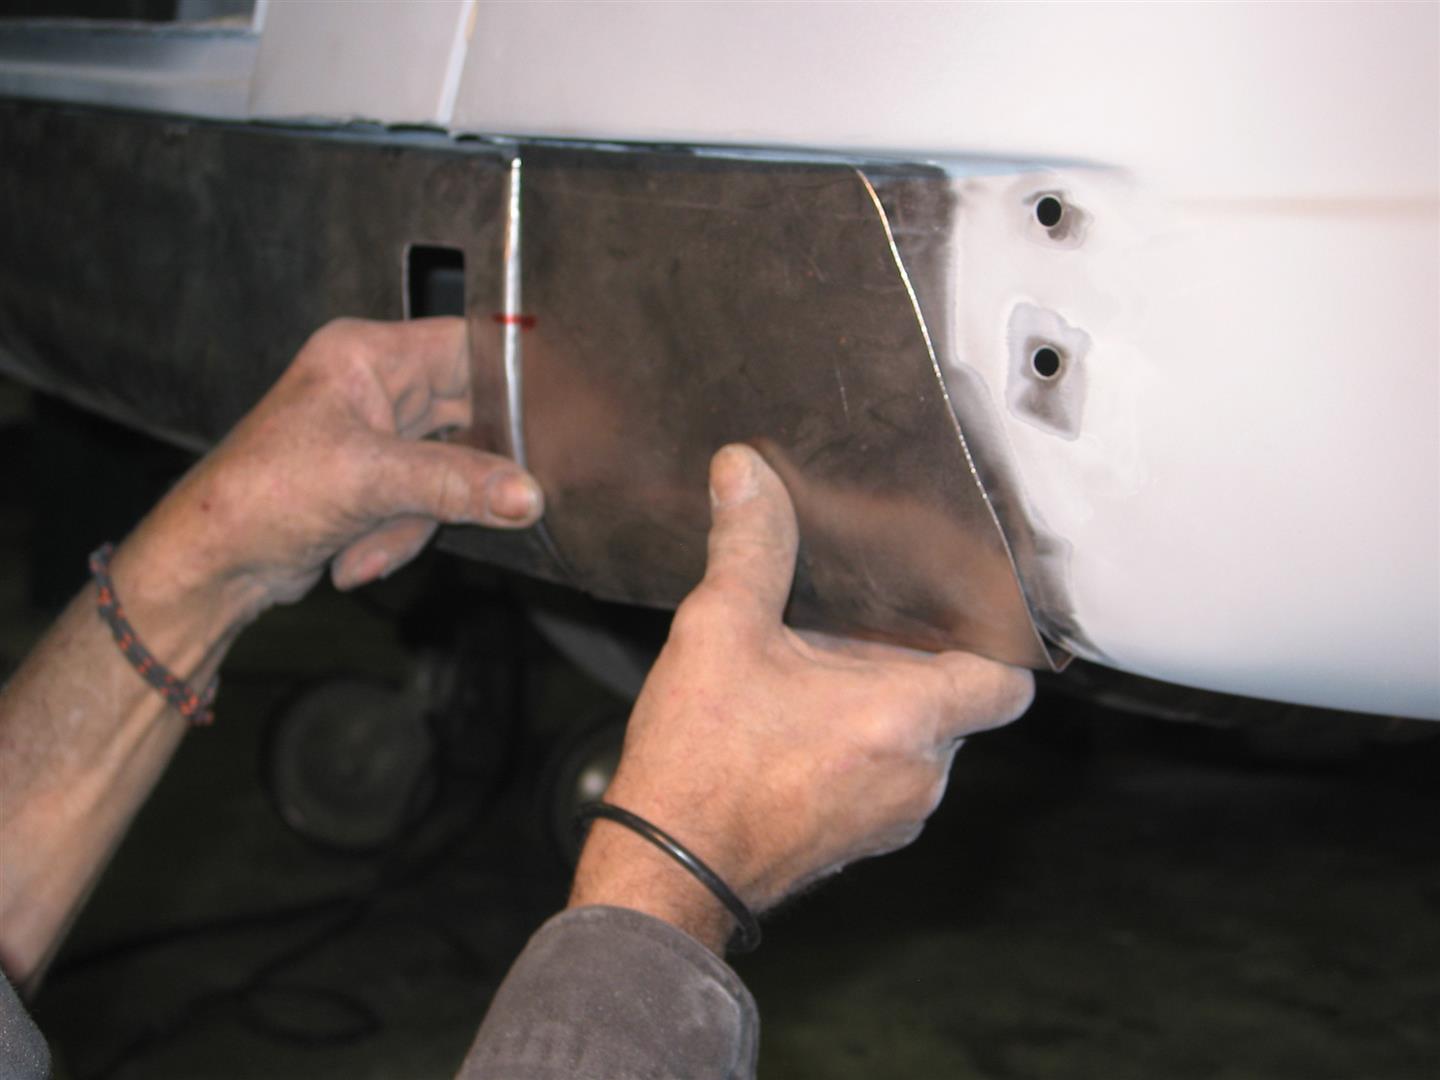
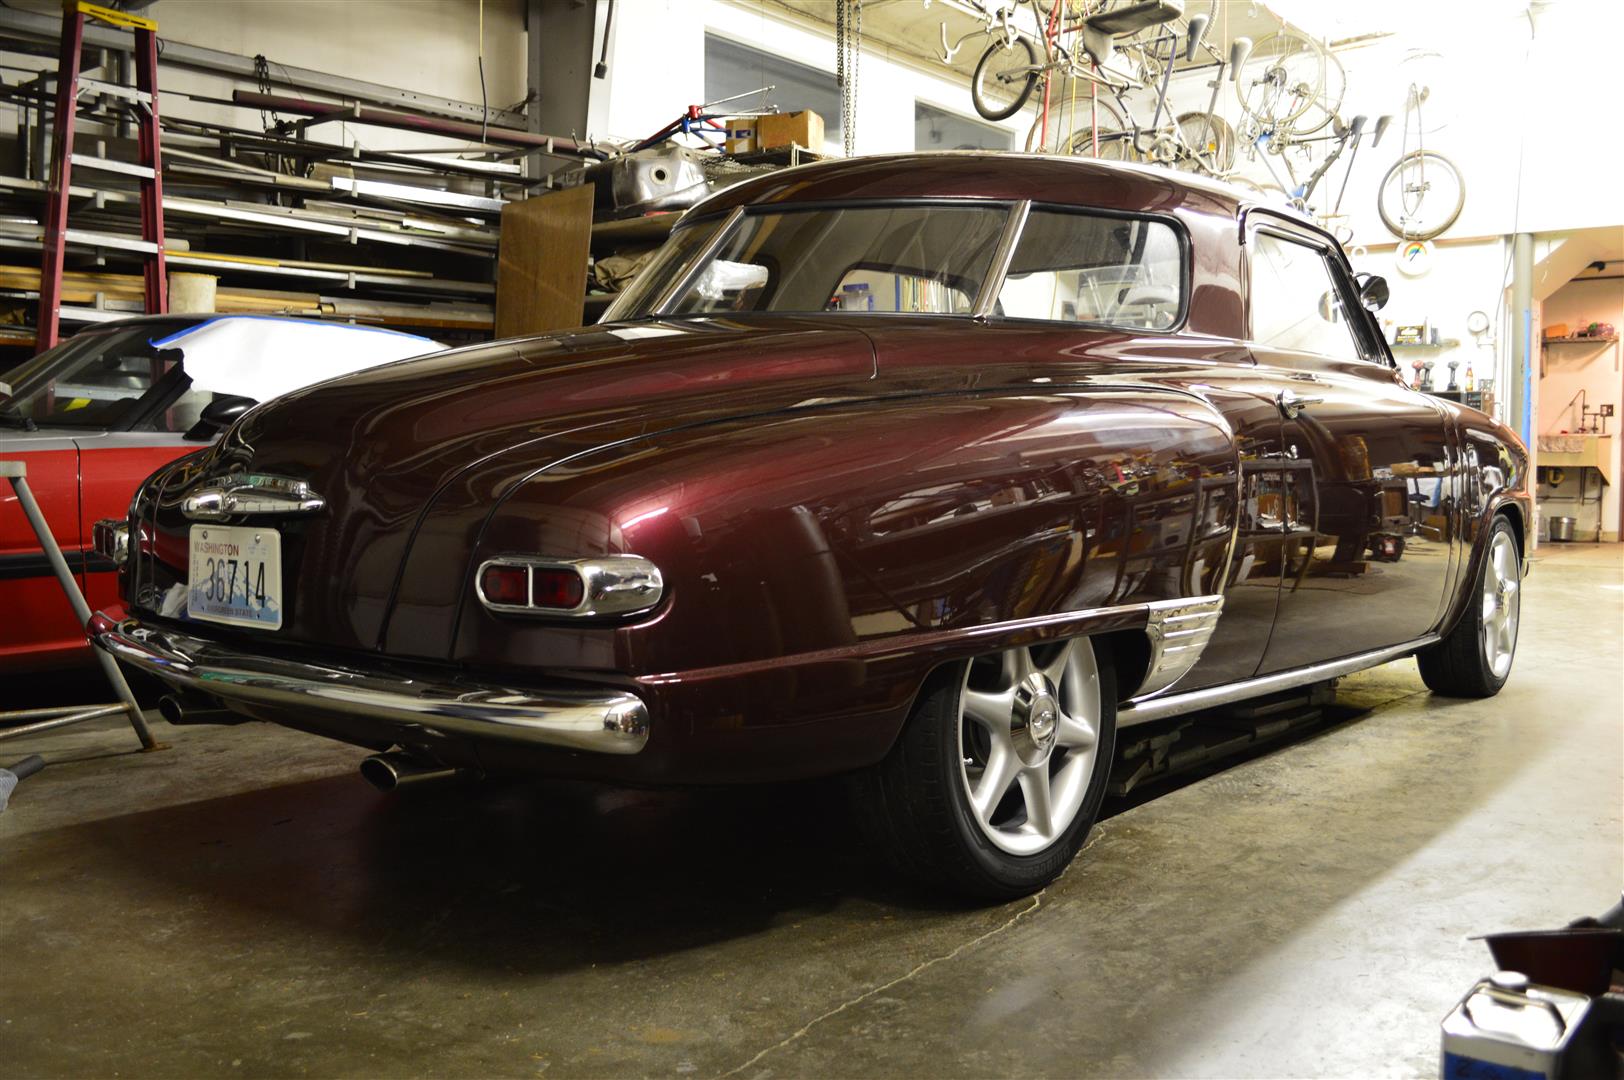
The first photos on this page above show the rear bumper sitting several inches back from the body with a gravel guard between the body and bumper. Then there is a skirt or valance panel hanging down from the bumper. We deleted all this, reshaped the bumper to match the body and moved it closer to the body. The body was finished off with a valance panel below the trunk, where previously there was nothing, and small matching panels on the rear fenders.
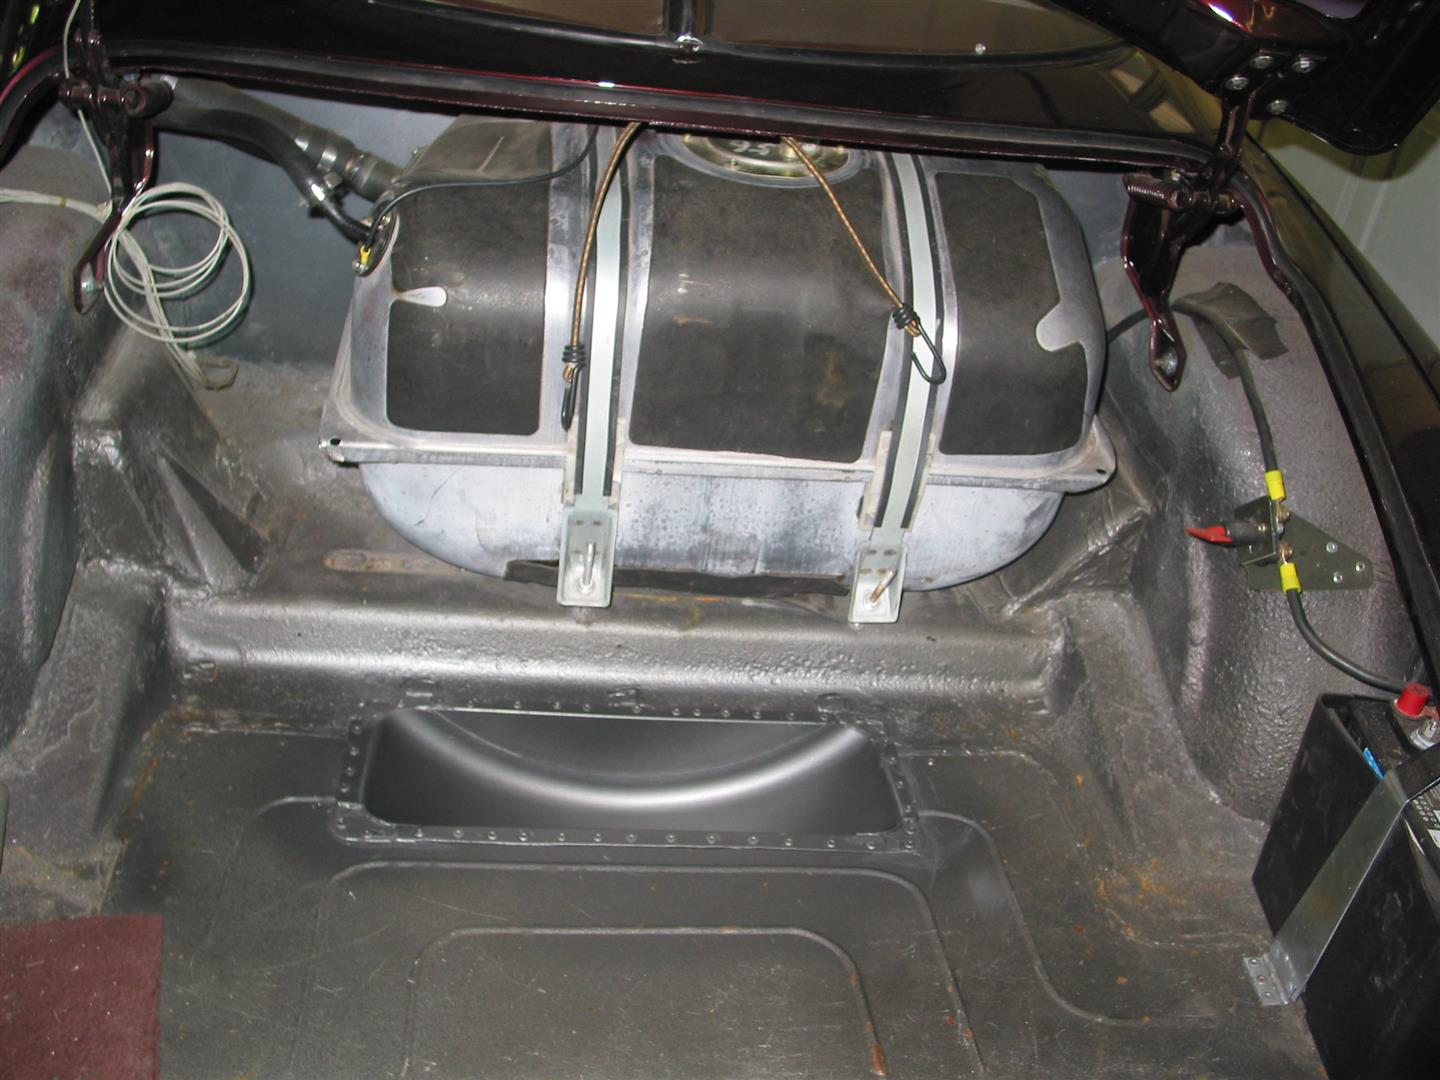
The rear suspension and exhaust took up the space for the original fuel tank. We found a Infiniti J30 fuel tank at the local salvage yard, in excellent condition because it sits in the trunk of the car – clean, no corrosion. It also has the correct fuel pump for the Skyline fuel injection and we think the fuel level sensor will be correct for the Skyline gauge. It holds 17 gallons and fits under the rear package shelf. We are using a motorcycle flip up fuel cap.


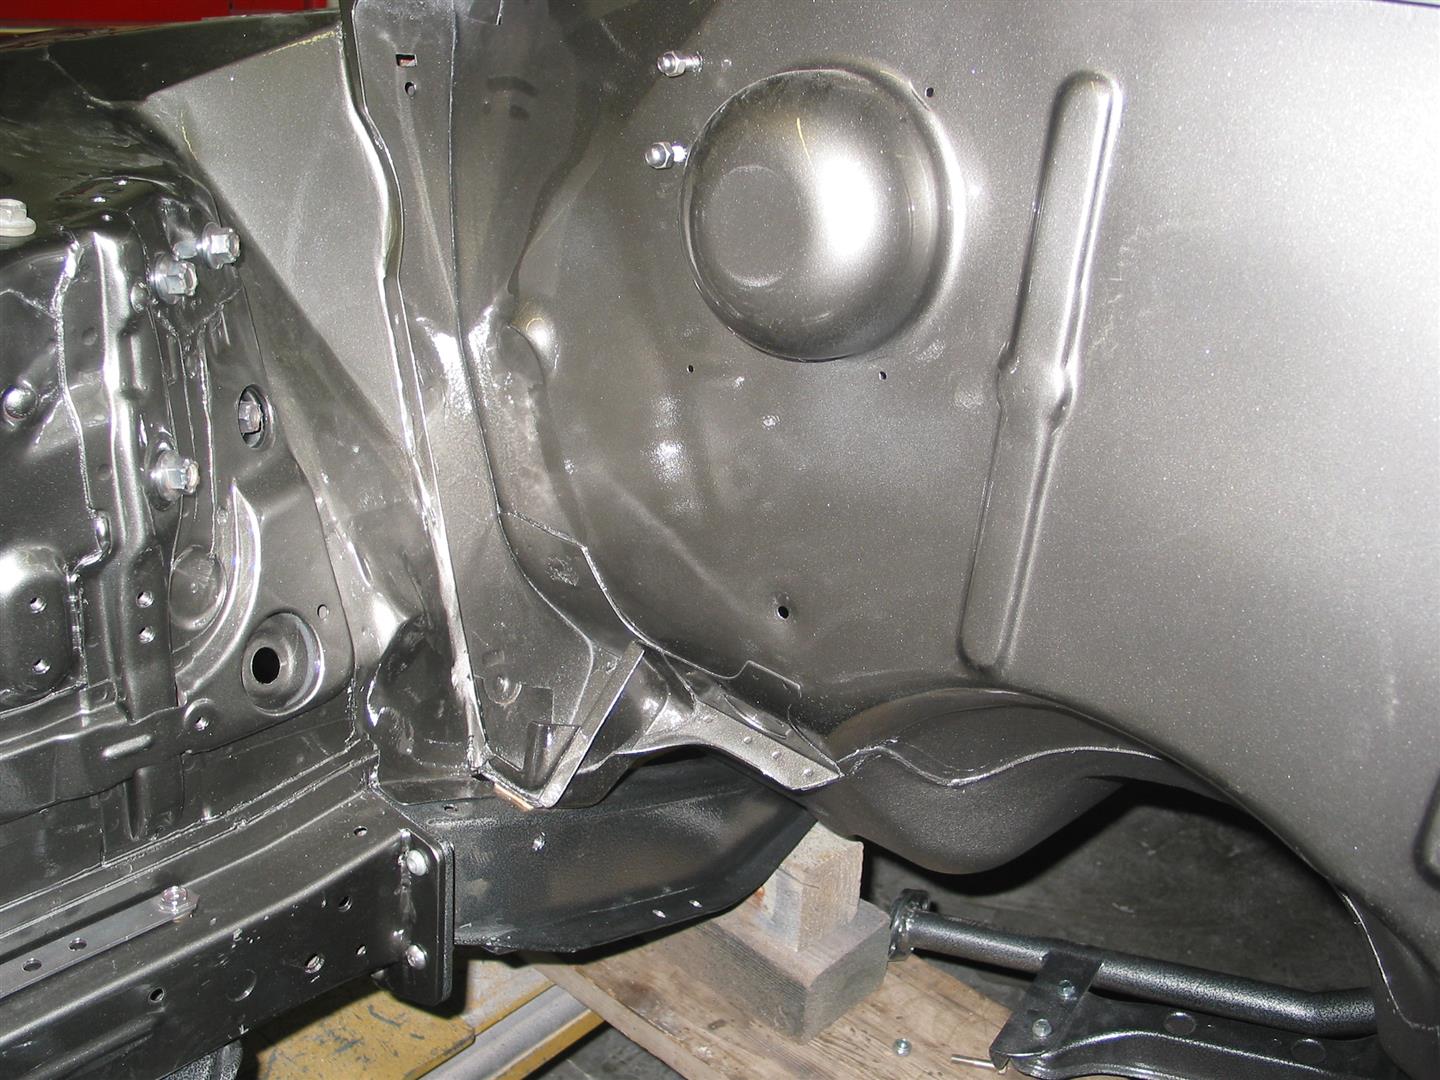
Adapting the front fender to the Skyline structure was easier than we expected. The panel shown is formed to fit the Skyline structure where the original fenders bolted on, and the upper flange fits the Studebaker fenders.
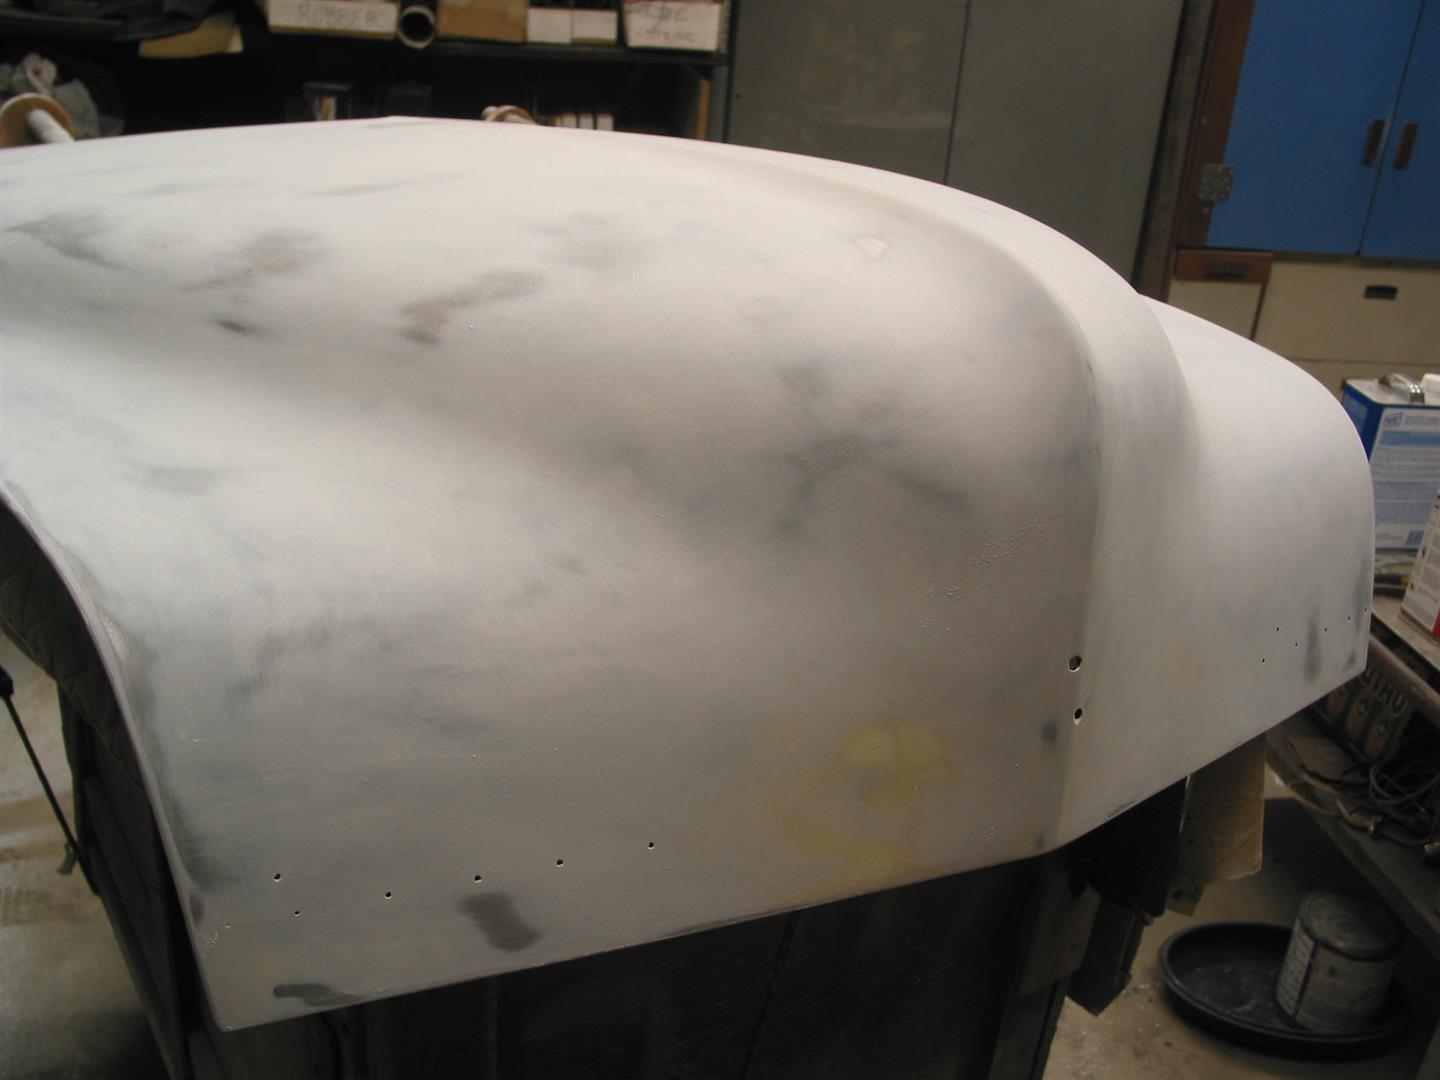
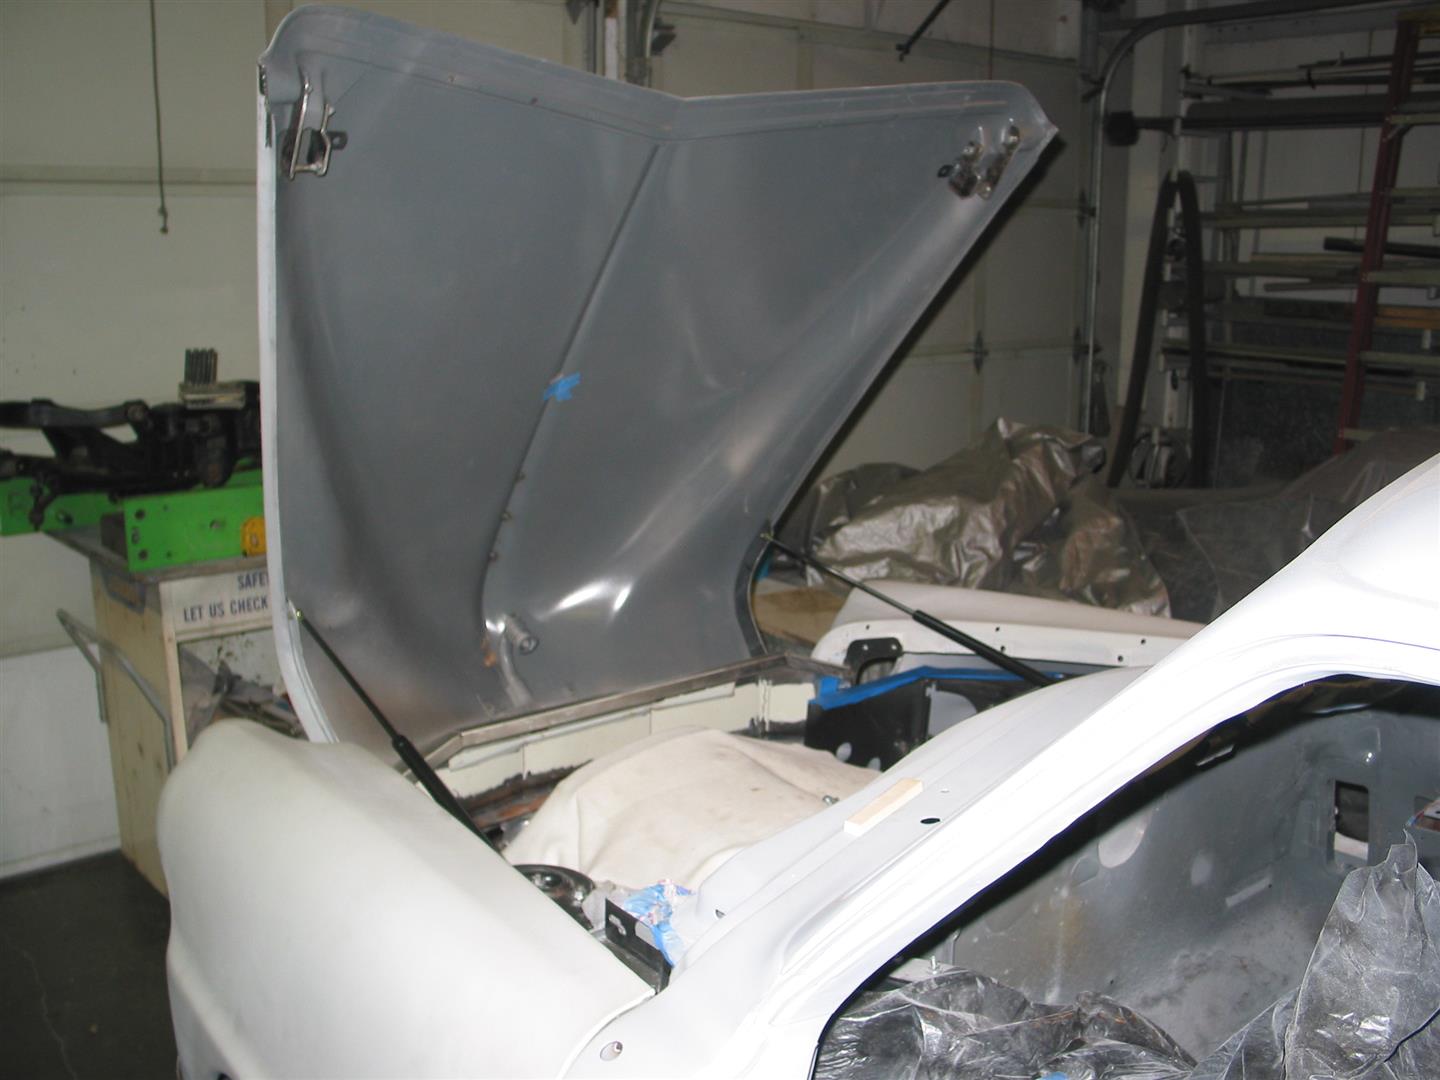
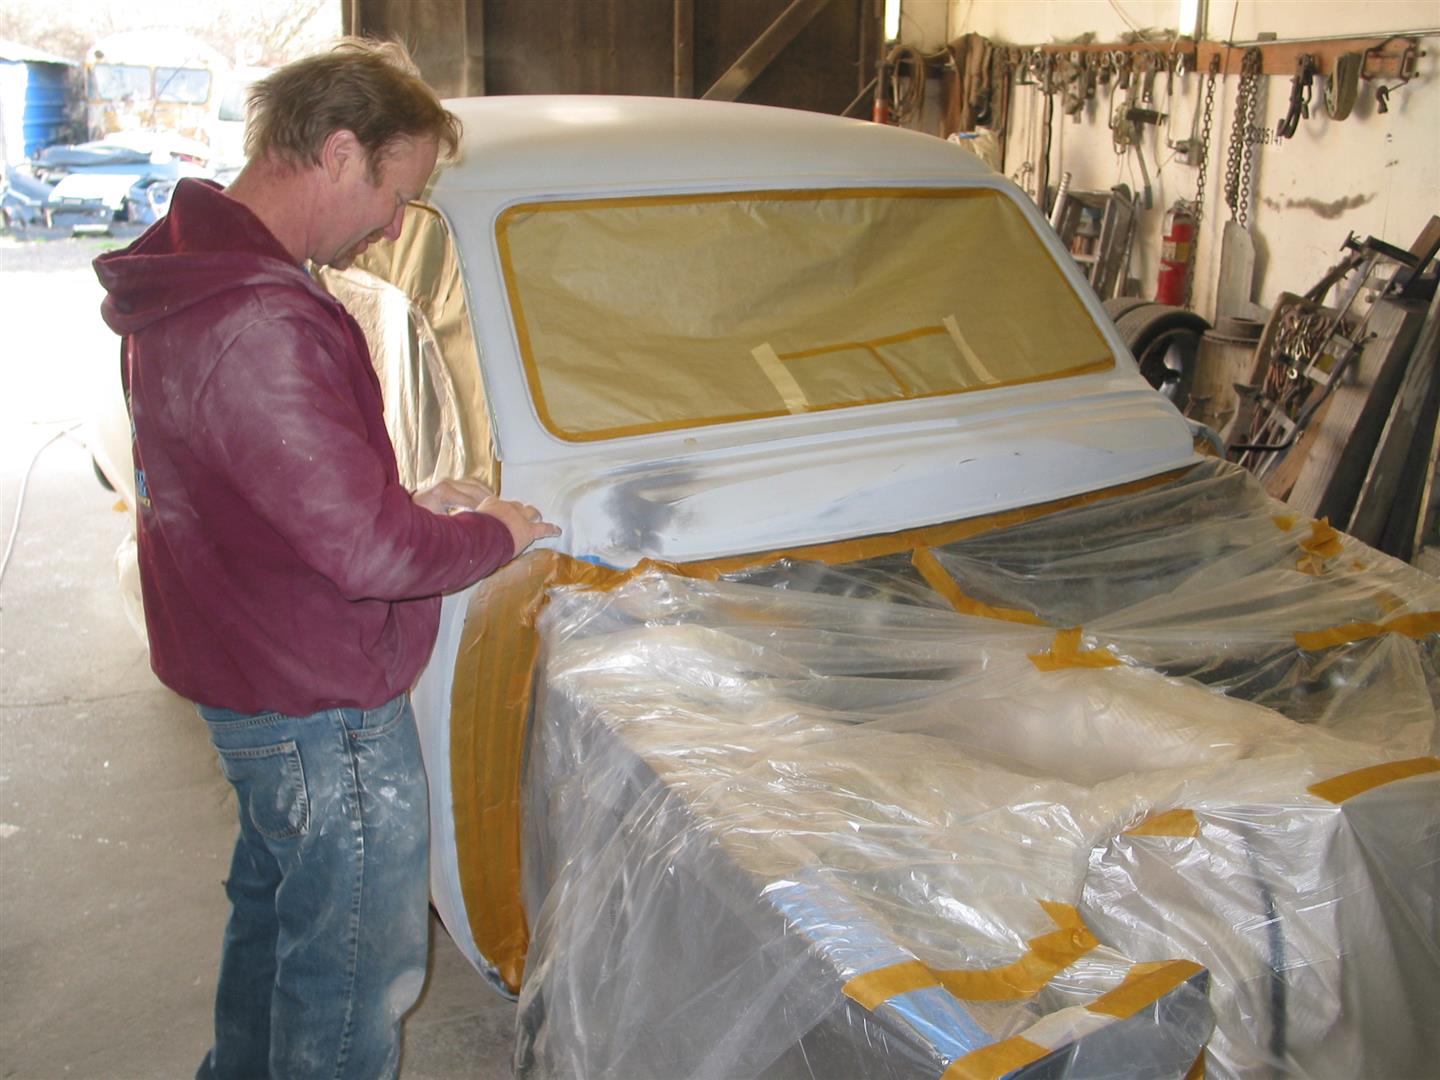
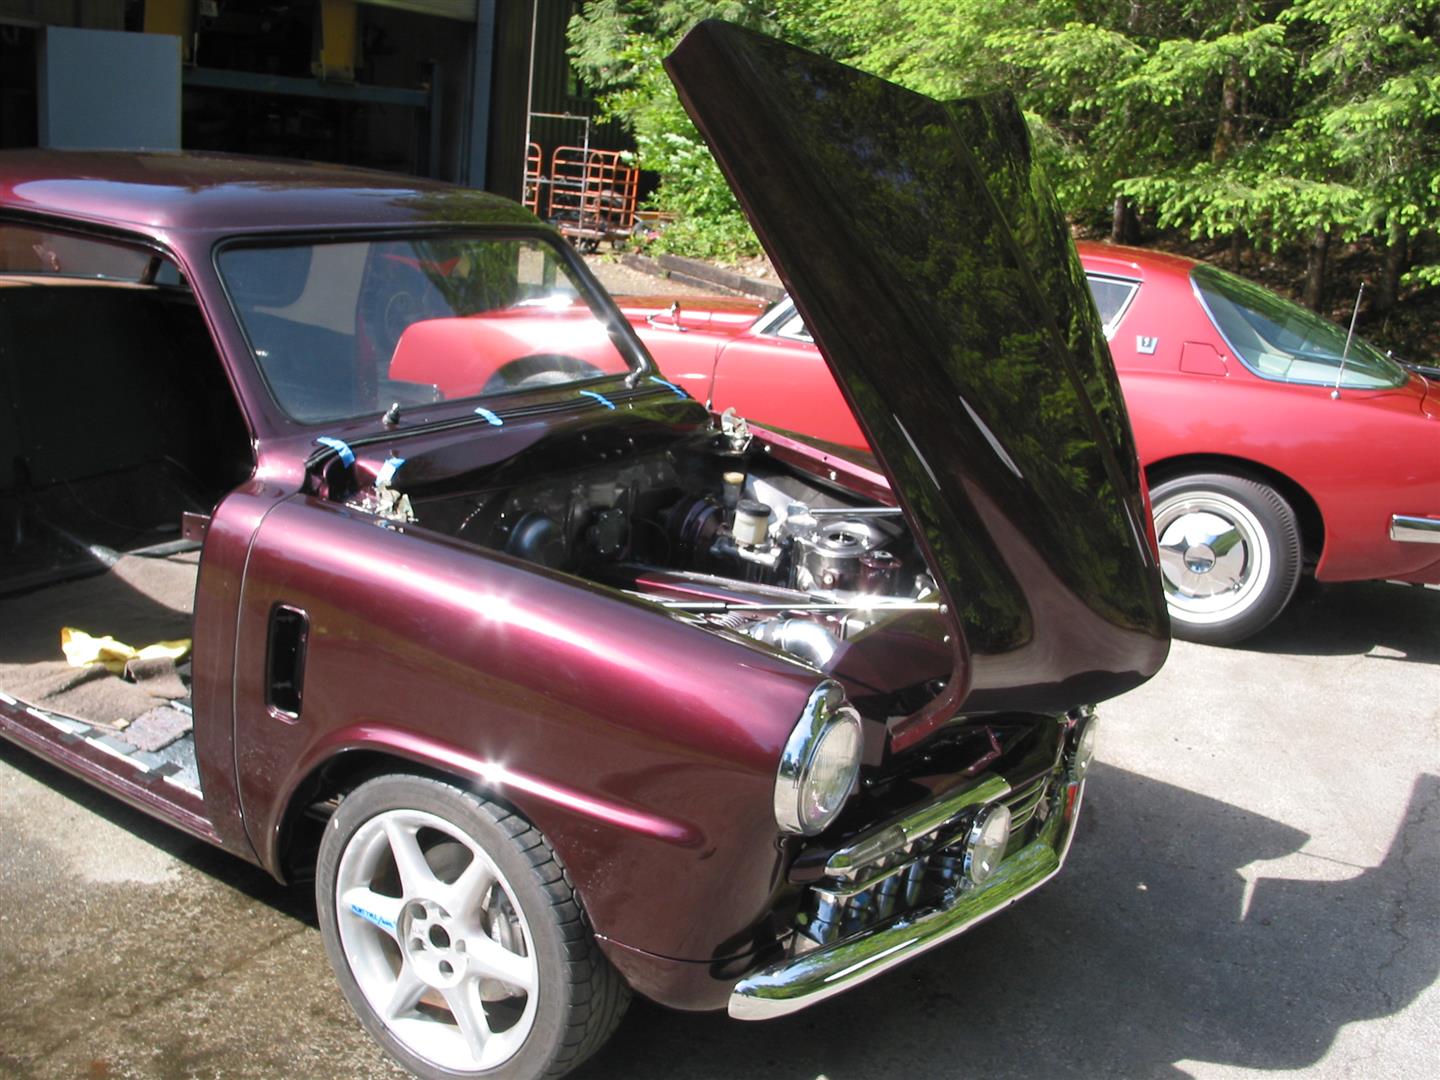
The body and the doors were stripped by hand, all other panels were stripped with plastic media blasting. Everything was coated with epoxy primer for maximum adhesion, then several coats of high build urethane primer and several weeks of block sanding, more primer, etc. We were not happy with the engine access and decided to make the hood tilt forward. The standard ways of doing this could not be easily used because of the crowded engine compartment up front, with the battery, intercooler, radiator and air intake, so we just used a simple hinge. Making it fit with the latches was not that simple.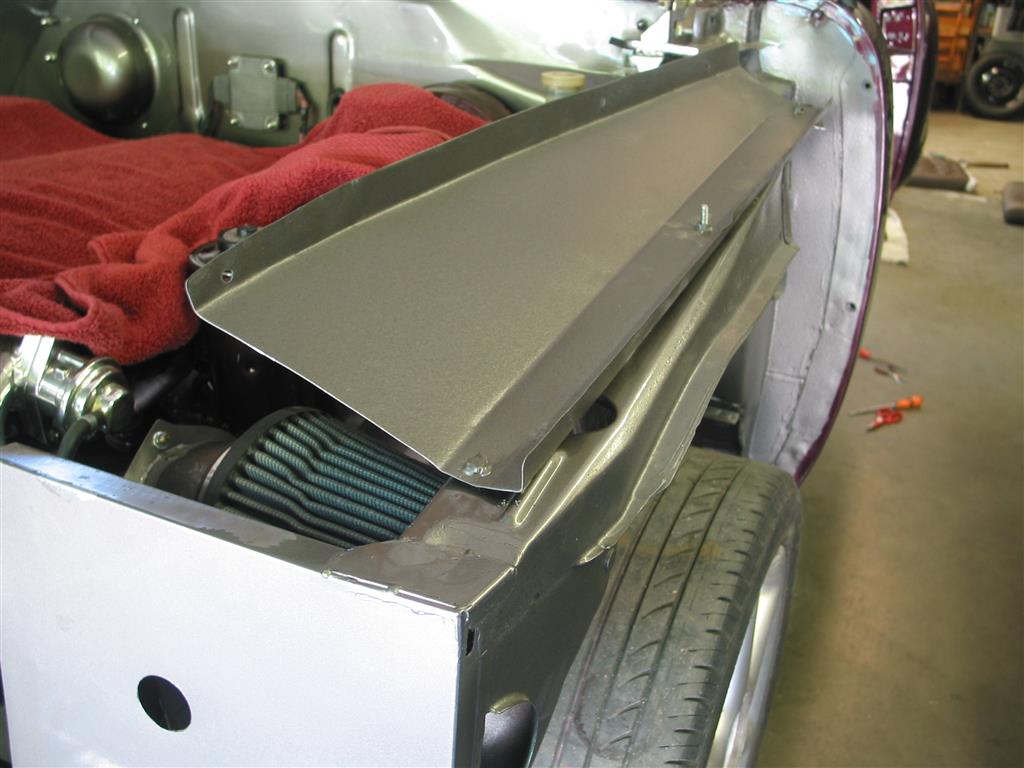
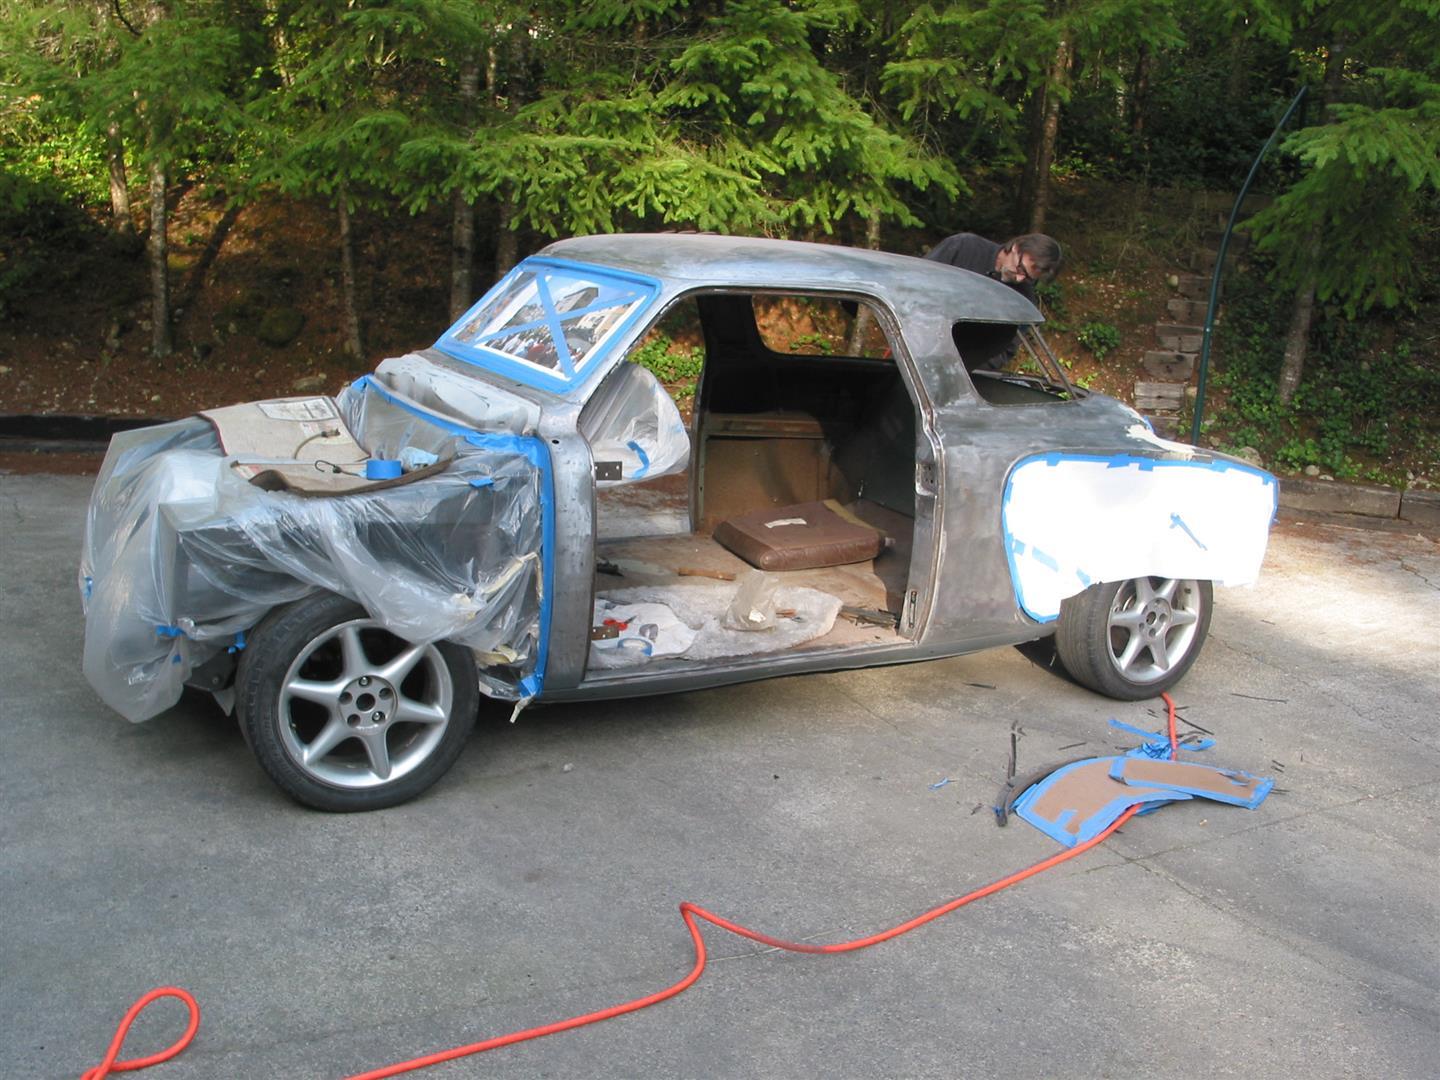
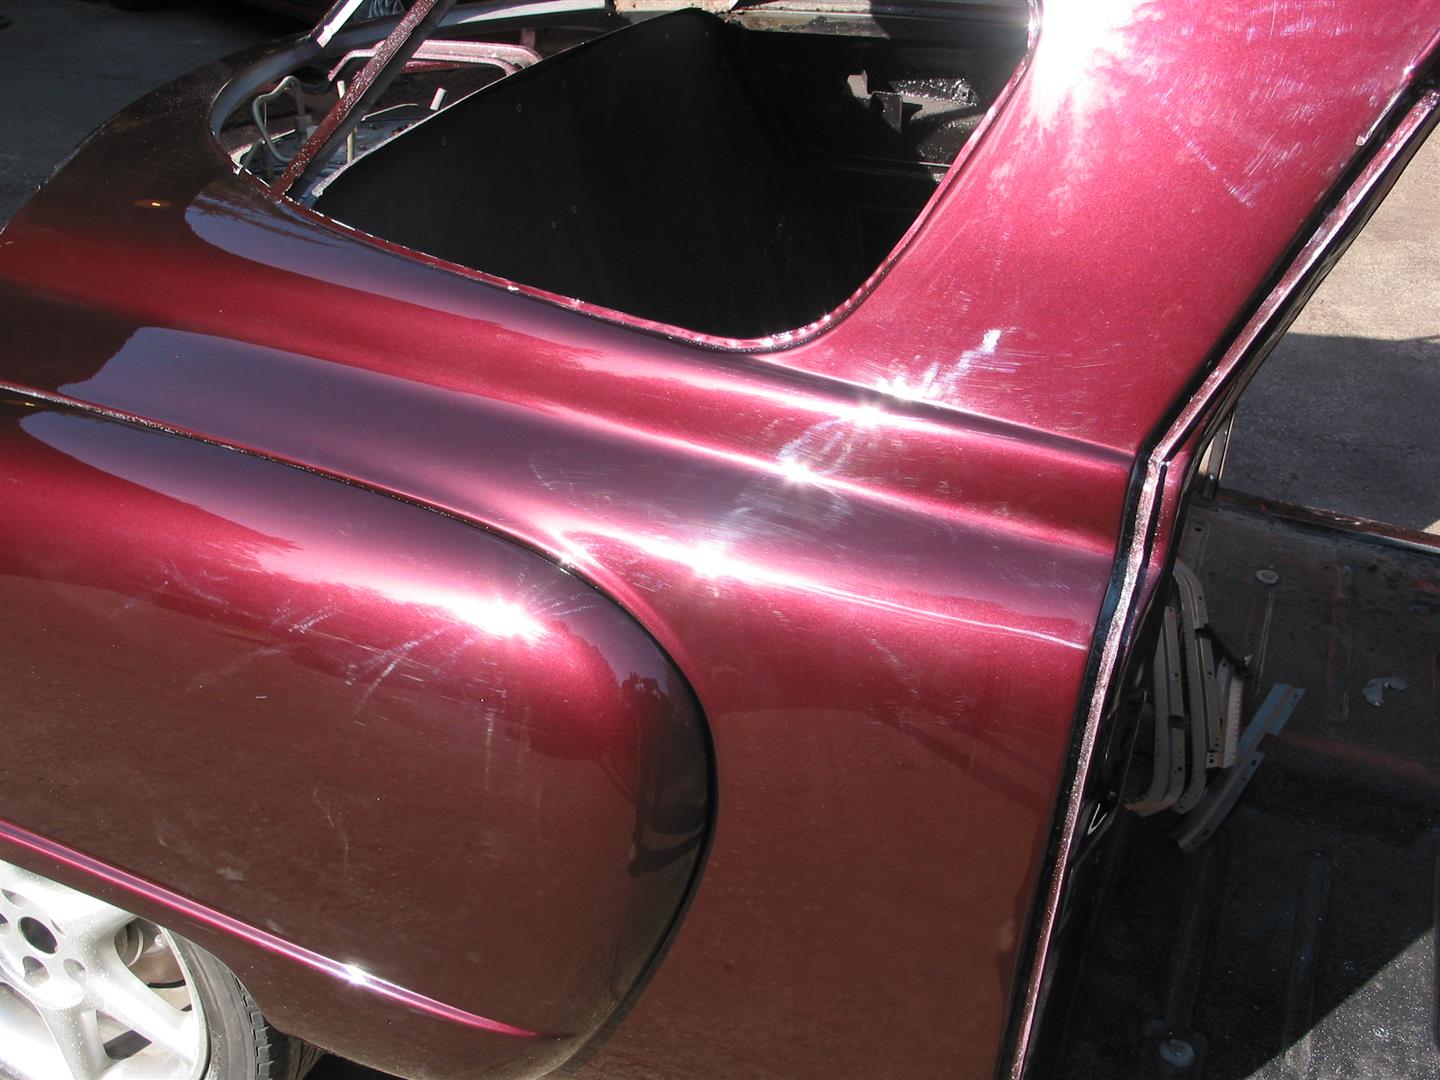
I have painted all my projects – cars, trucks, airplanes, boats, motorcycles and bicycles since 1958, but I never tried to do what I would call a show quality paint job, although I did win some trophies with my airplanes. I wanted the Studebaker to be really nice, and I never sprayed pearl paint. Fortunately, my local body and paint guy, Bill Rush, took an interest in my project and said he would spray it if I did all the prep work. I bought the paint from an on-lne source, The Coating Store. They sold me a kit consisting of a gallon of “Sparkling Merlot Pearl” urethane basecoat, a gallon of urethane clearcoat, with the reducer for the basecoat and the activator for the clear for $220. I have previously painted four cars and a motorcycle with their paint and I can recommend the product and the excellent service I got.
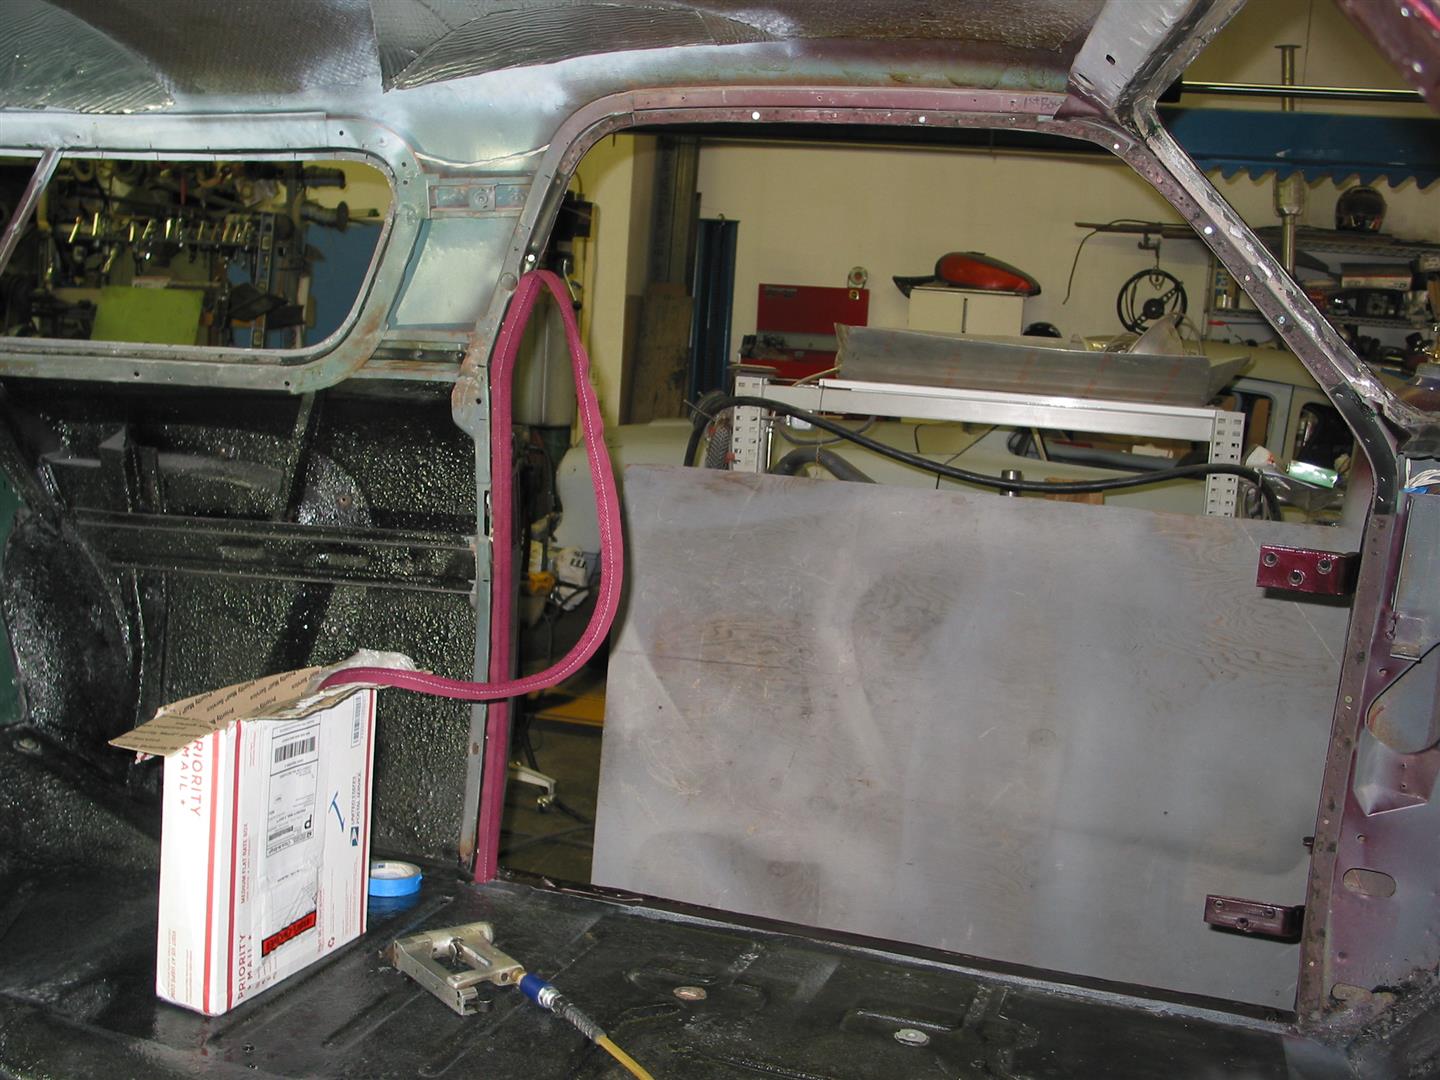
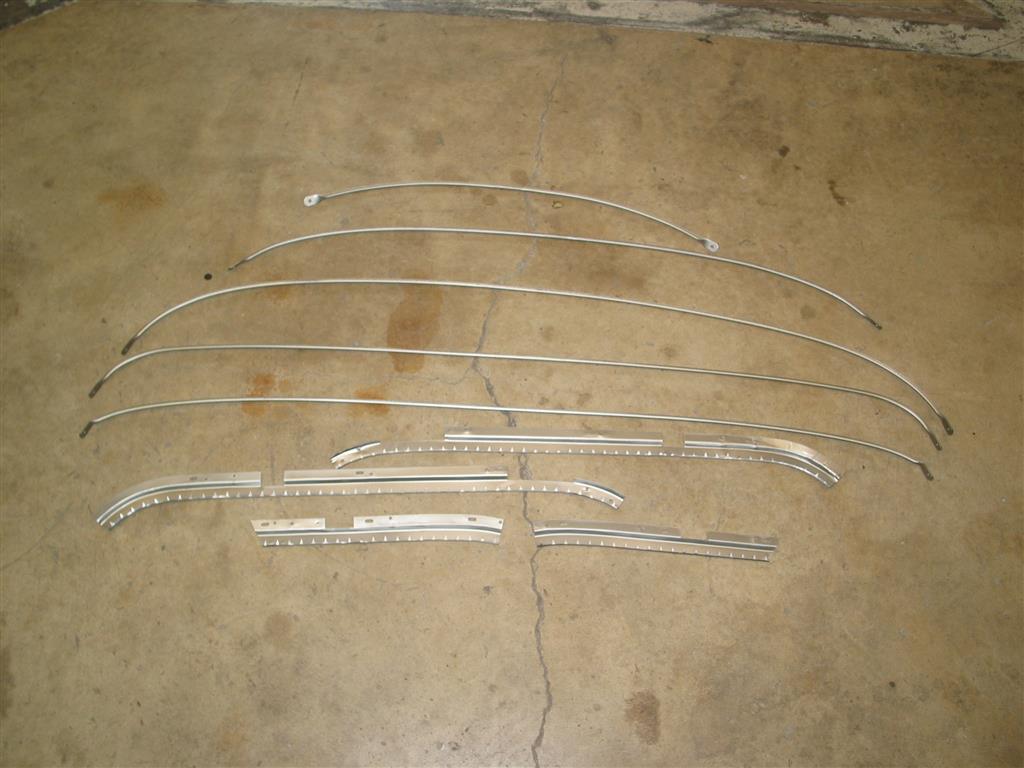
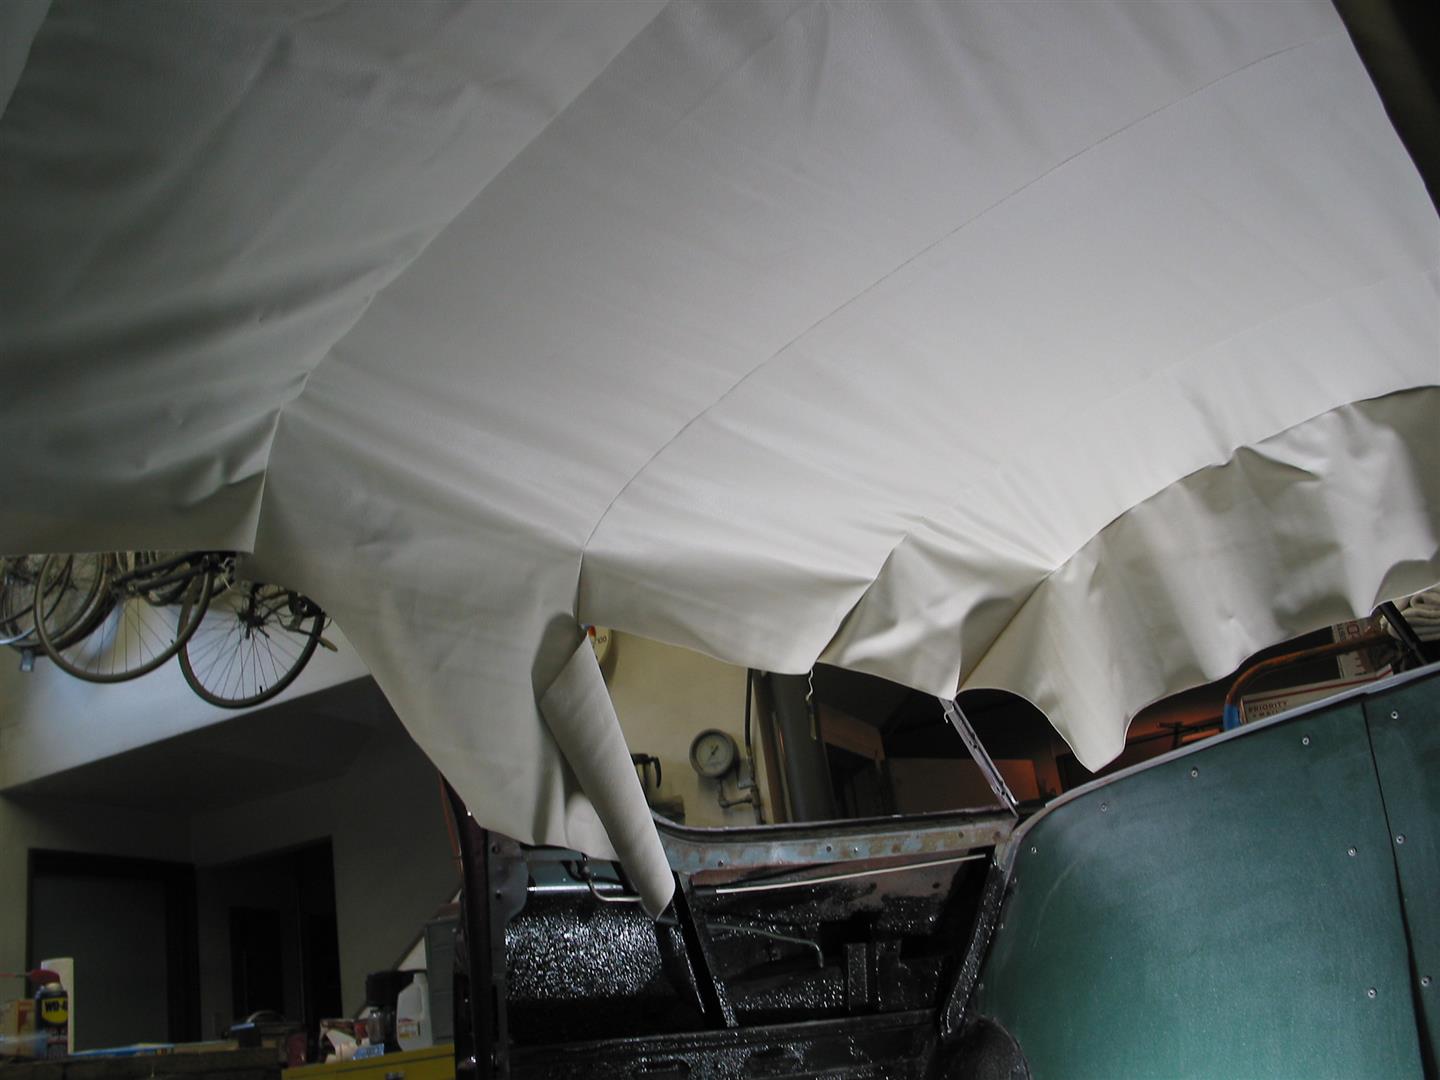
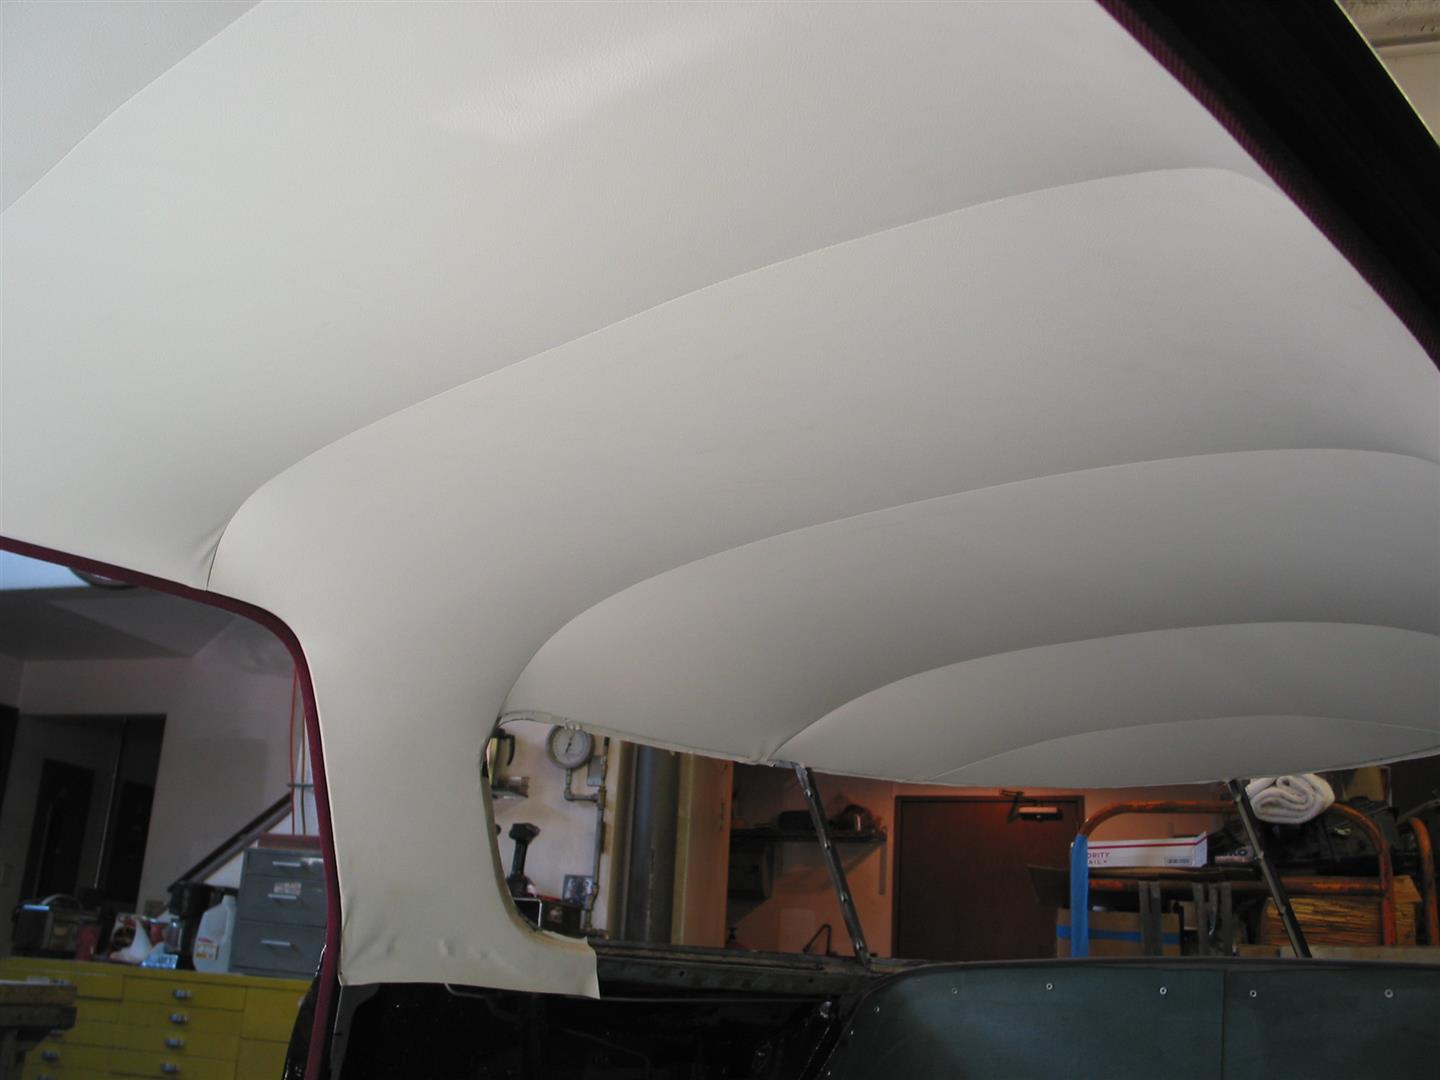
I purchased new windlace and a presewn headliner and did the installation myself. The bows and retaining strips for the headliner were sprayed with Seymour stainless steel paint, which goes directly on bare metal and gives good corrosion protection.
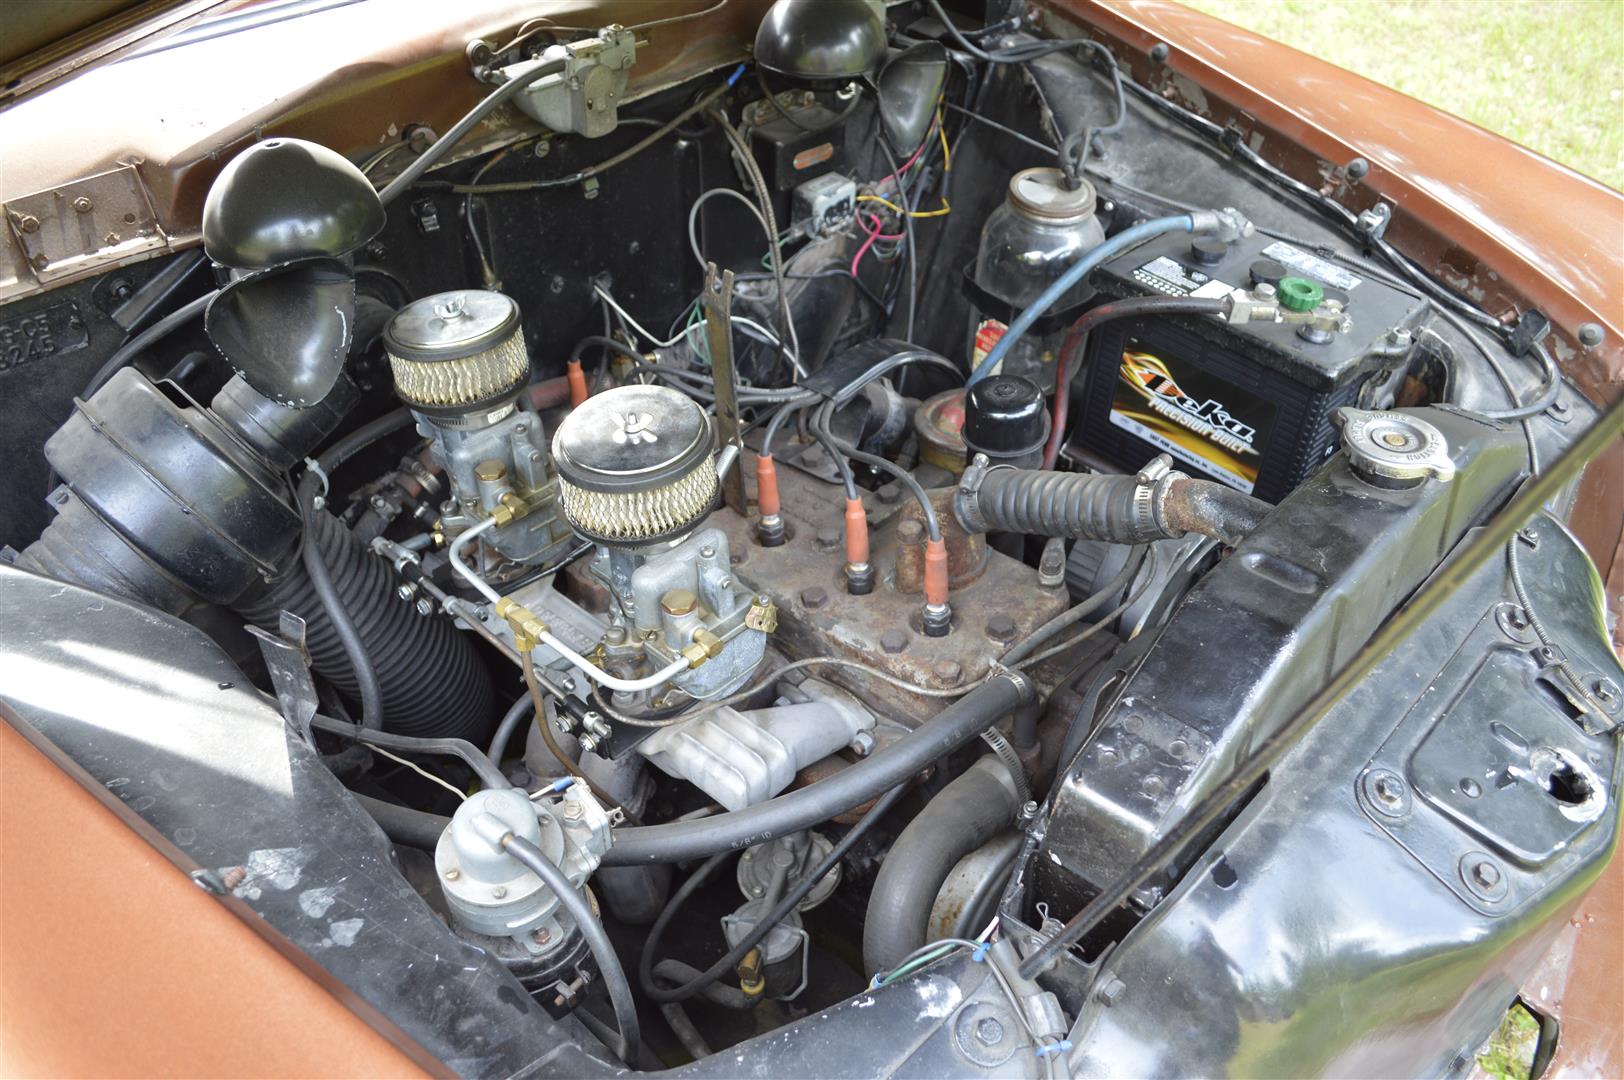
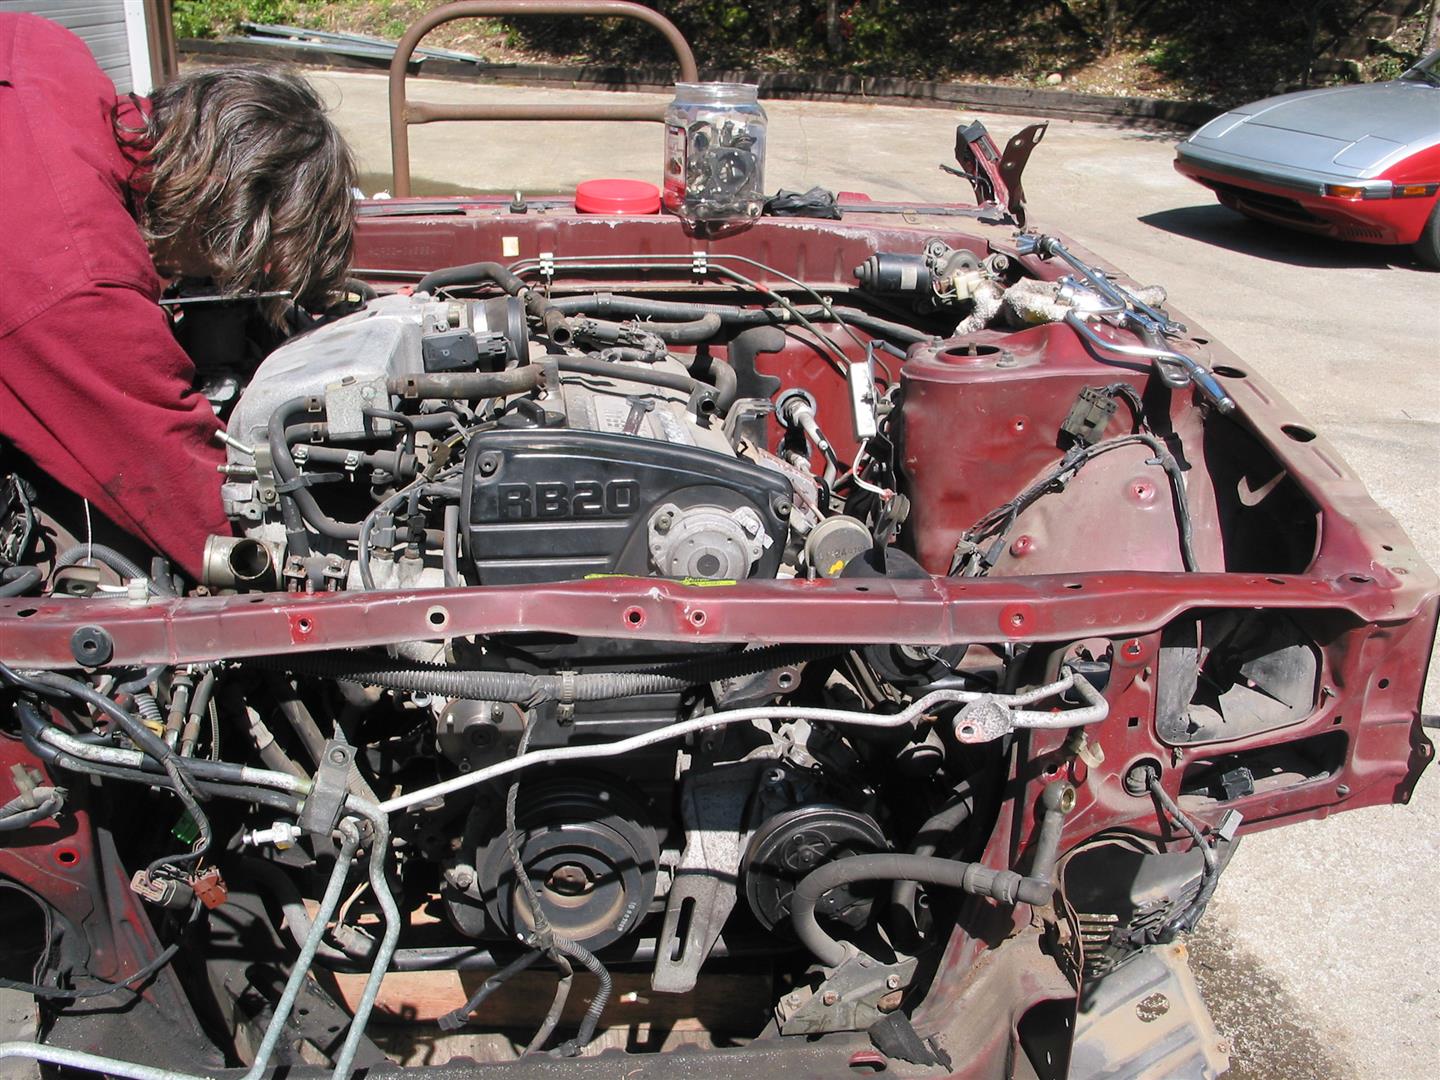
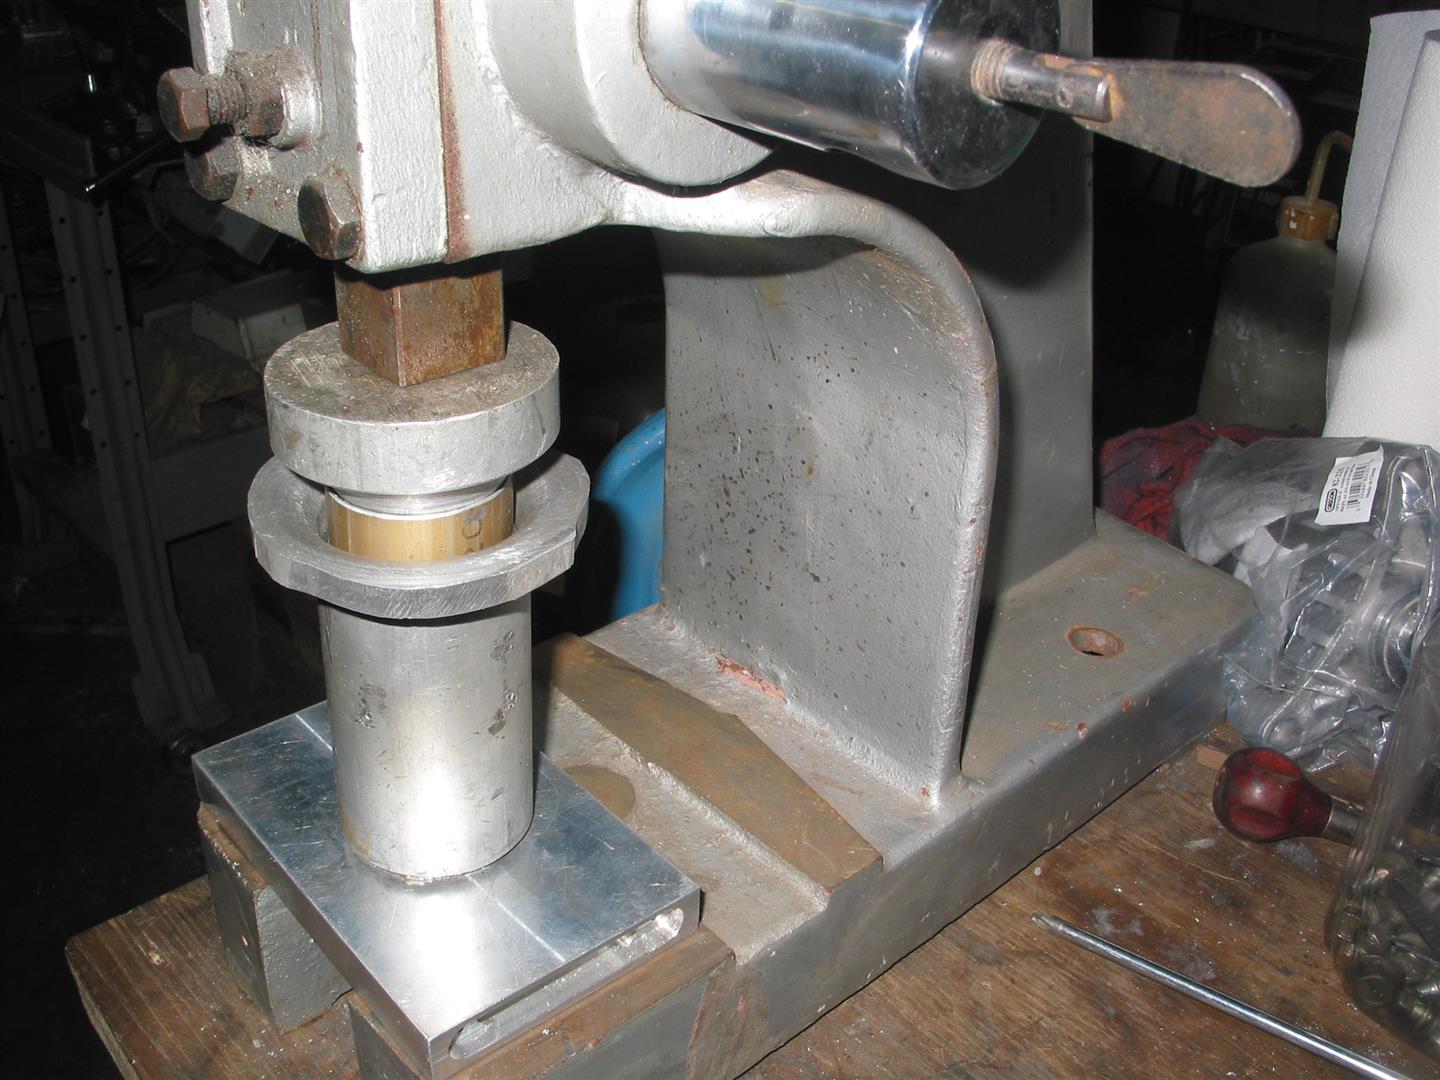
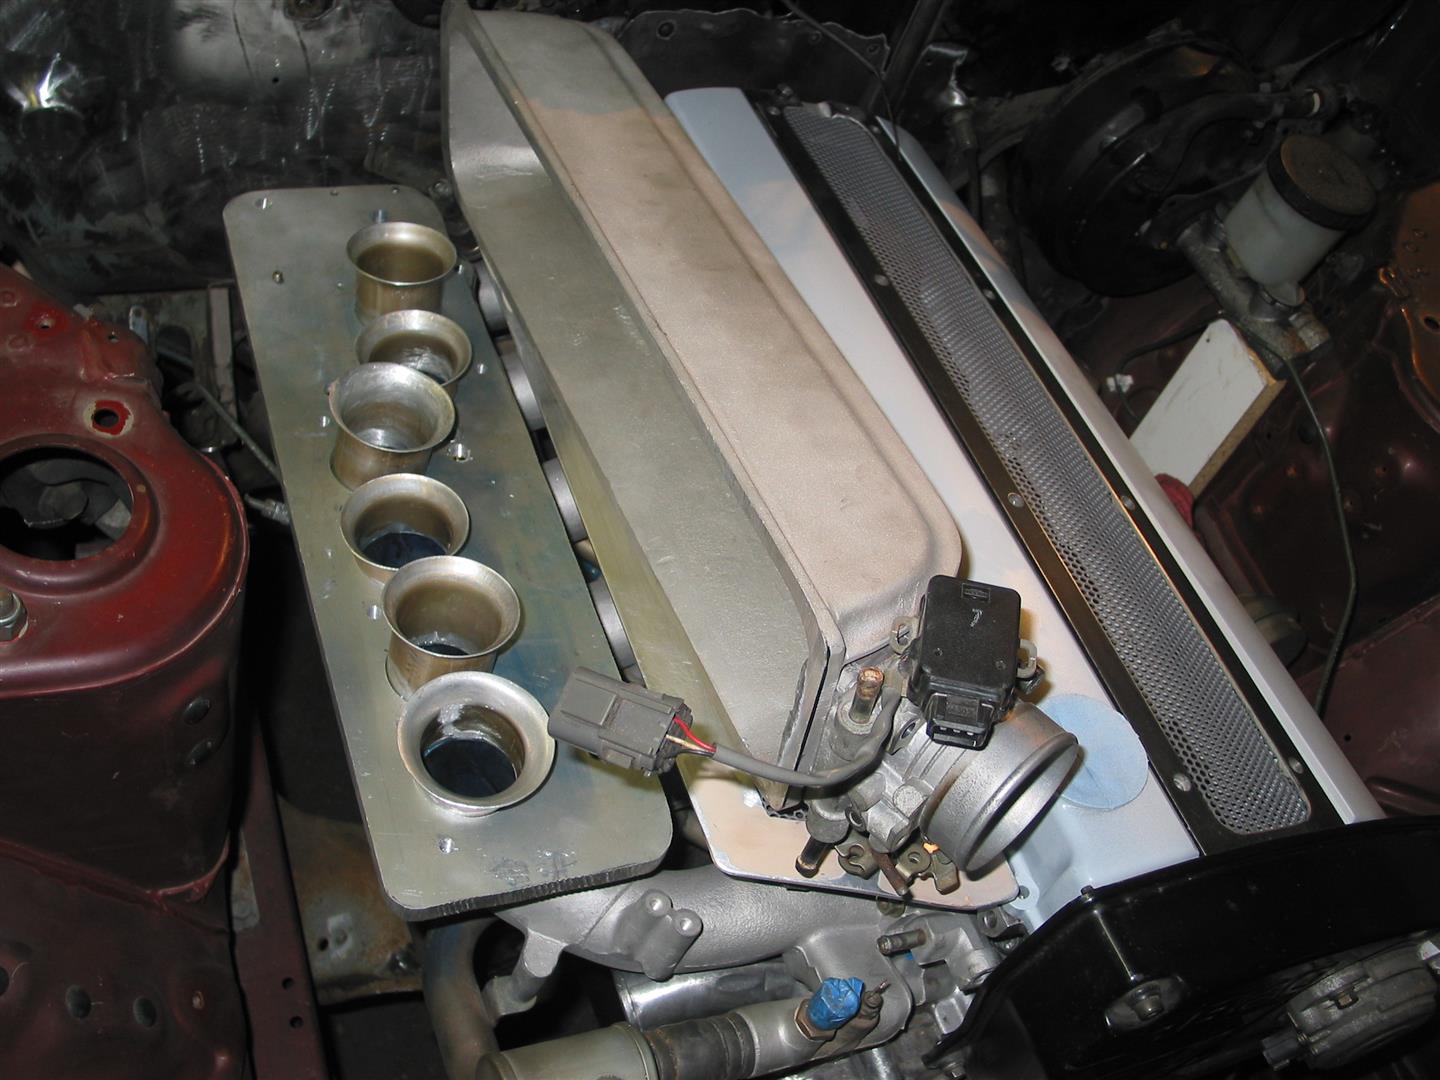
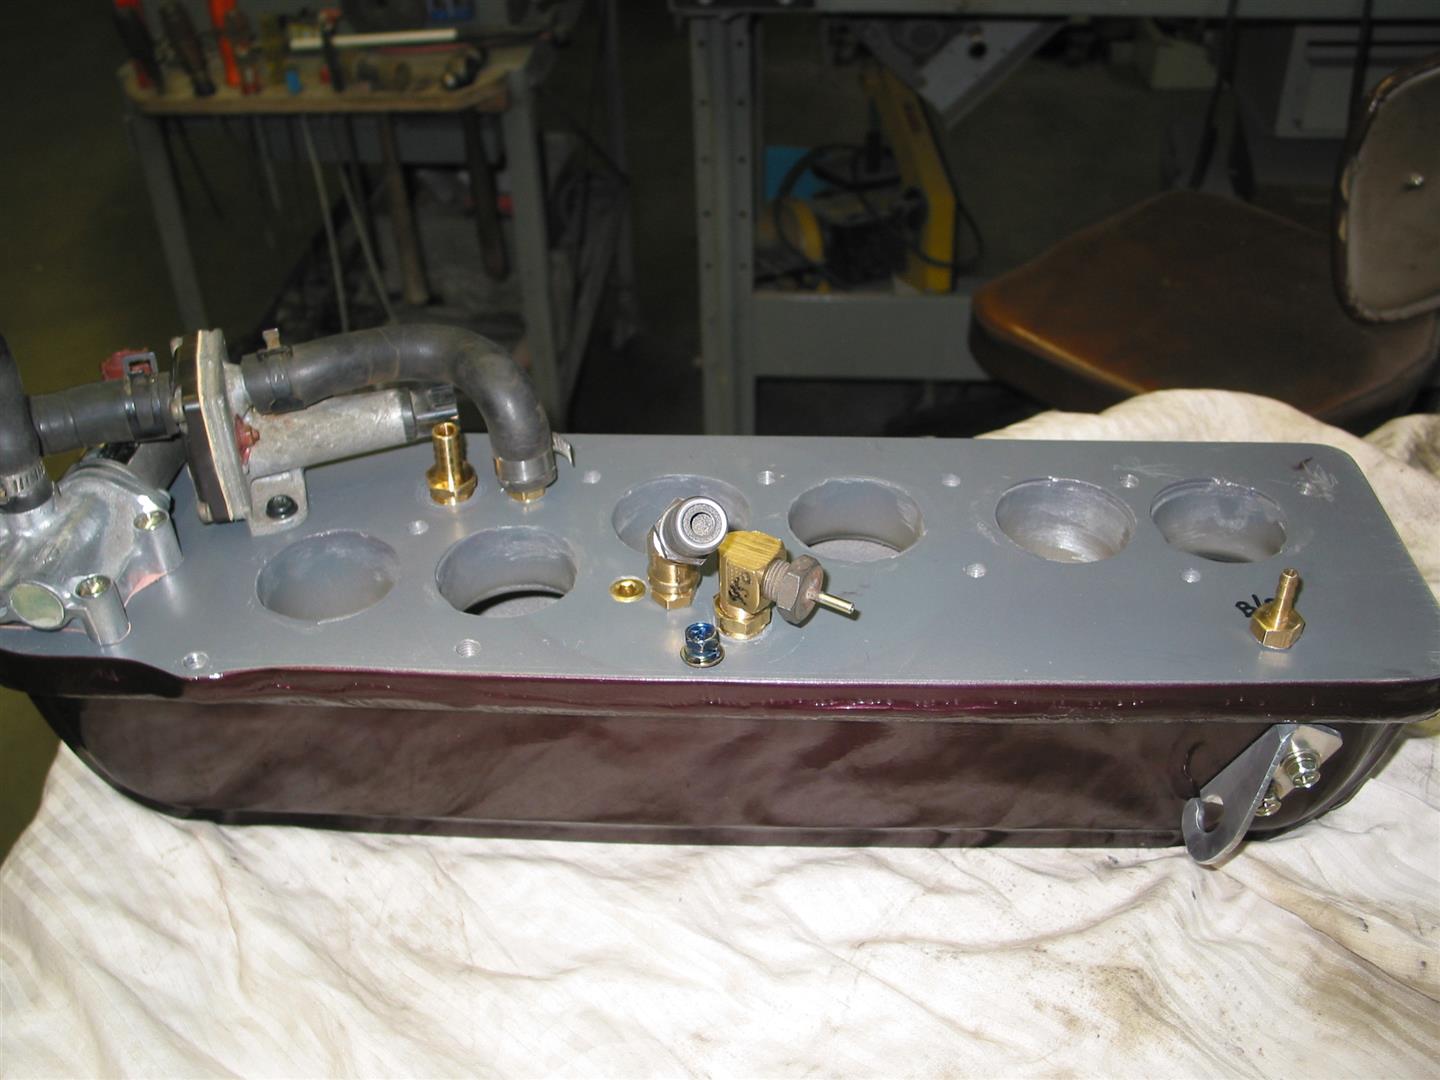
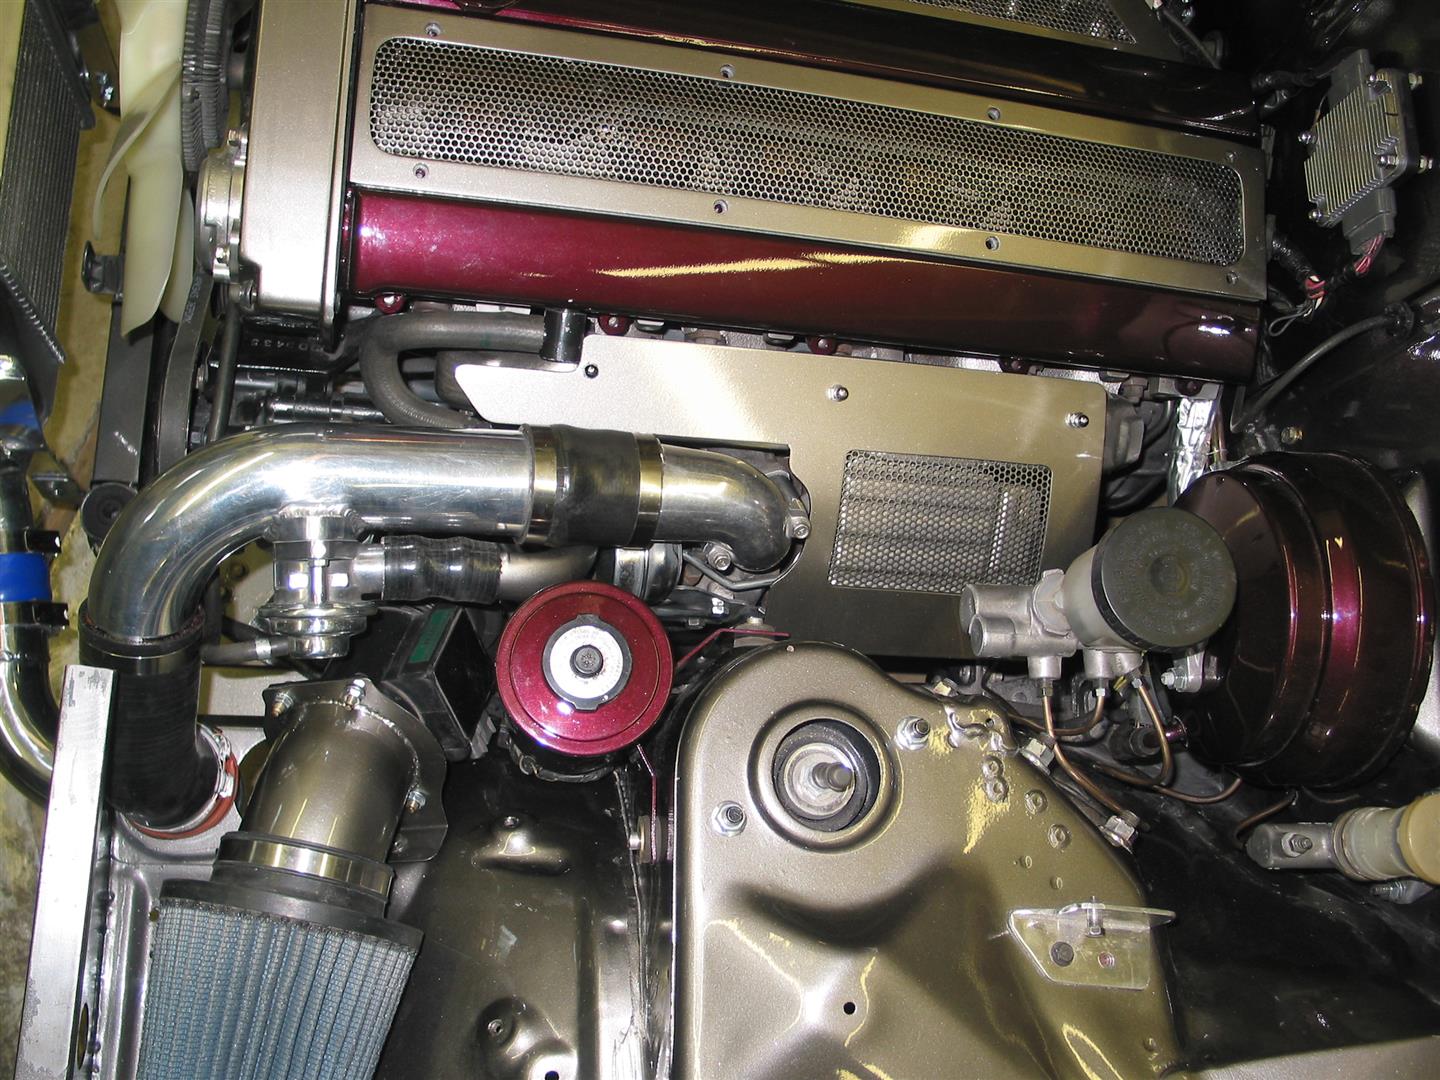
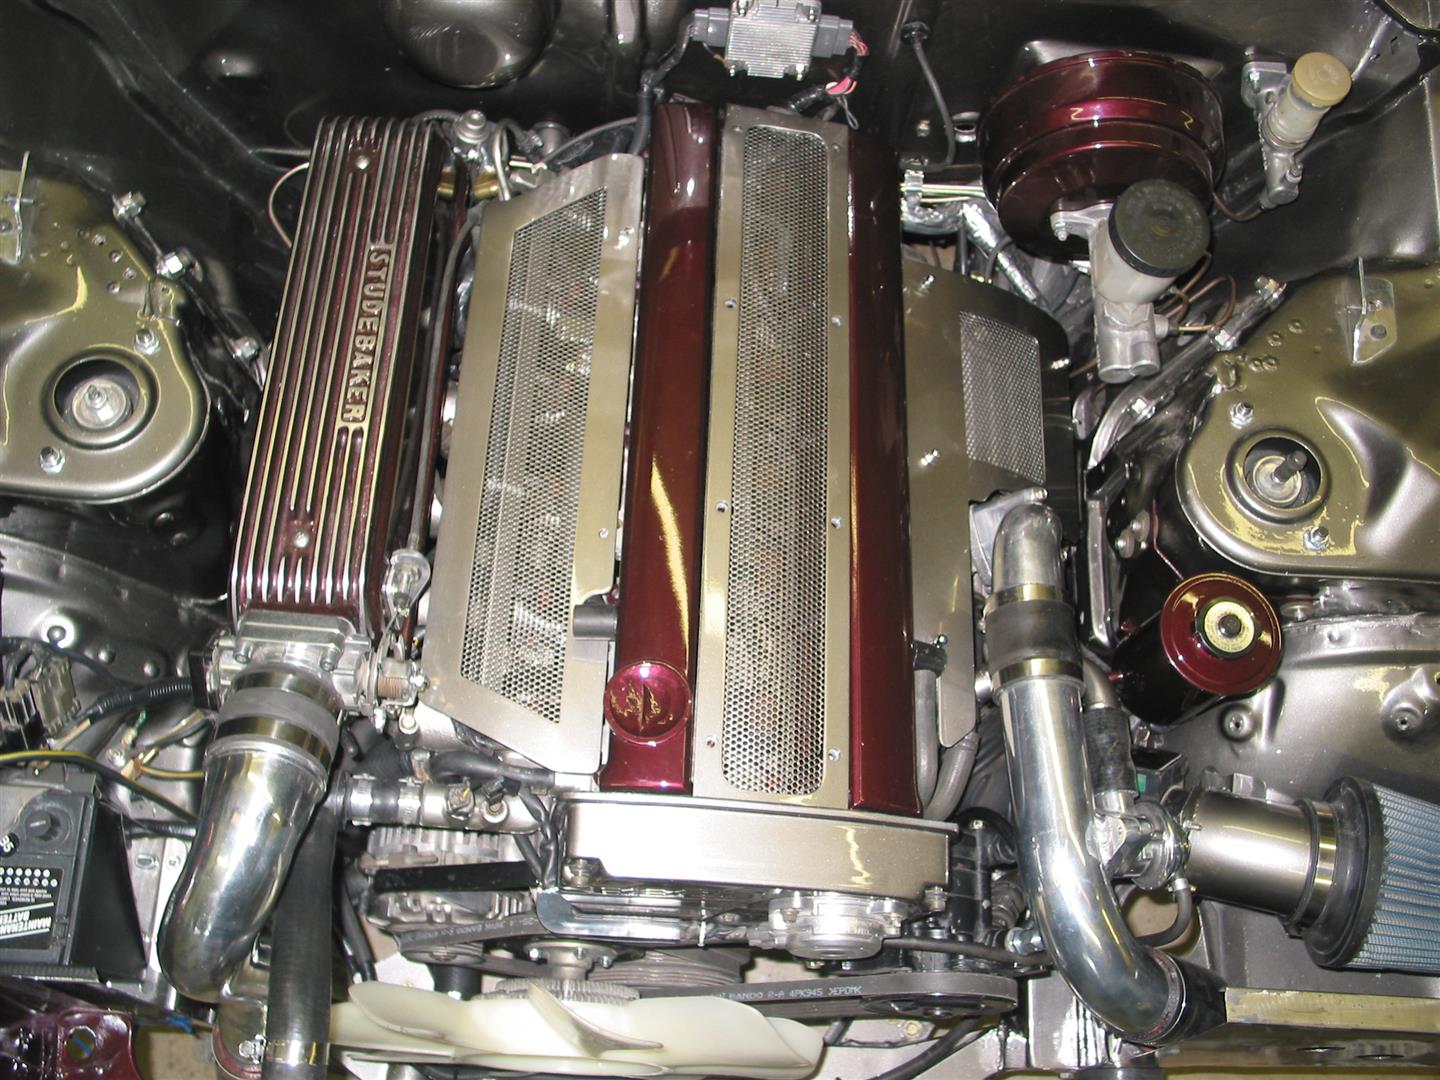
We have done a pretty radical “restomod” project, to the point that the only Studebaker mechanical parts left are the door latches and the window mechanisms. But the RB20 motor is still the heart of the project, and I wanted the engine compartment to look like “show quality”. I read that the coil packs were failing due to the heat trapped under the solid cover, so I cut it out and inserted a perforated steel panel. Sean suggested that we make similar covers for the fuel injection and the turbo. Sean also suggested that we should make an intake plenum that looks correct for an older car, he suggested that a cast aluminum valve cover would be about the right volume and shape. I found a source for one with the Studebaker script. We made a heavy plate for the bottom so we could mount the idle air controller, cold start valve and various vacuum fittings underneath to minimize the visible clutter of hoses and wires. I read that most of the high dollar super cars and some aftermarket turbo plenums have internal velocity stacks to improve the air flow. We made a die and I pressed some velocity stacks from some soft aluminum tubing I have had for much too long in my materials rack (Boeing part number, dated about 1970 – probably 707 fuel line tubing)

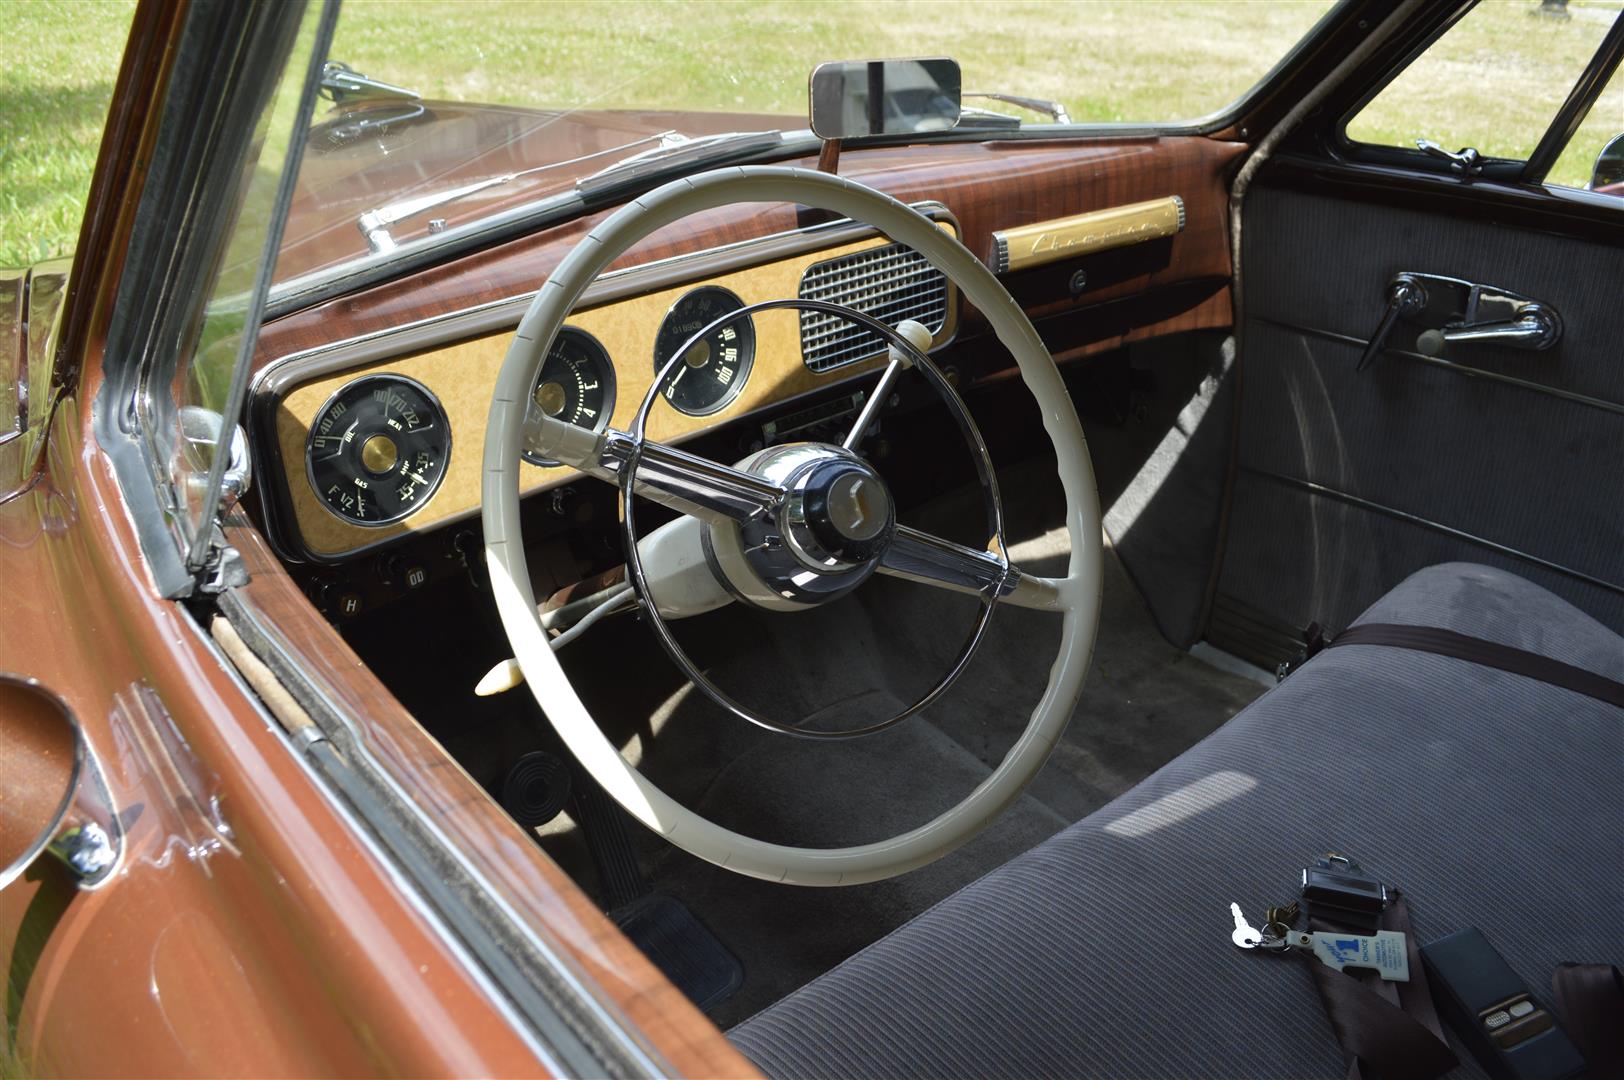
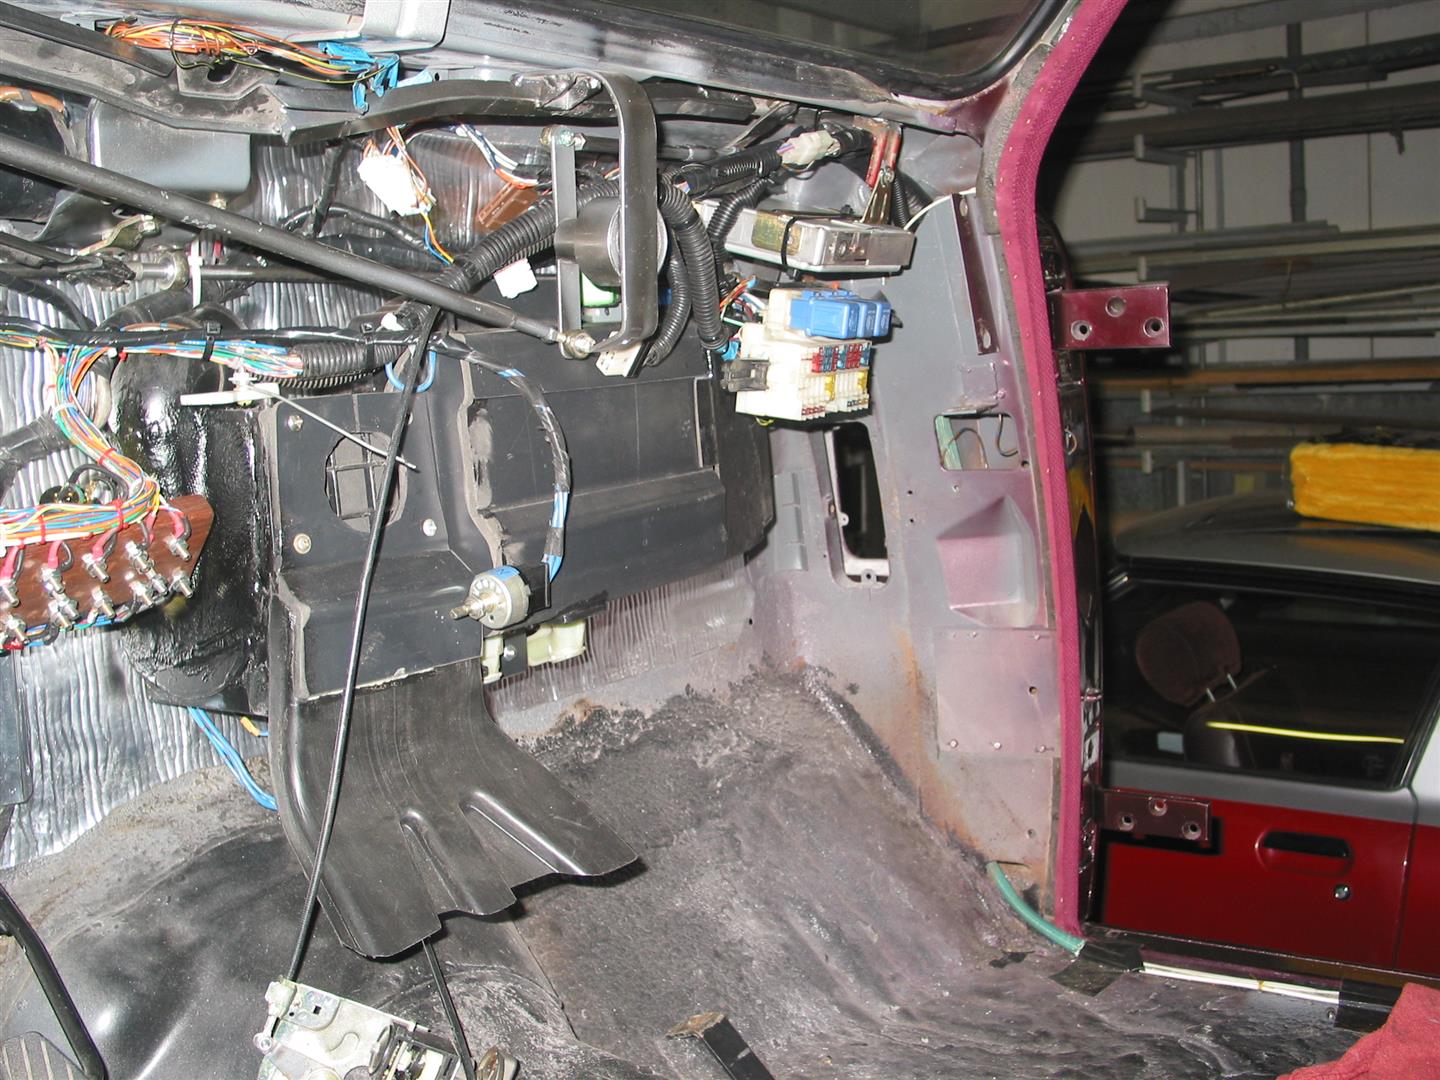
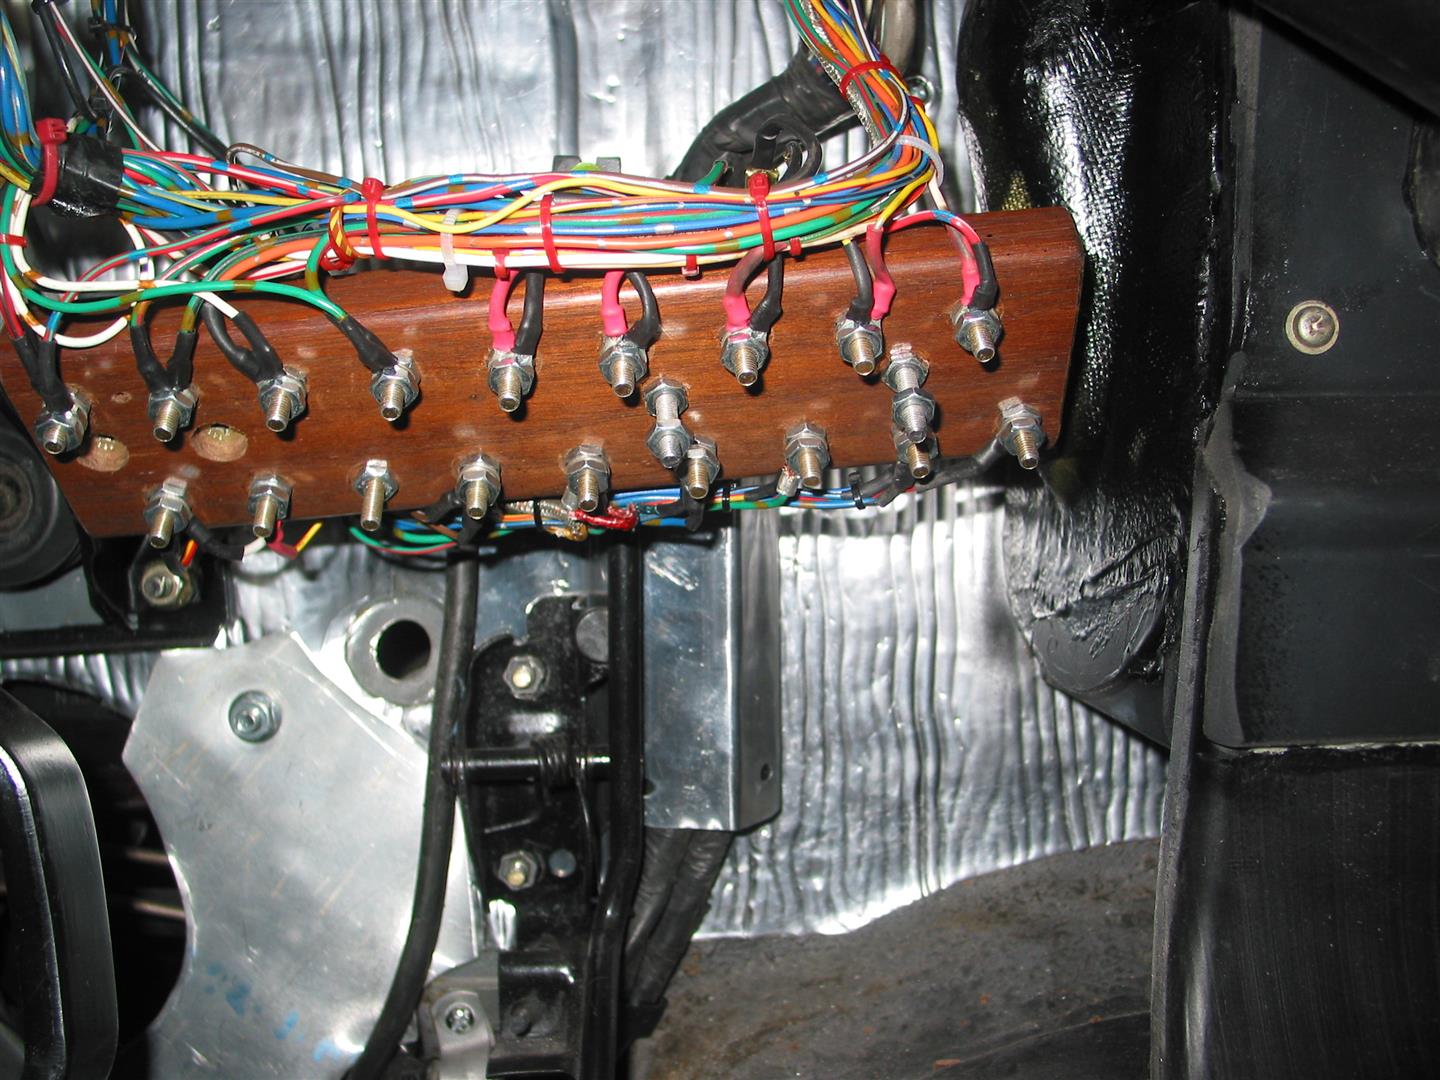
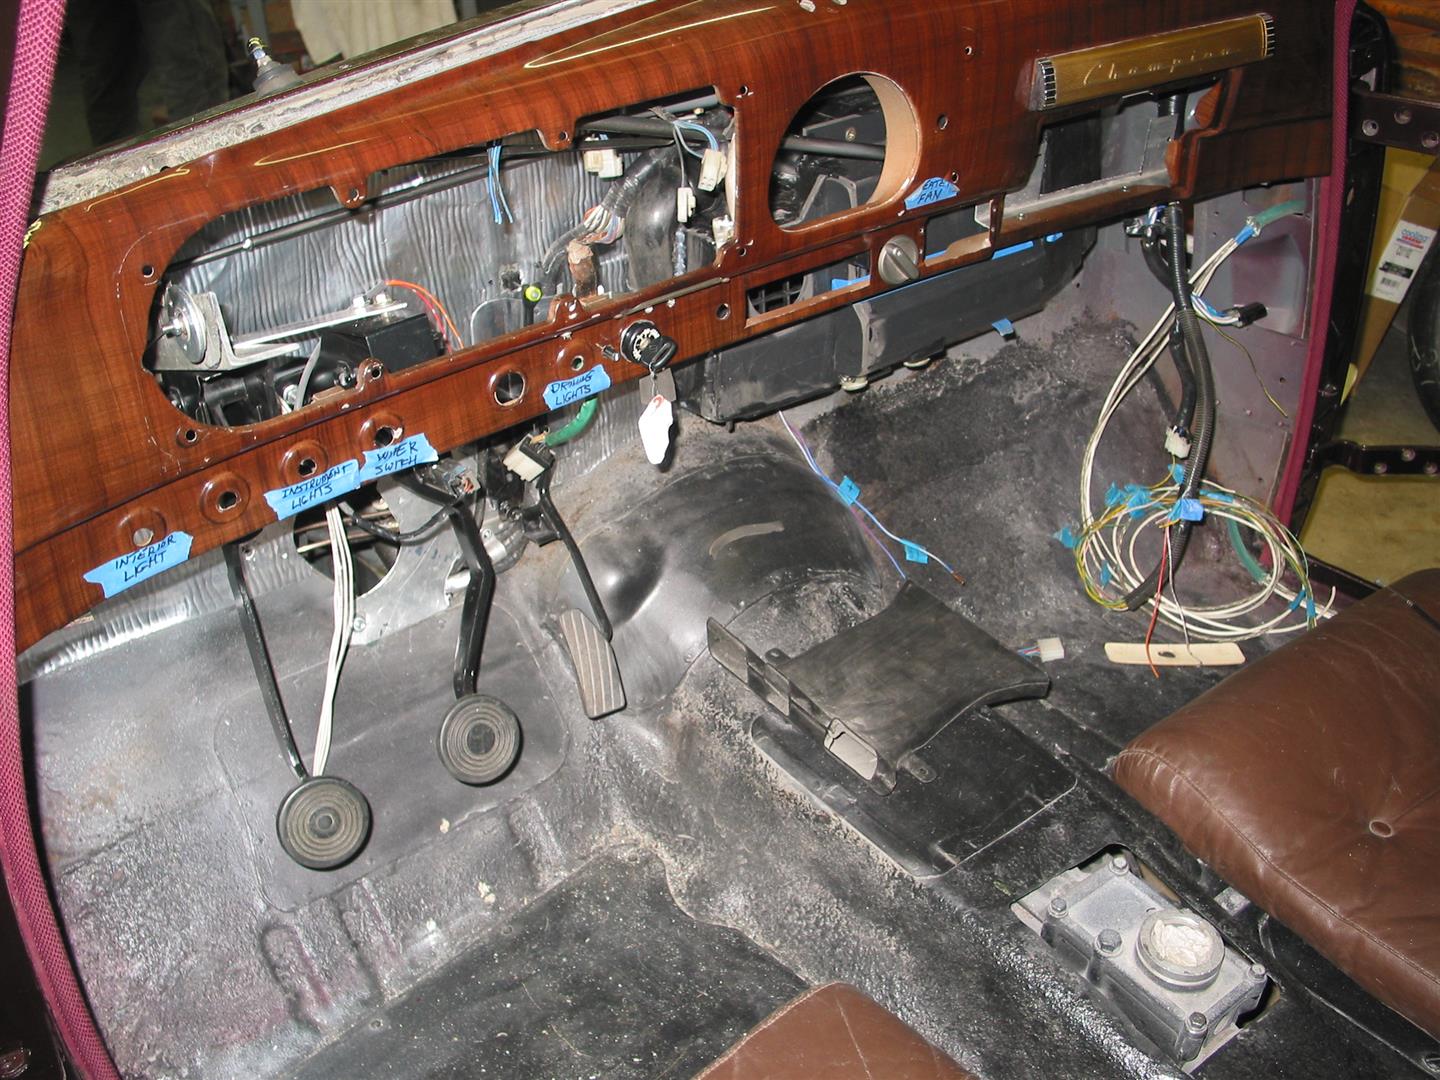
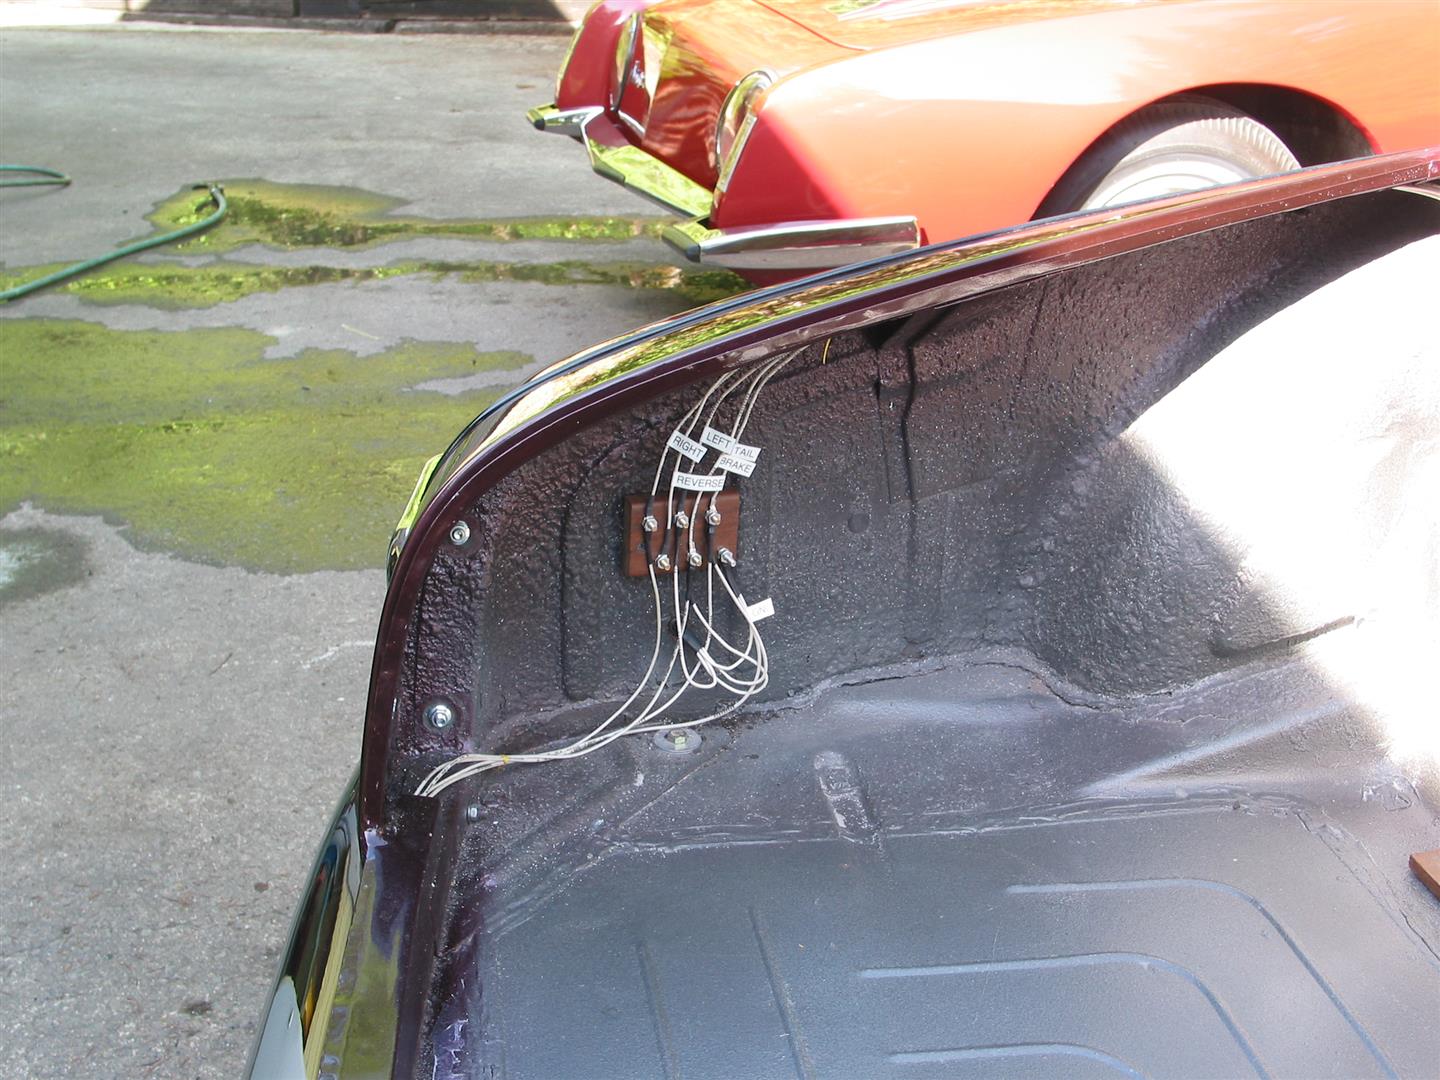
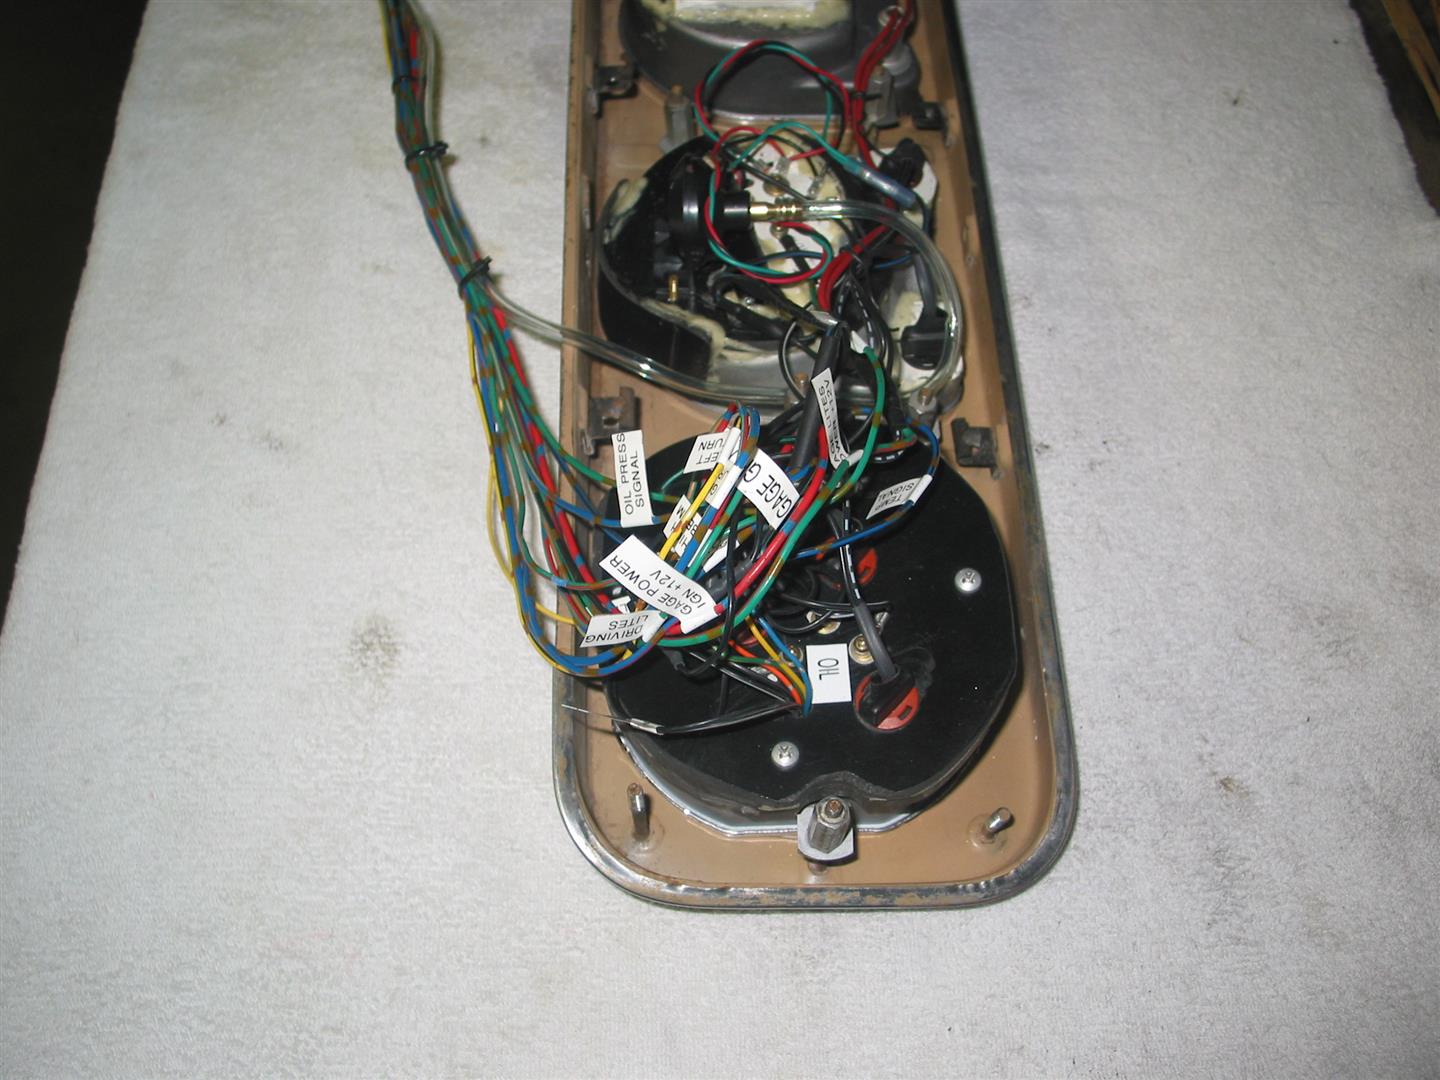
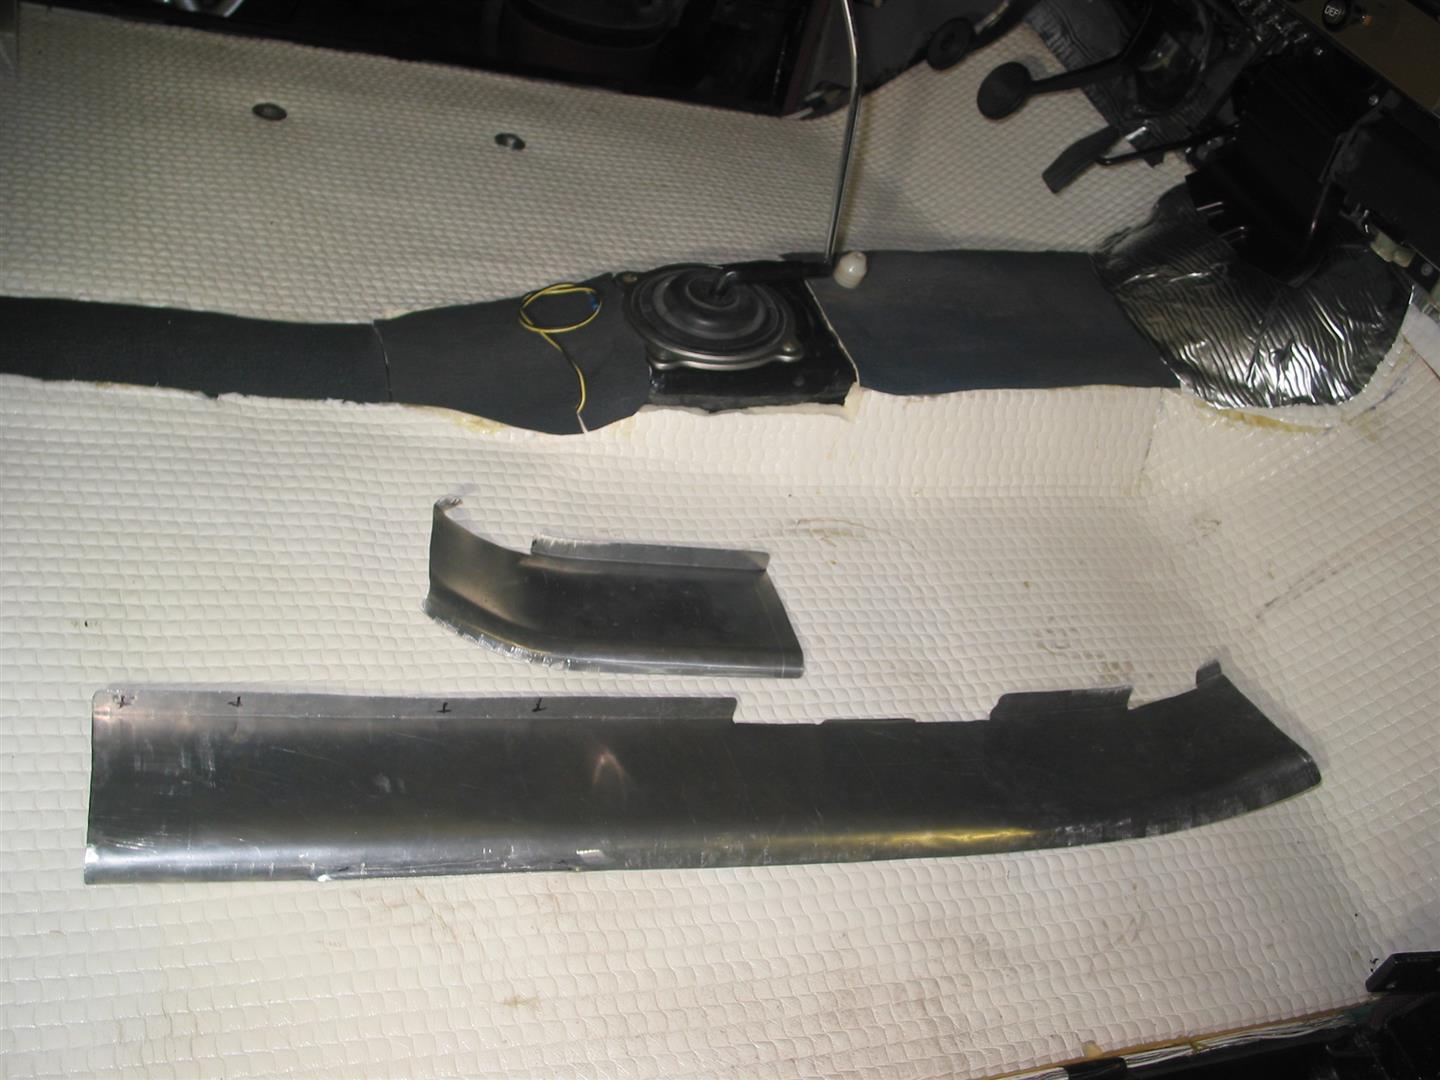
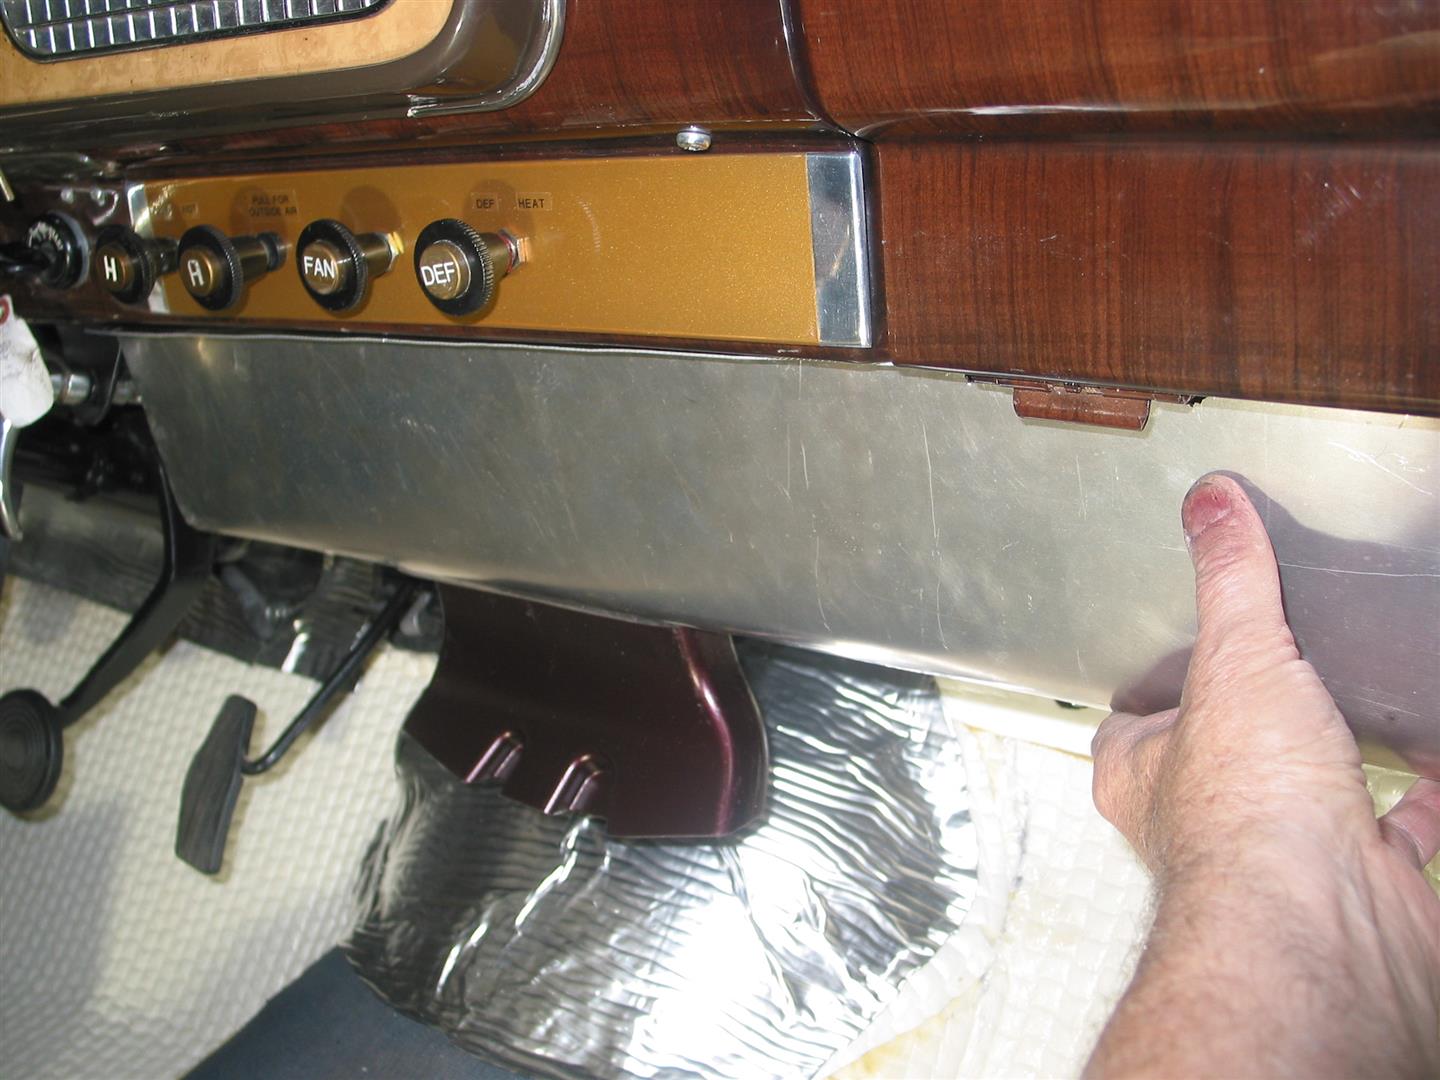
This Studebaker originally had a heater located under the passenger side front seat. I fabricated a heater using parts of the Skyline heater and some controls from an RX-7 heater. The Studebaker dash is much closer to the firewall than a typical modern car, so there was not much space to work in. The vacuum wiper mechanism was deleted and we modified an RX-7 wiper motor and linkage. The photo shows a rocker lever that reverses the motion of the passenger side wiper, so the blades have opposing motion like the original Studebaker. The Skyline engine computer and fuse panel are mounted inside the glove box door. To help with organizing the wiring, I made some terminal boards, using walnut wood strips and some aircraft bolts I had. The white wiring to the back of the car has an interesting history. In about 1963 I was in the Air Force in Tuscon and was restoring an old MG-TC. I went out to the boneyard where all the old airplanes were being scrapped and bought a large bundle of wires from a Boeing C-97. I have used that wiring over the years for home stereo, car stereo, airplane radio and audio circuits and now this car. Each wire has a unique part number stamped on it every few inches.
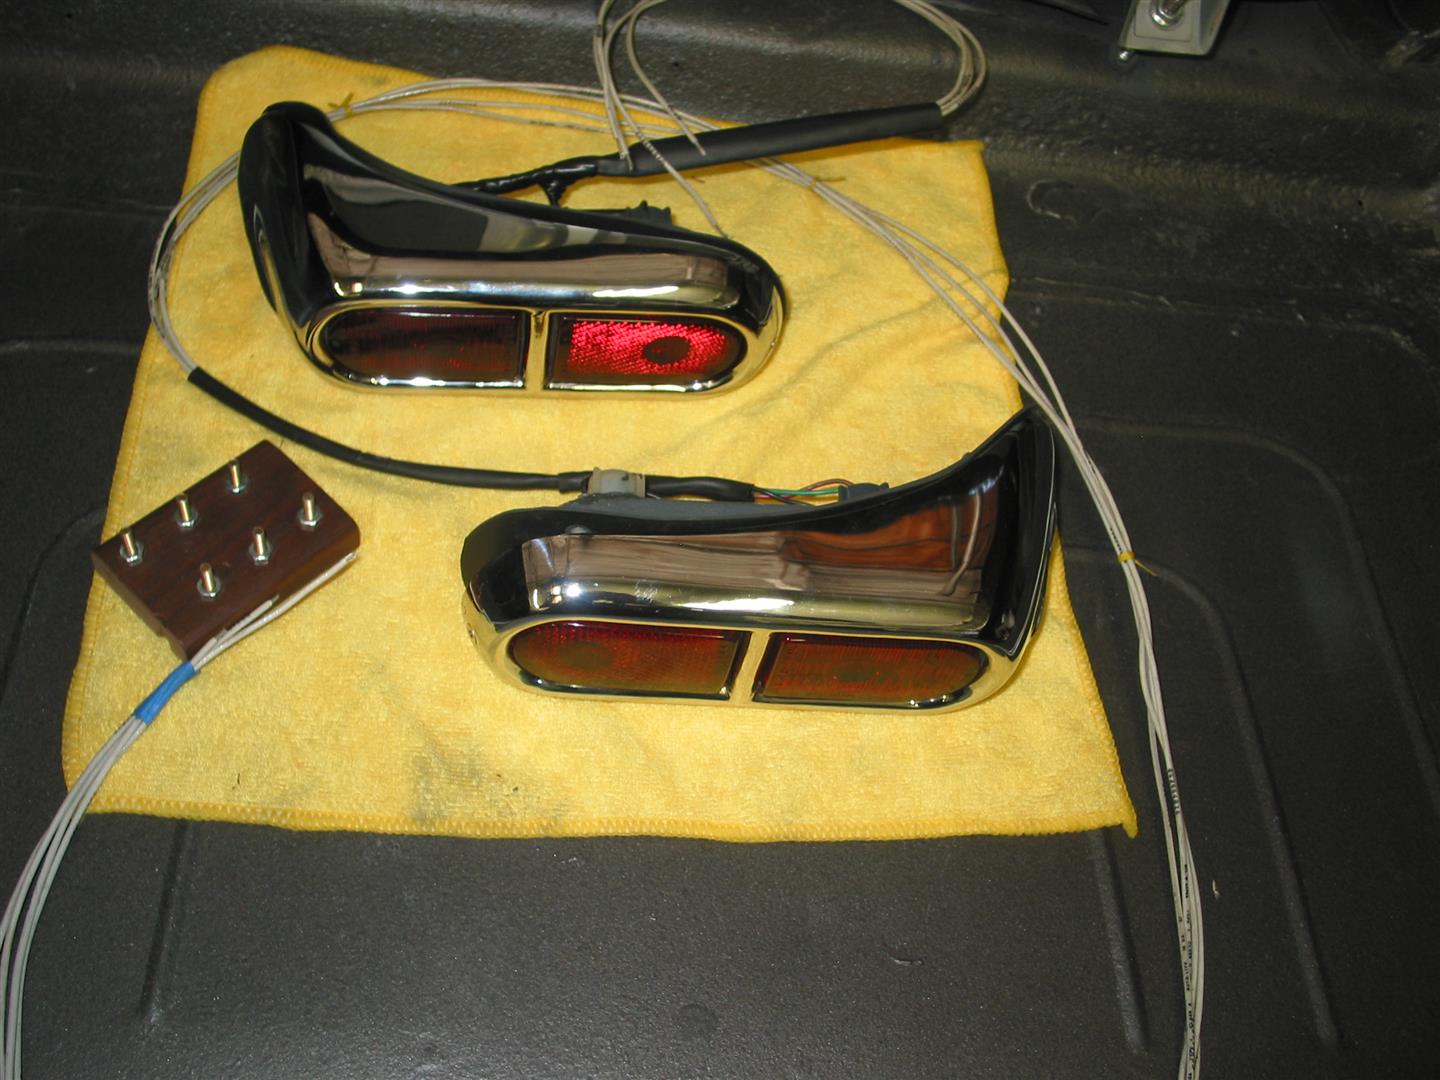
I replaced the corroded light bulb sockets in the tail lights with some nice sockets from early RX-7 tail lights, each for two element bulbs (1157 or equivalent). I am actually using some very bright LED bulbs for the tail, brake and turn lights .
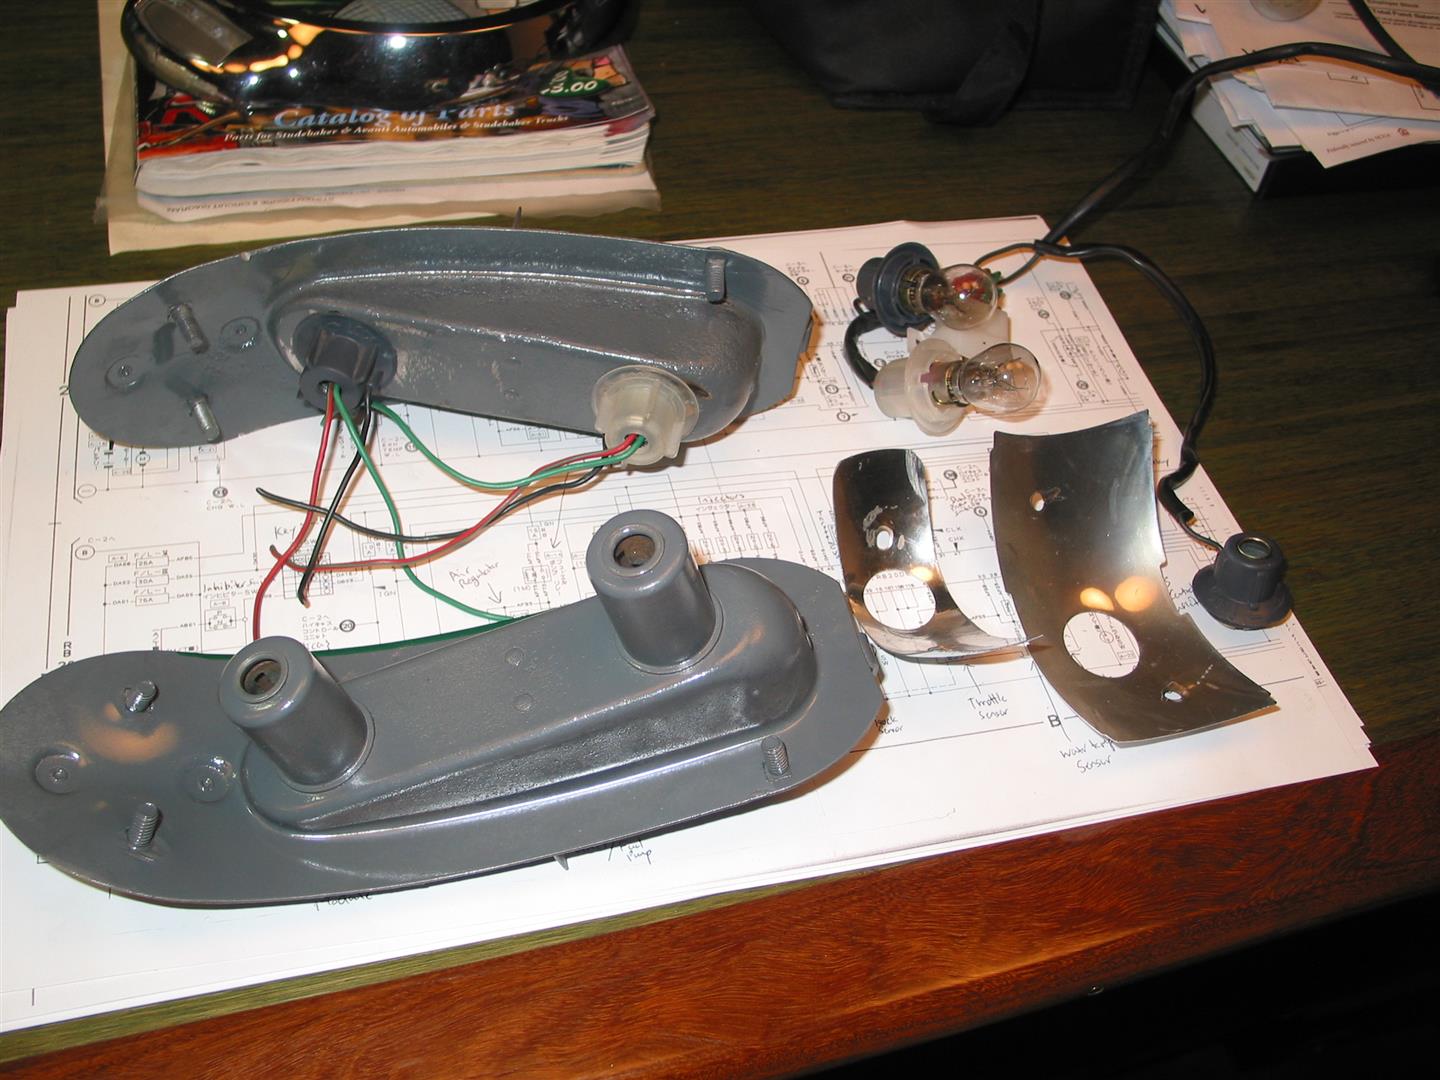
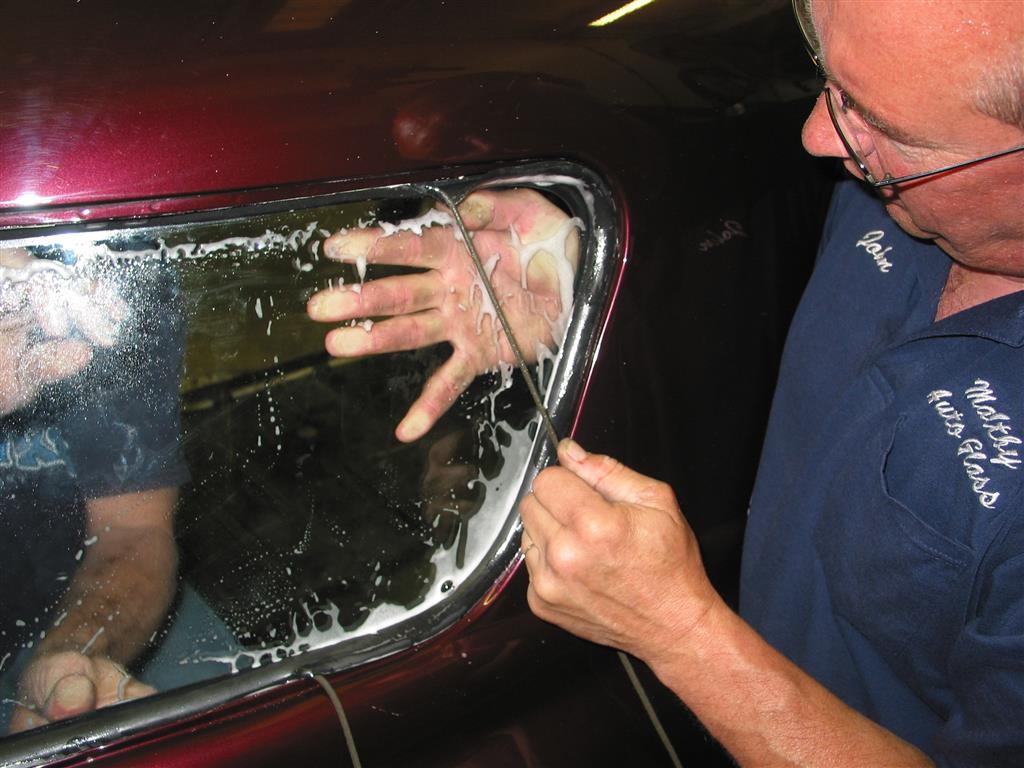
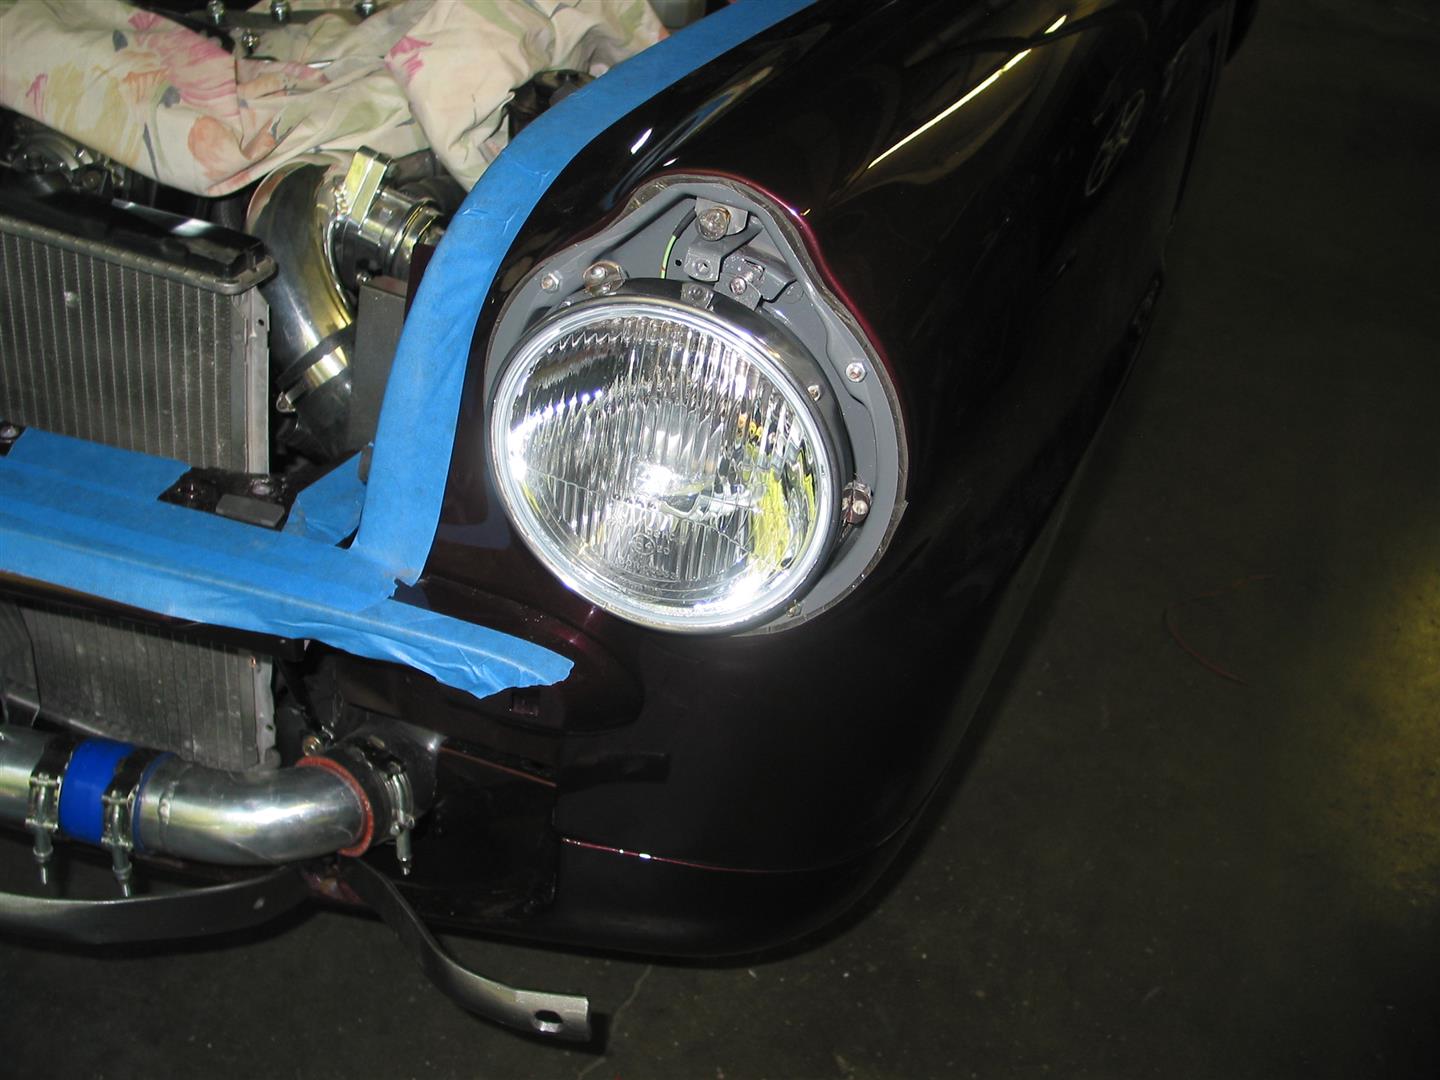
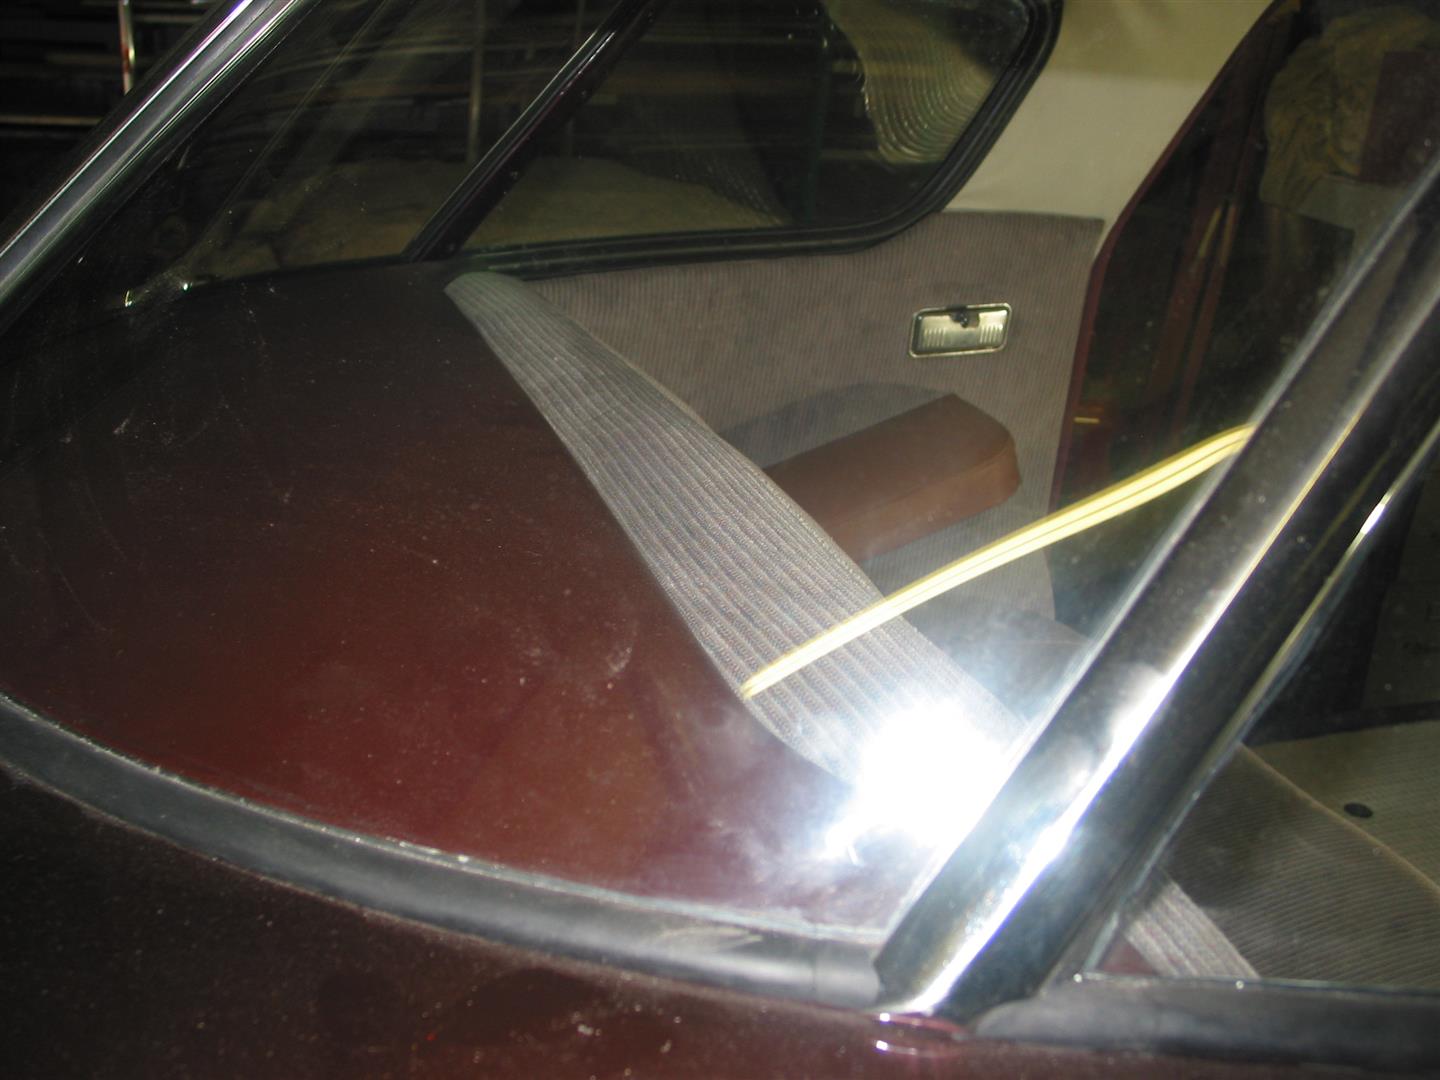
The windshield was fairly easy to install, but the four rear windows were very tight fitting. All of them were installed from the inside which is not common. We installed the front fenders and headlights, and the rear fenders with the new welting. I made rubber gaskets for the headlights and tail lights.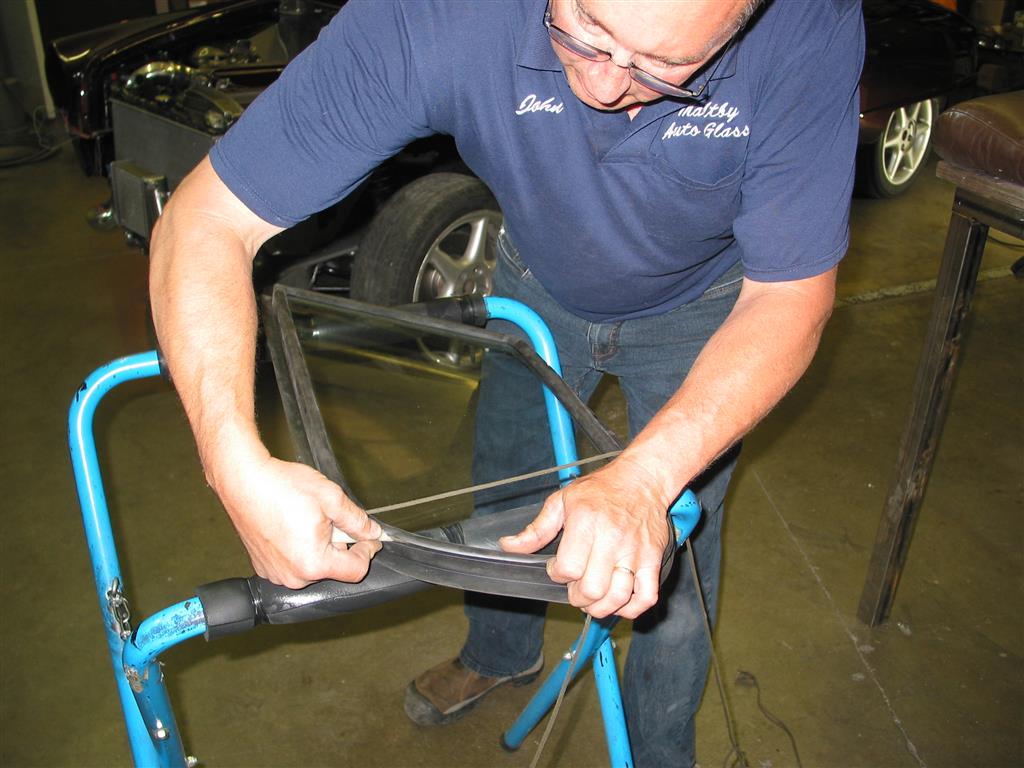
The rear valance panel was installed and then the exhaust was fitted and the tips welded on to fit the cutouts in the valance panel. The rear bumper and tail lights were installed, and the rear body is pretty much complete except for the trunk.
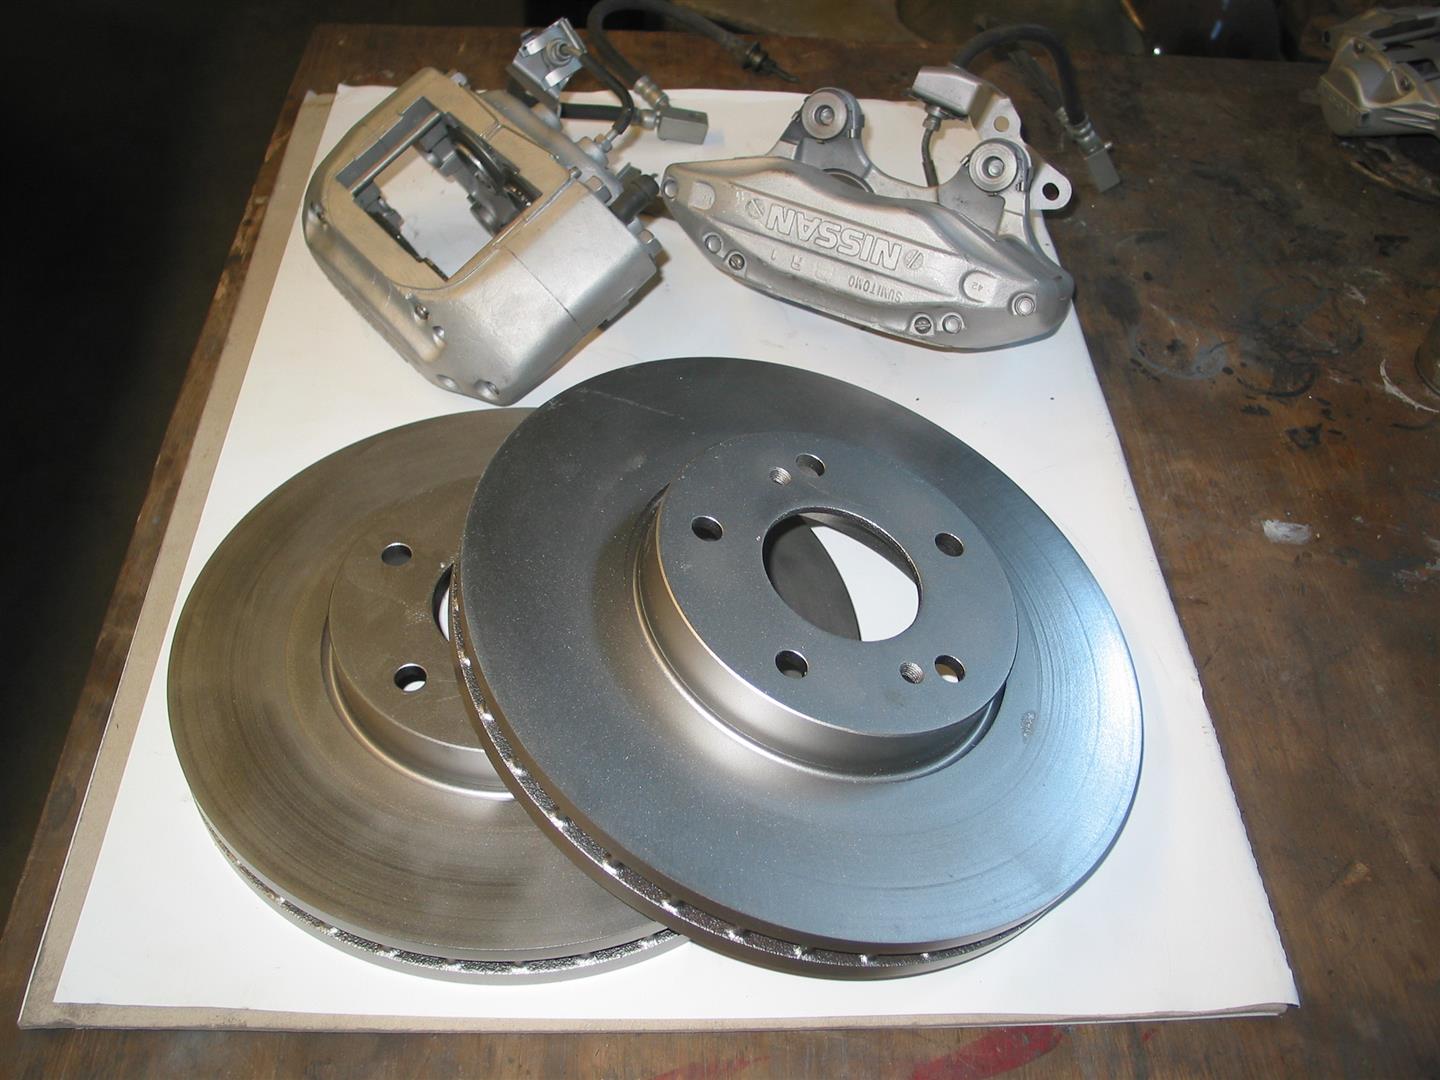
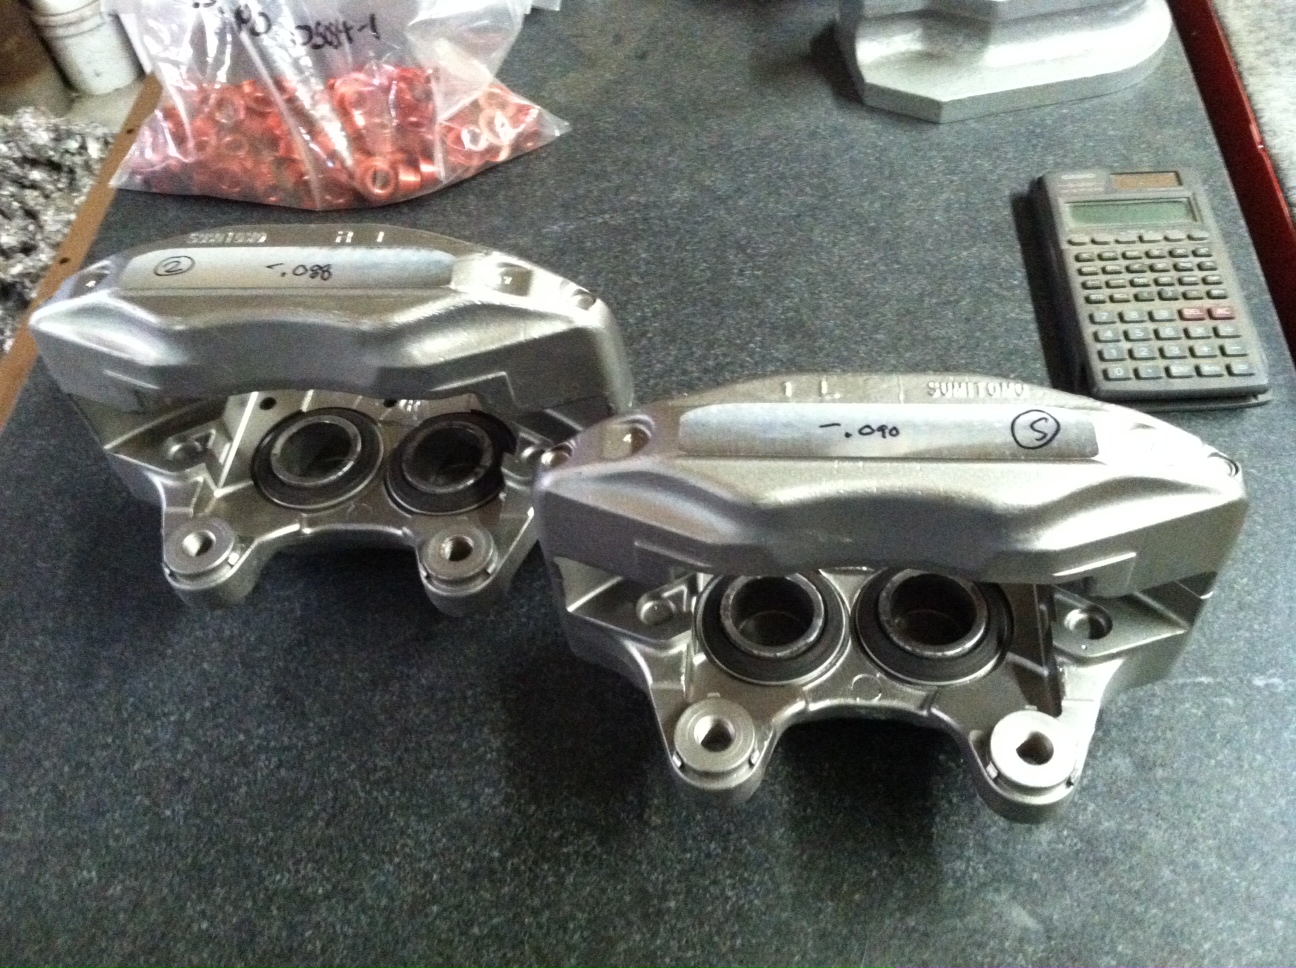
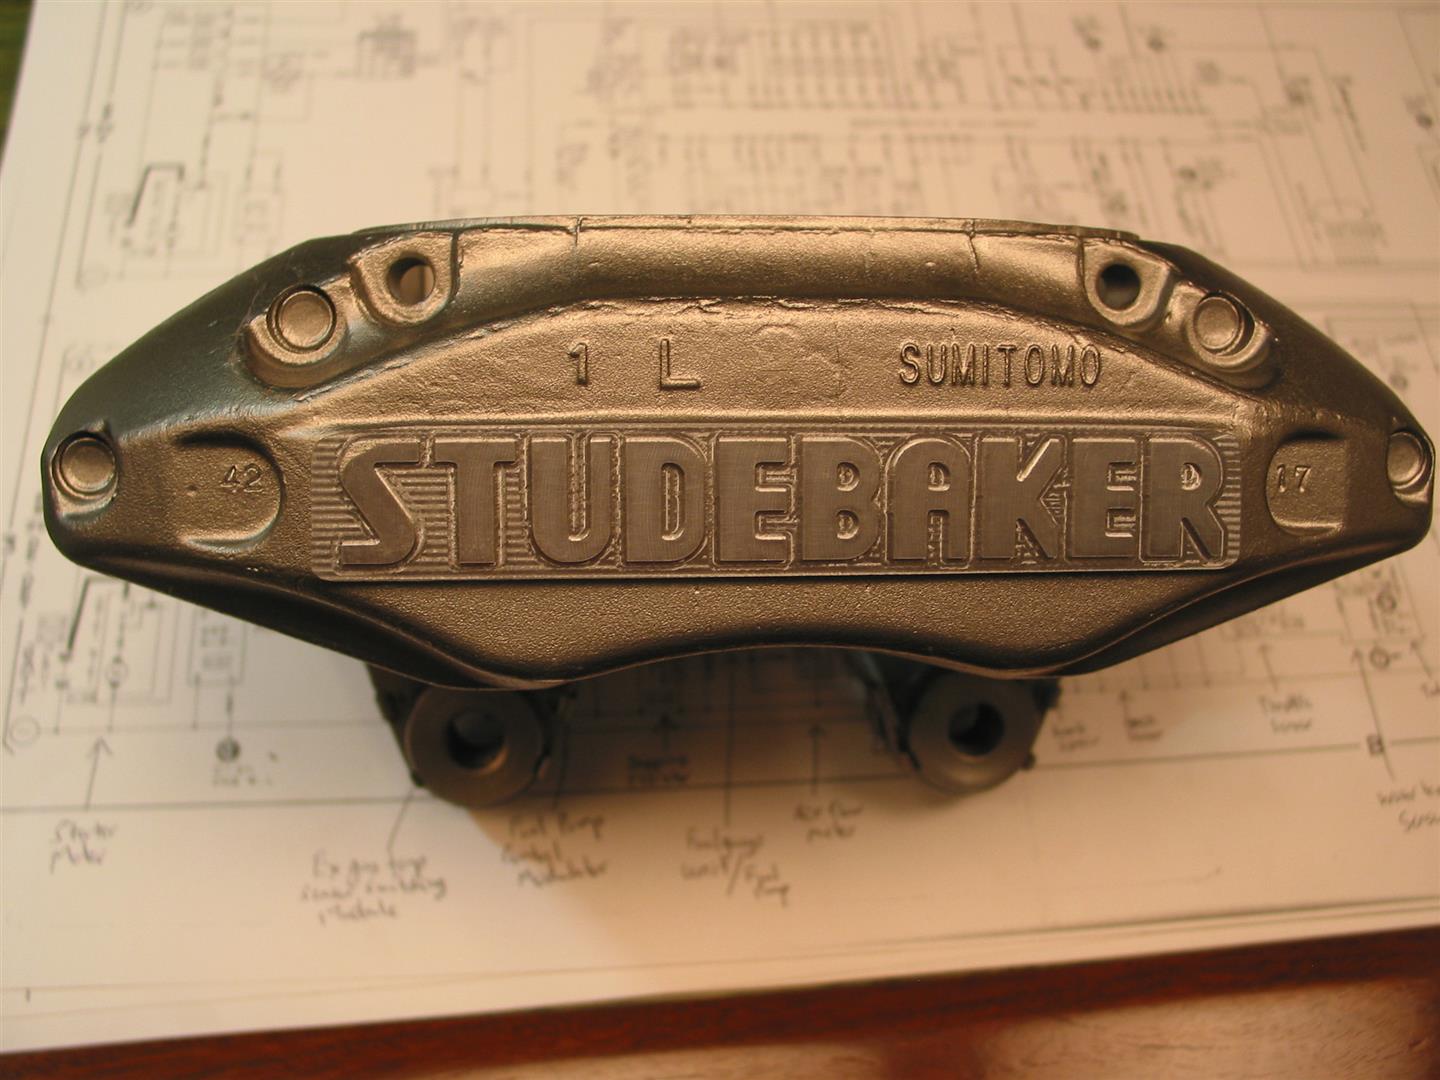
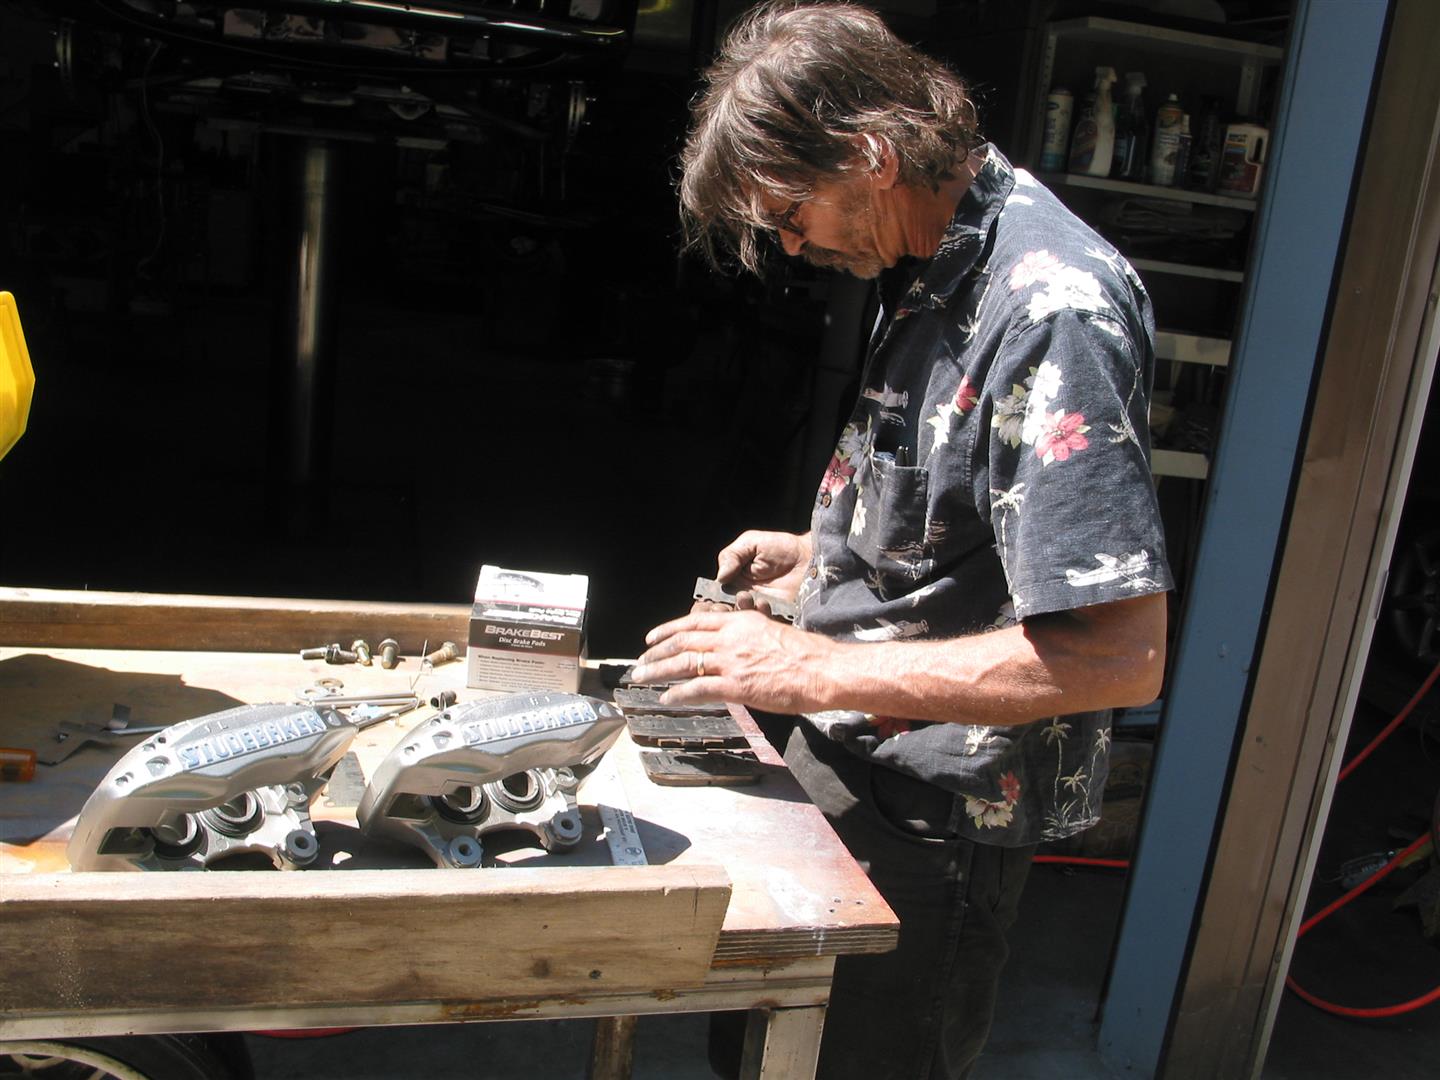
The front clip, engine and most of the parts we used are from a 1990 R32 Skyline. The rear suspension and the front and rear brakes are from a later R33 Skyline, which has larger brakes – 12 inch discs front and rear. My machinist, Tom Chamlee, was not quite as busy as usual, so I gave him the assignment of turning these Nissan front calipers into Studebaker calipers.
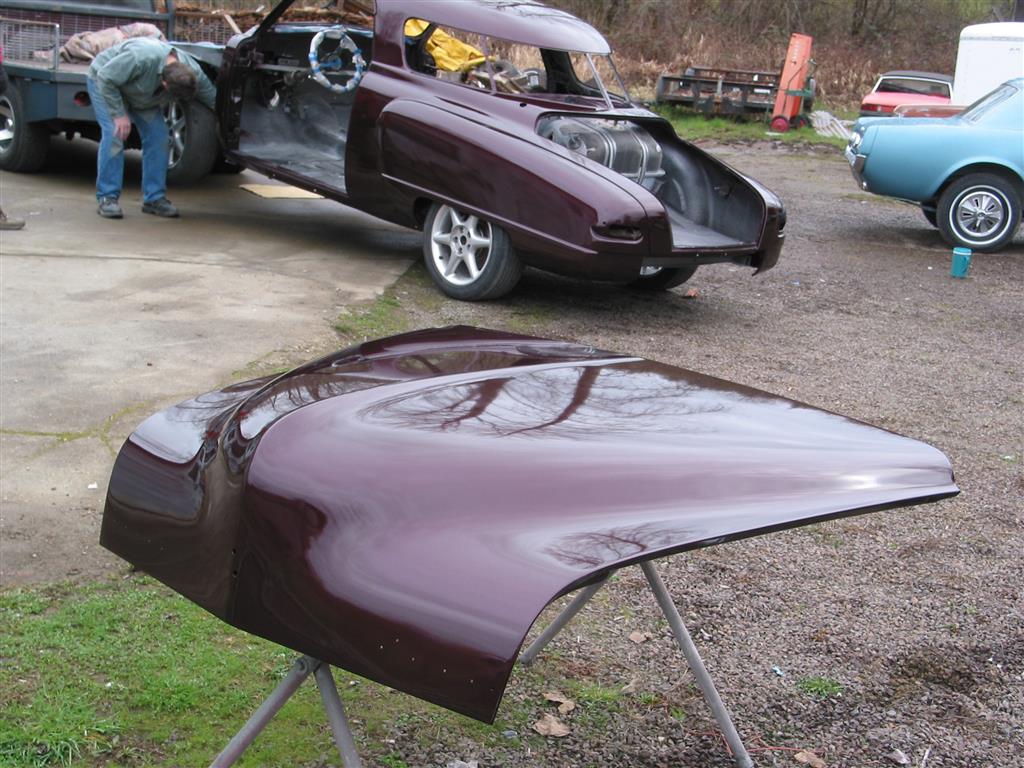
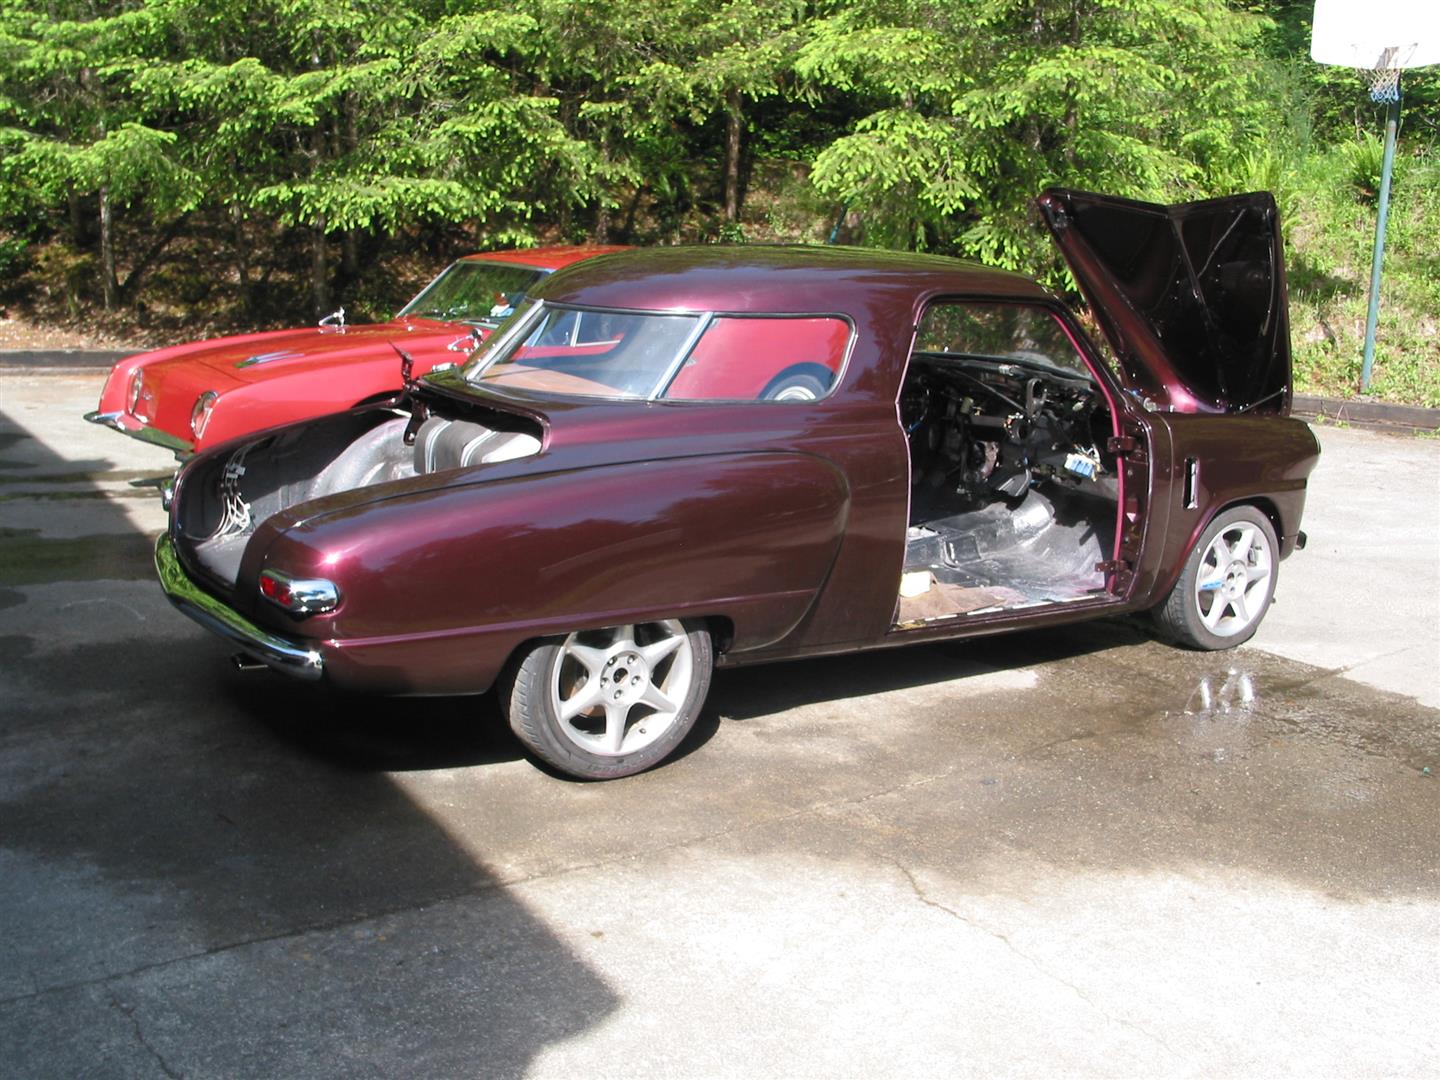
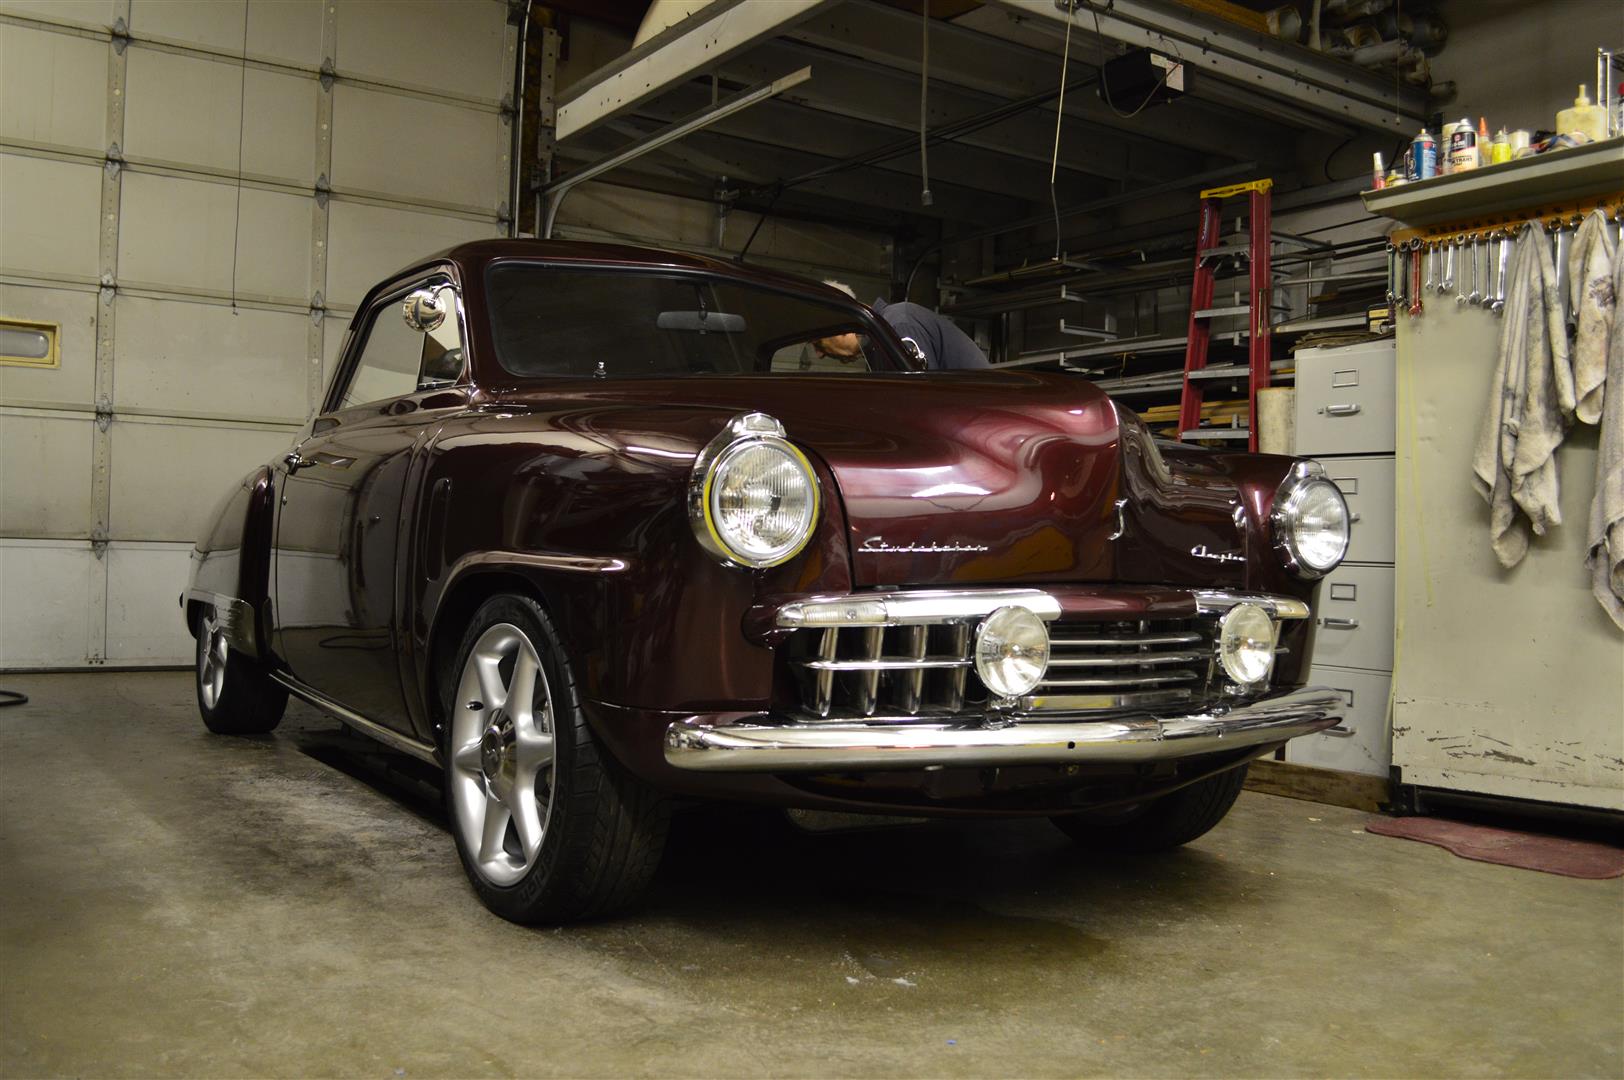
Lance Lambert, host of the Vintage Vehicle Show on TV, came to visit with his newly acquired Avanti. We rolled our Starlight Coupe out into the sunlight for the first time with most of the body panels on it and took these photos. The driving lights are Hella halogens that I bought in the 1960s, probably some of the very first available. I sold the car they were intended for and have never used them but they seem like a perfect match for the very nice Hella halogen headlights I bought.
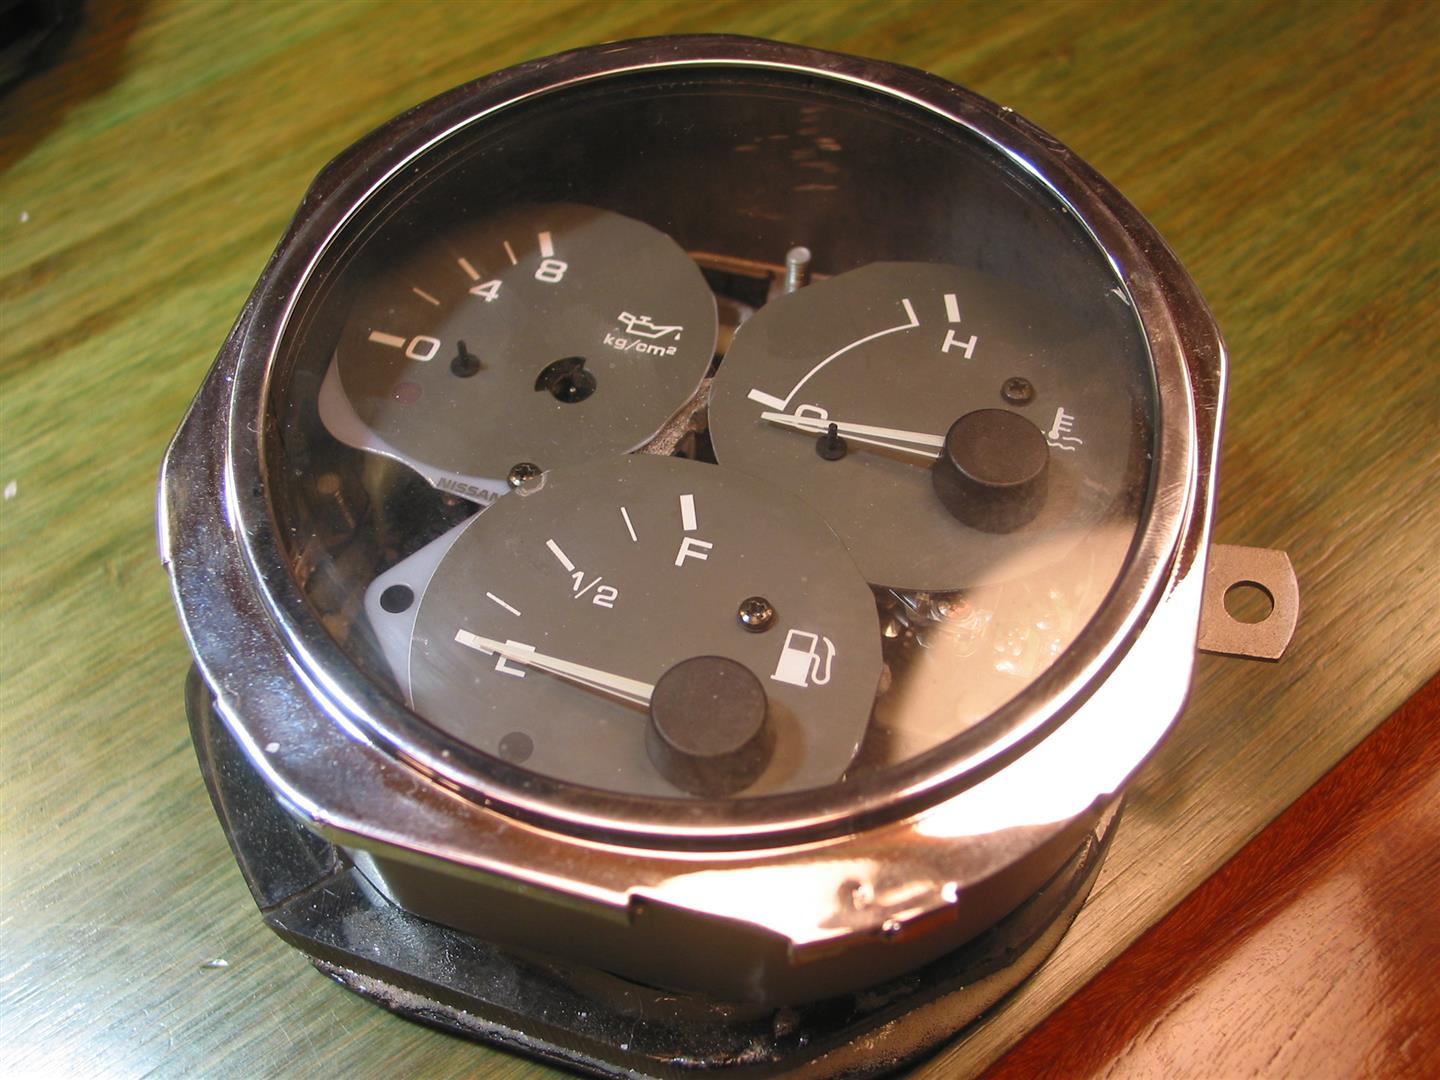
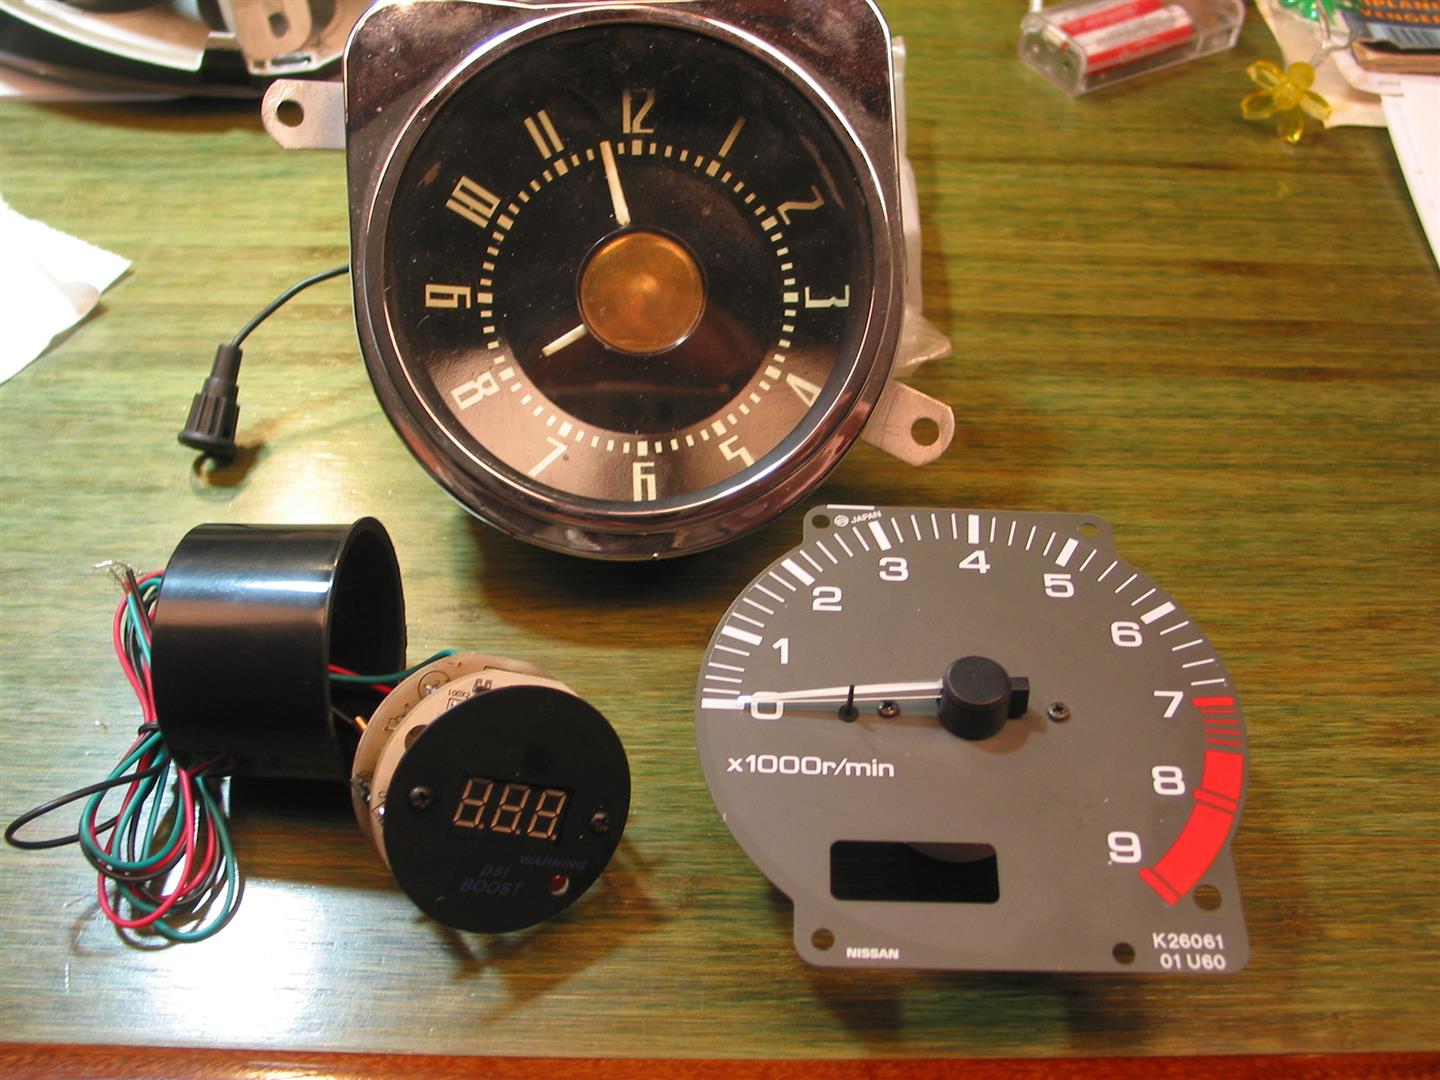
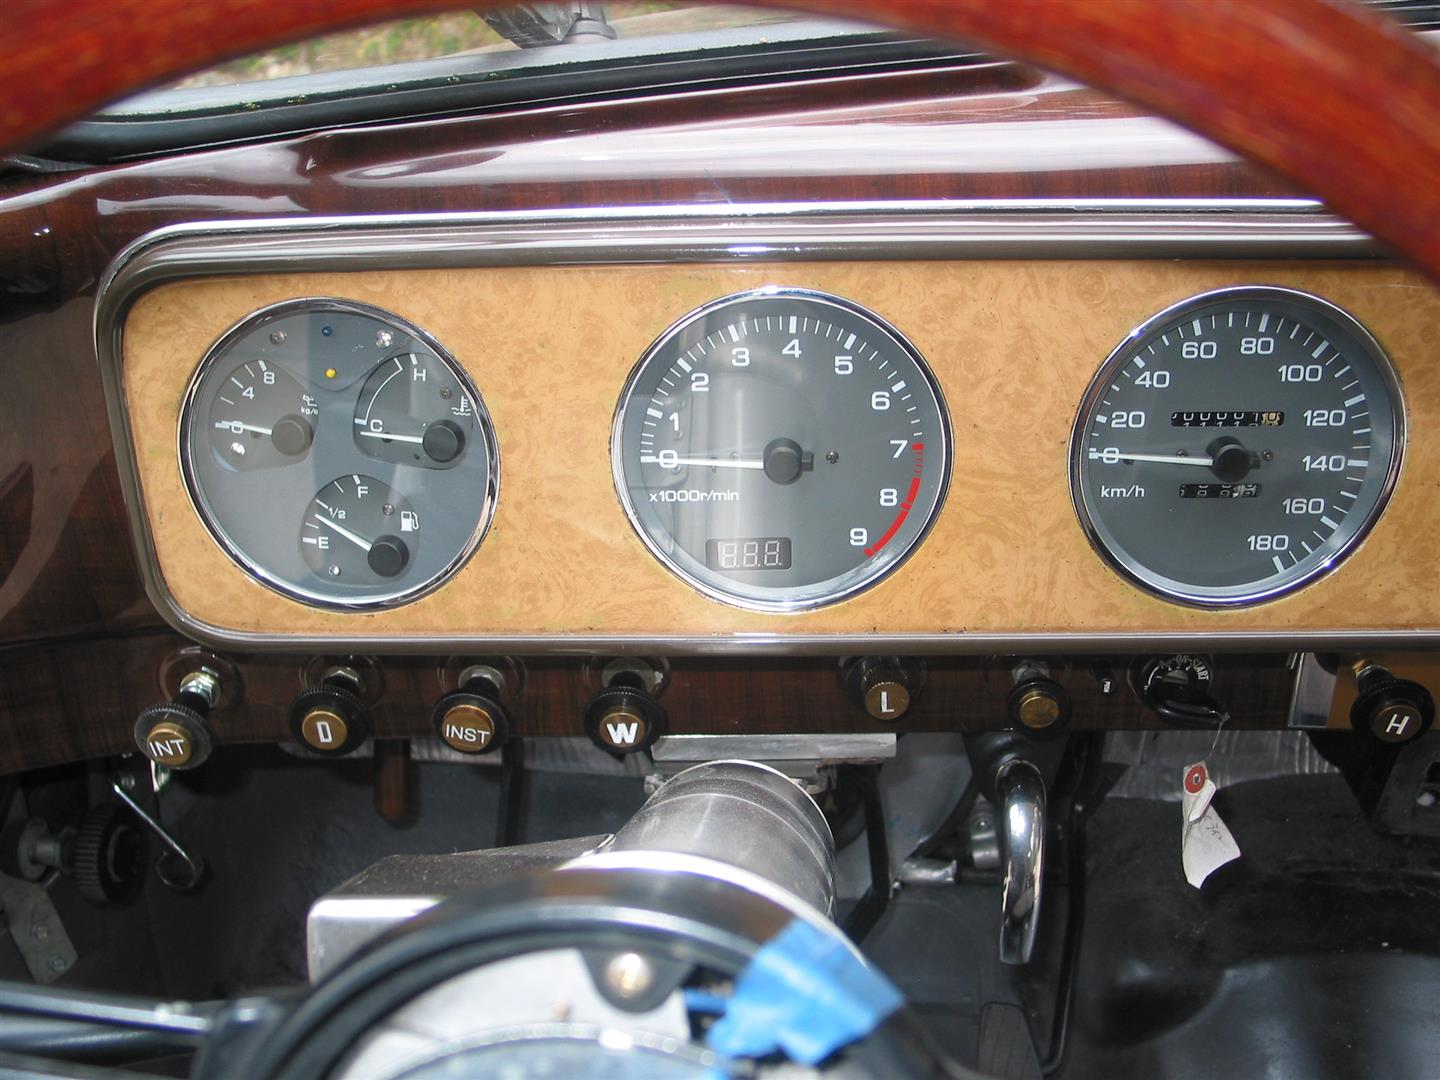
The Skyline instruments were separated from the instrument cluster and mounted in the original Studebaker instrument cases, a somewhat tedious job. The clock was replaced with the Skyline tachometer, and the digital clock at the bottom of the tach was replaced with a small digital boost gauge. The speedometer reads in km/hr, but an adapter cable will be used with the correct ratio so that it will read in miles per hour.
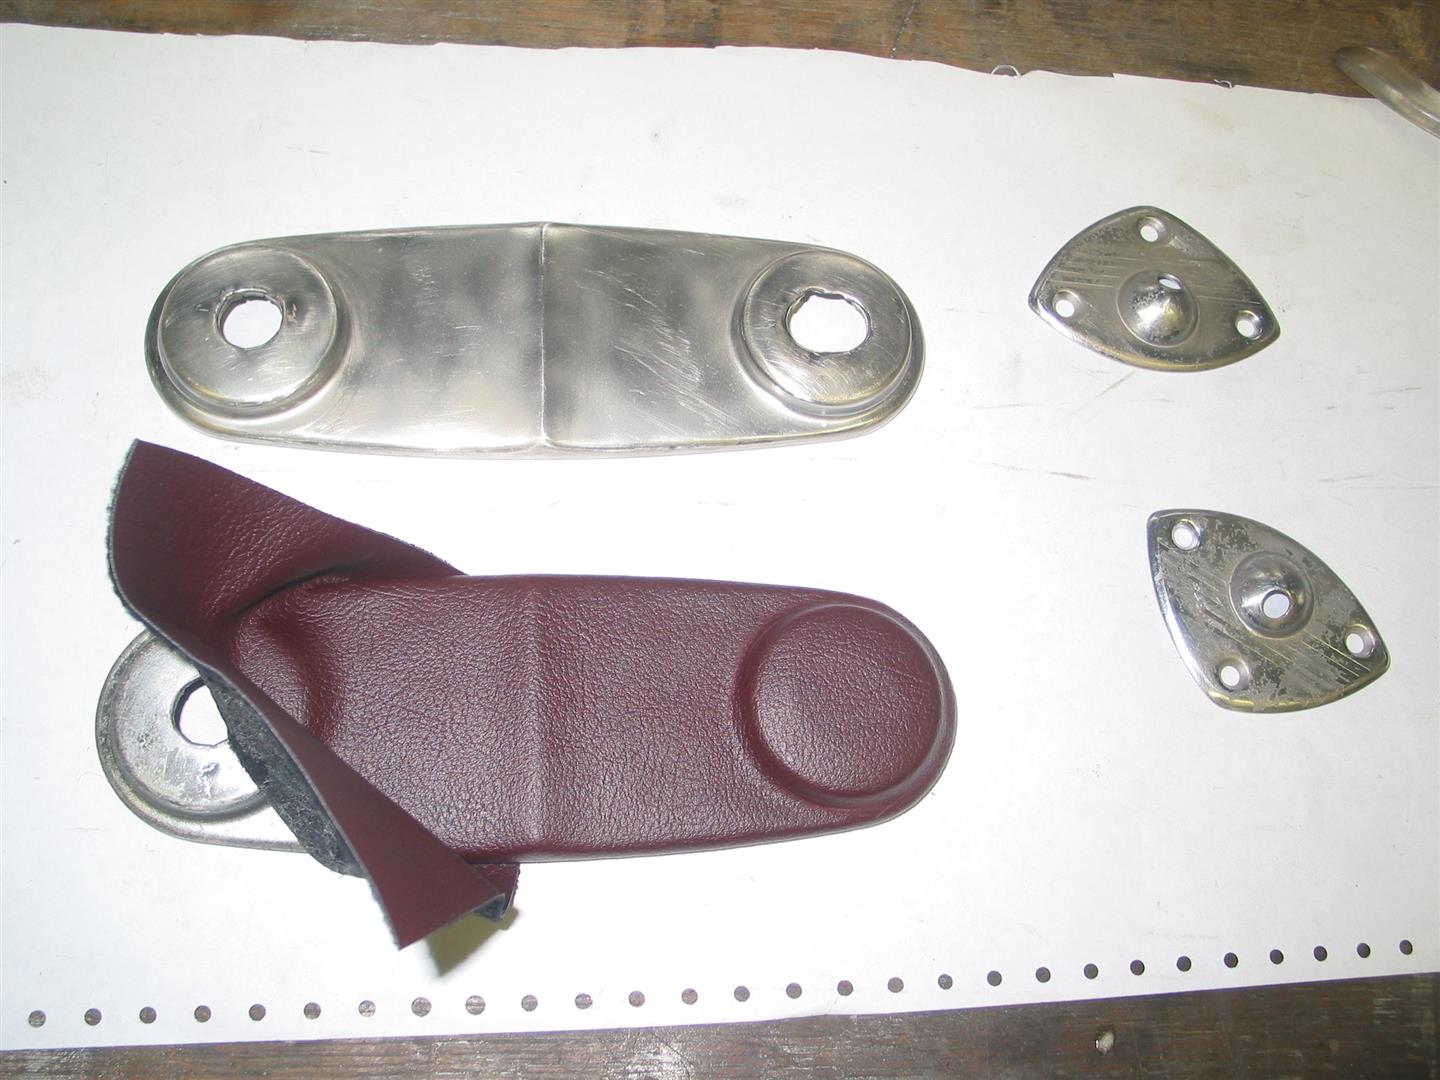
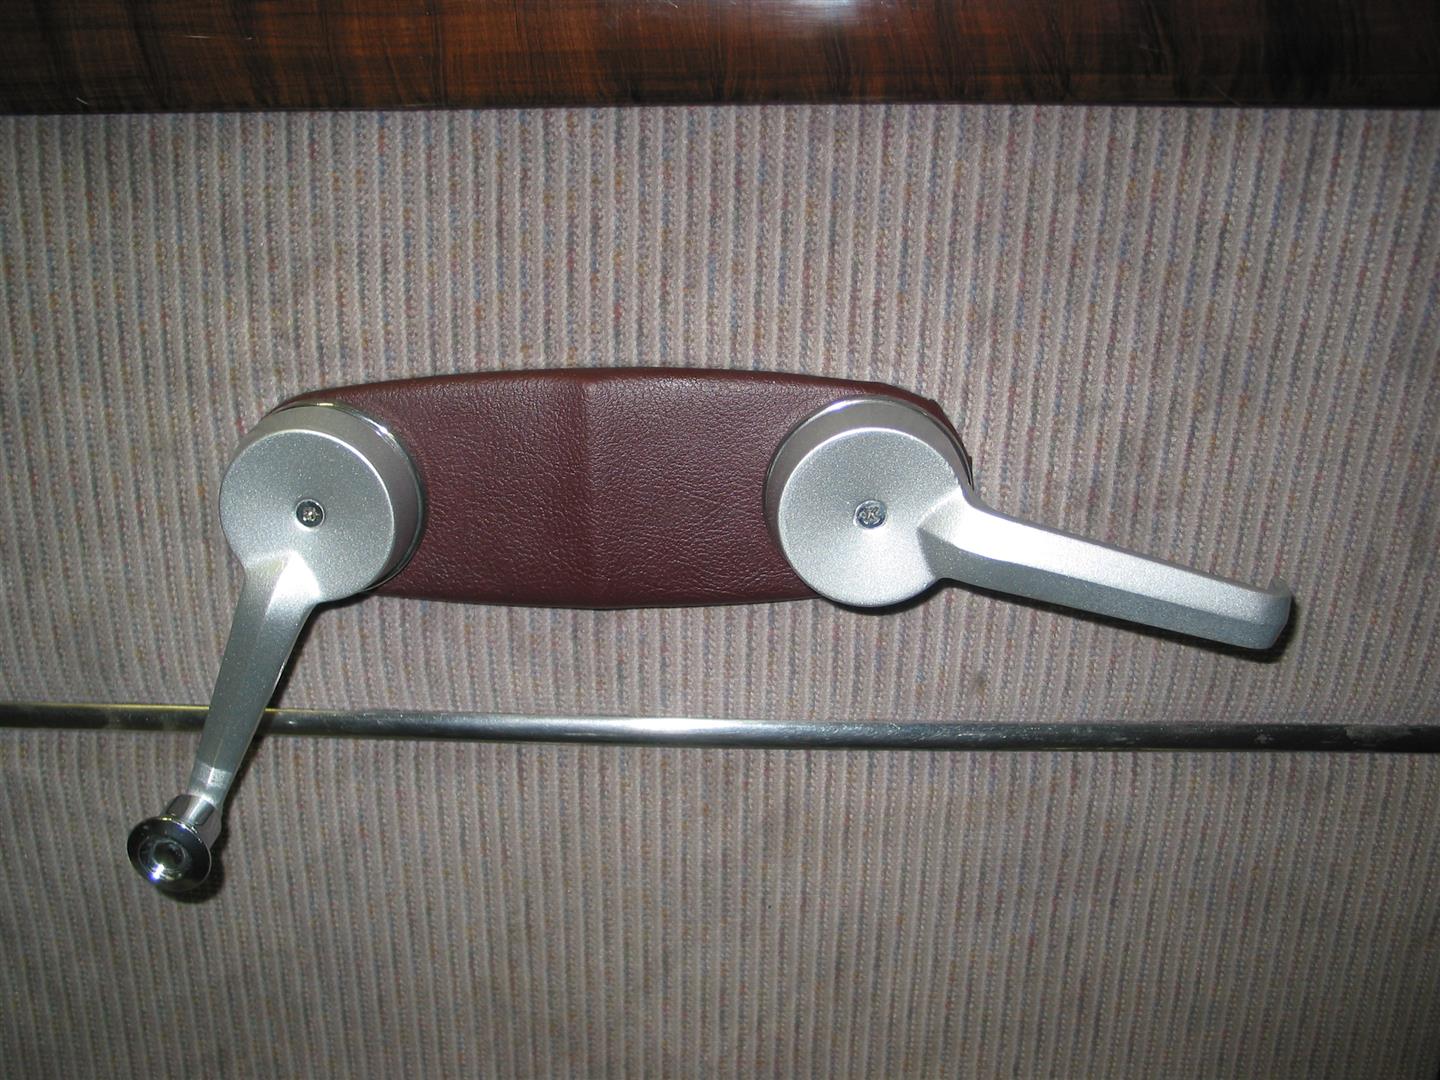
The dash is quite narrow, so I fabricated some panels to cover the heater and the wiring. These panels are covered with the maroon vinyl, also used on the rear package shelf. The inside door handle plates were vary beat up, so I covered them with the maroon vinyl also. The door handles and window cranks were pot metal and badly pitted. I inherited a big box of Studebaker door handles from various years and models, and I picked the ones I liked, sanded and blasted the pitted chrome, coated them with epoxy primer and painted them with silver paint and clear coat. I had to drill and tap the square shaft on the window crank for the screw, which replaced the spring clip on the original. These particular handles are installed with a stainless bezel ring, which I buffed to a high gloss.
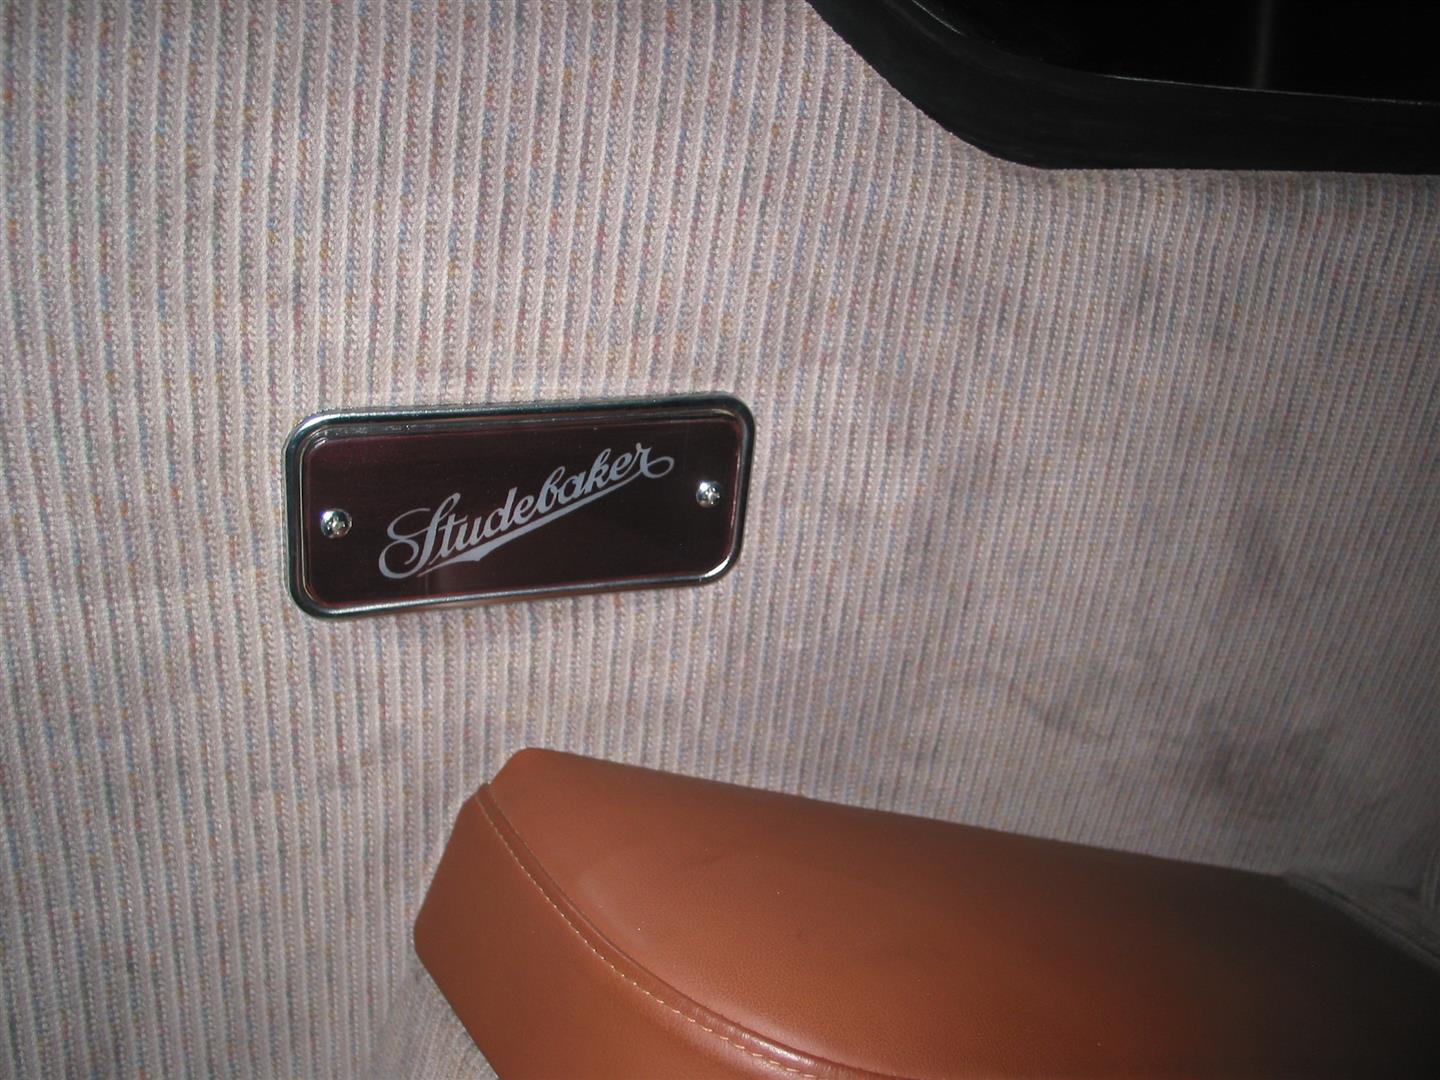
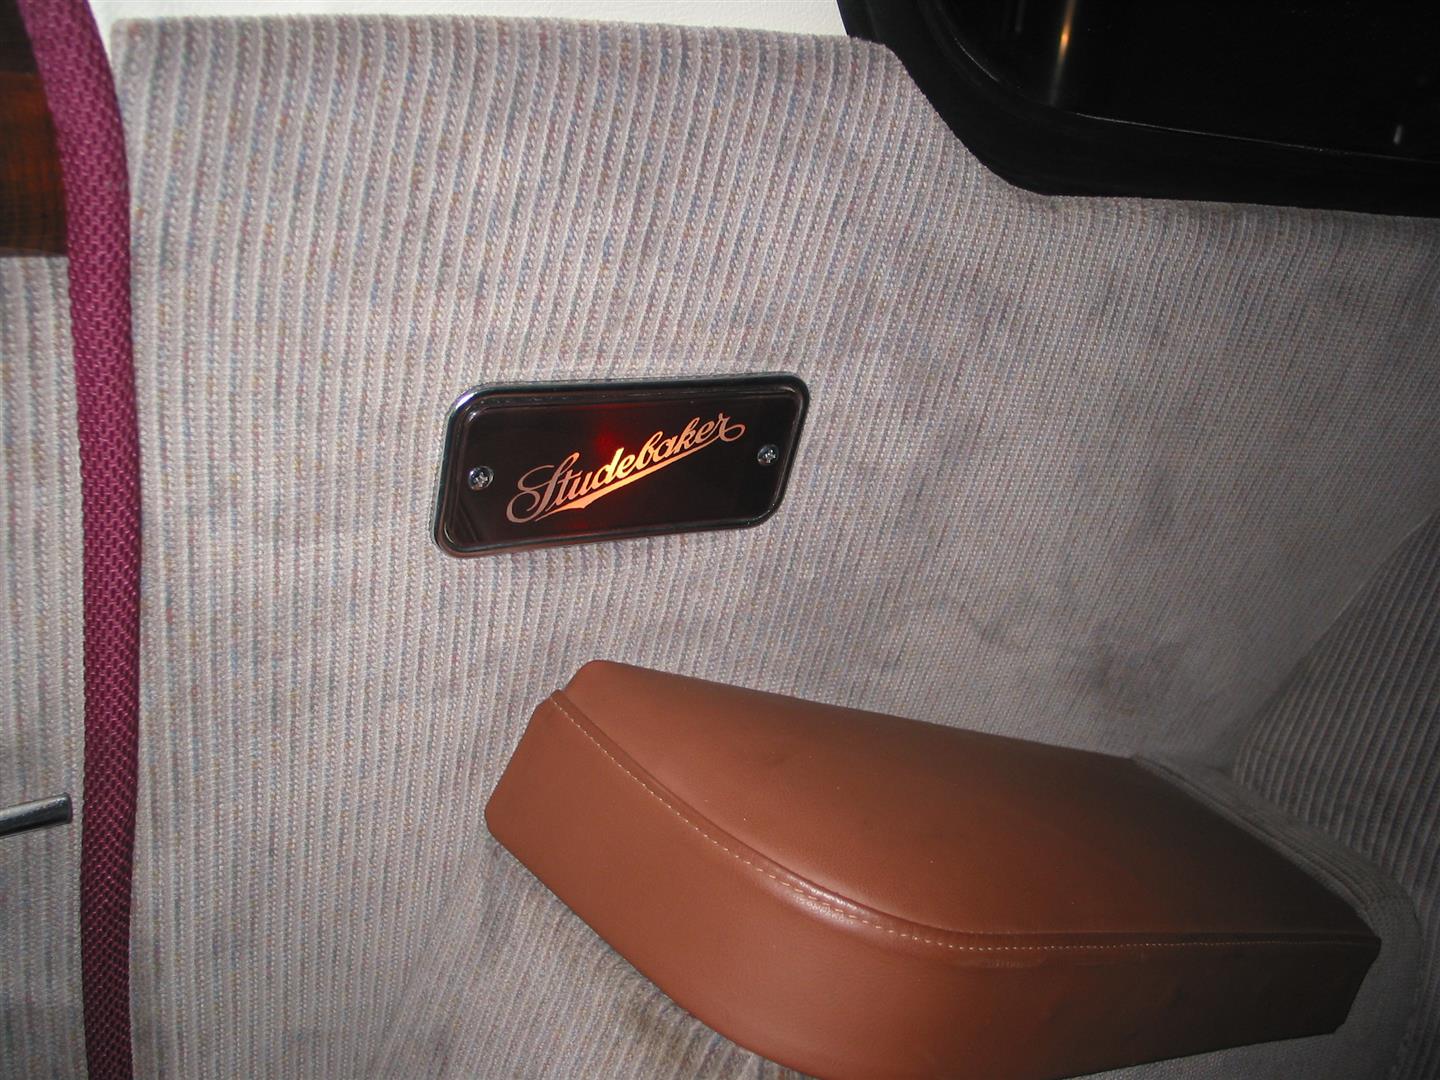
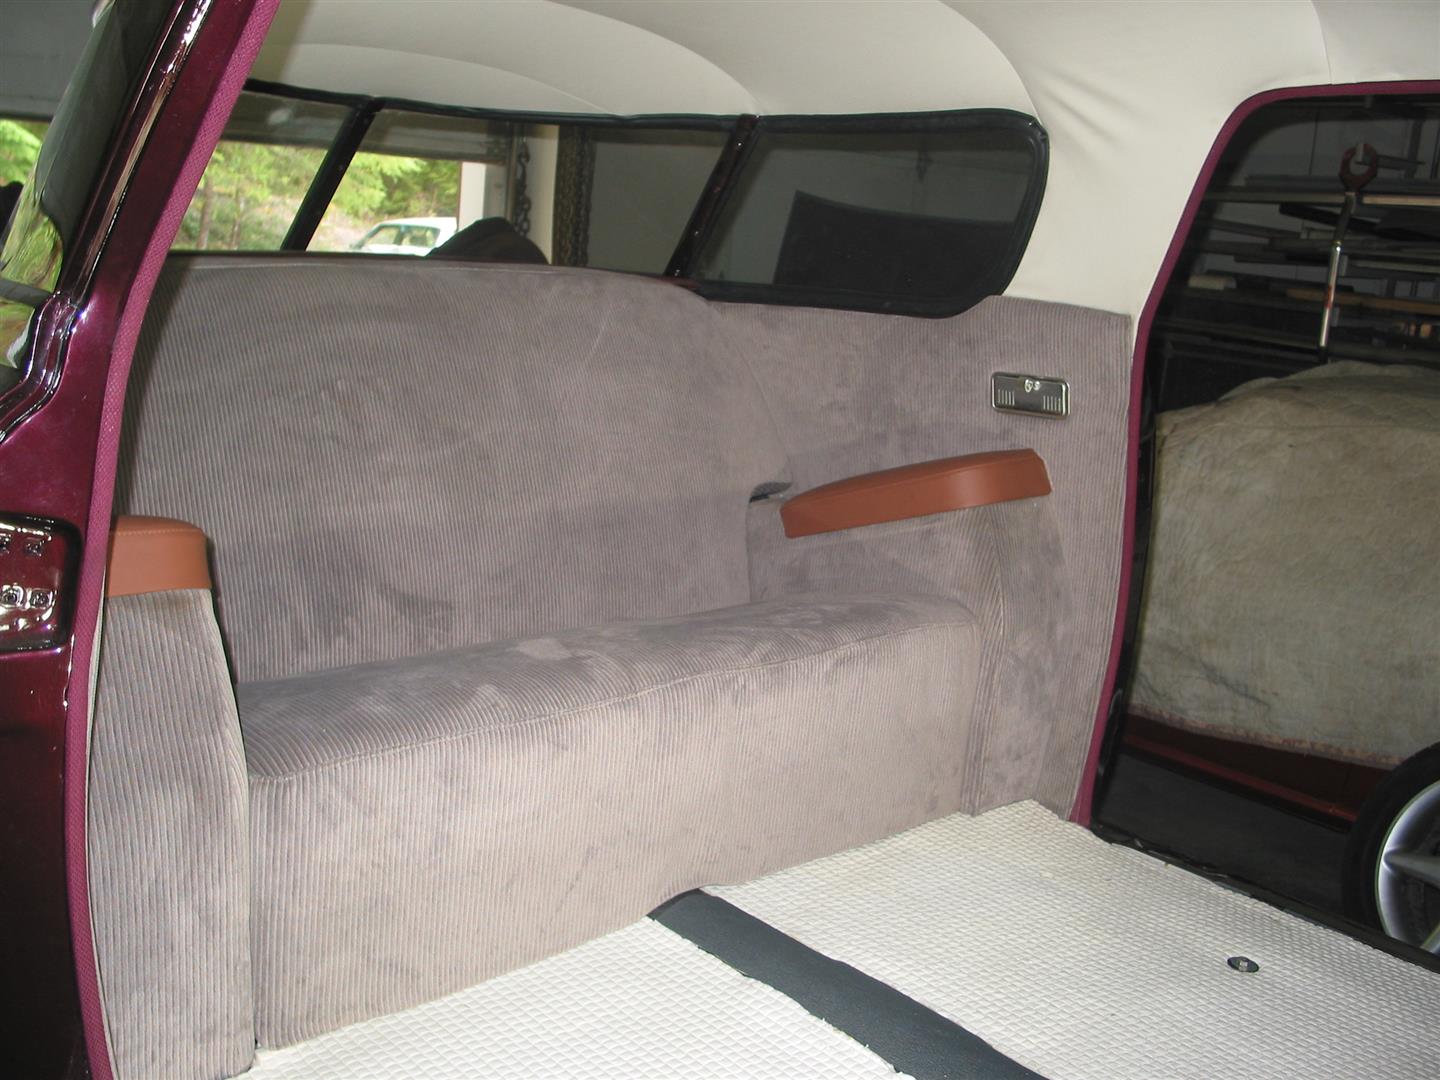
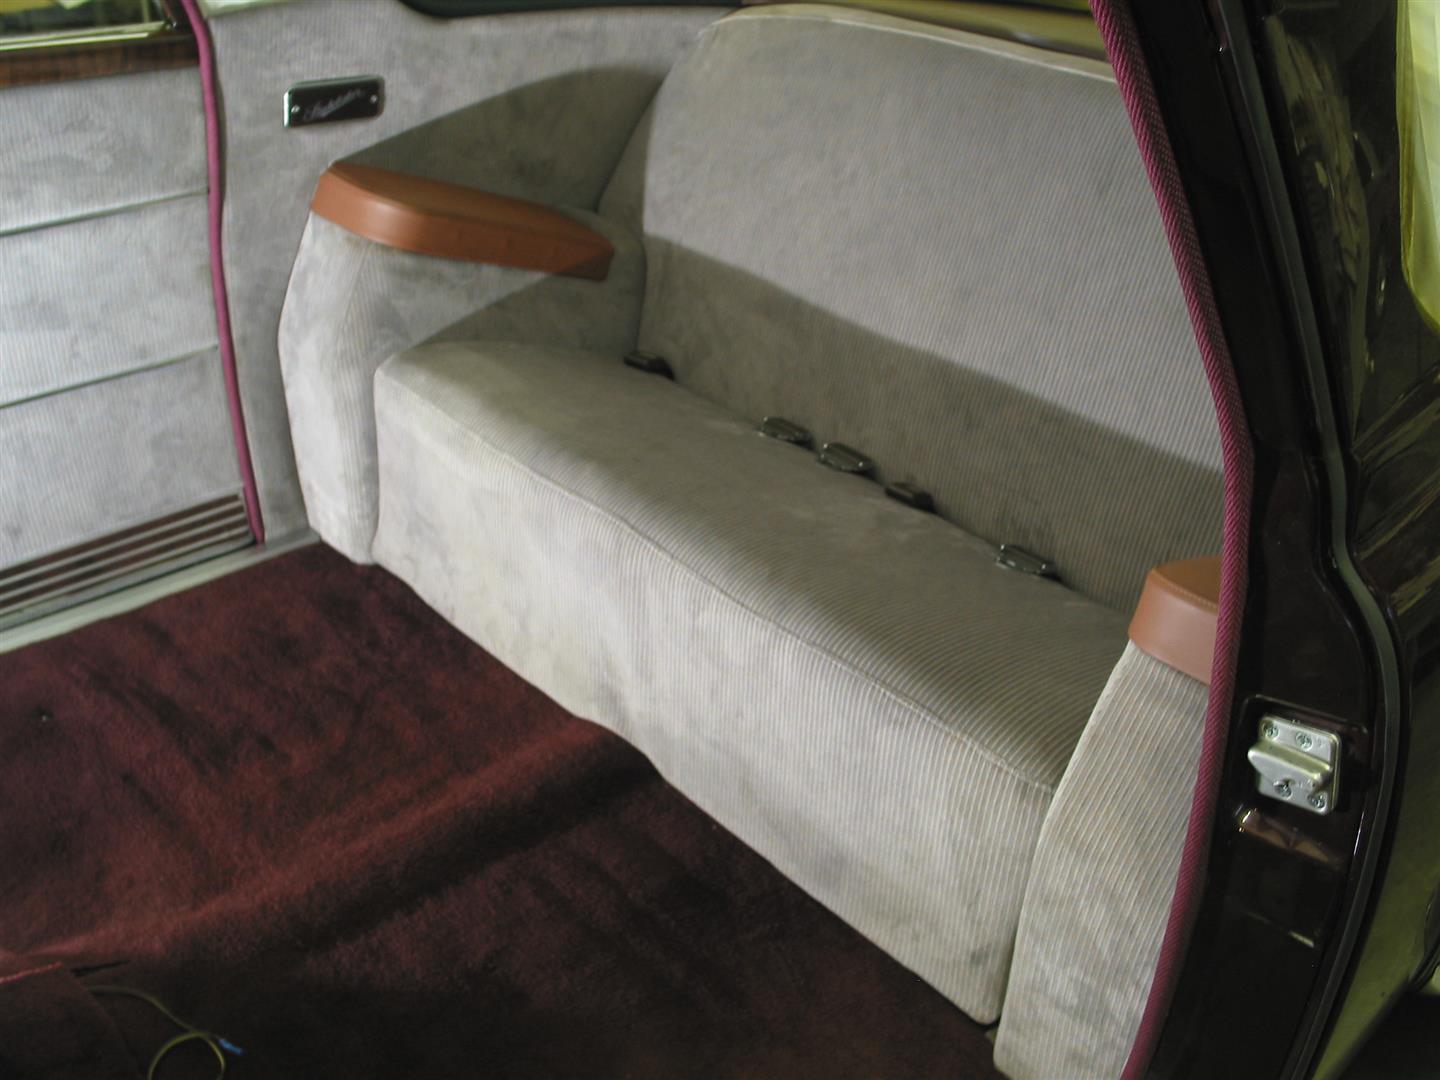
The rear package shelf is installed, covered with the maroon vinyl. The rear armrests will be recovered with the same vinyl. I had so much trouble getting the headliner to fit smoothly, I decided there is no way I will chop a hole at the rear for the dome light, even though I have the wires coiled up there. I decided to delete the rear ashtrays and make some courtesy lights. I reshaped and drilled a hole in the steel piece that covered the ashtray, to fit a snap in light socket for a 1156 tail light bulb. I then made a cover from 1/8 inch plexiglas, sanded and polished the edges, and sanded the back side with fine paper to give it a frosted look and disperse the light and give good paint adhesion. My friend Peter found the image of this Studebaker logo and cut a mask with his vinyl cutter, I put the mask on the back side, painted it body color then peeled off the mask . It is wired into the interior light switch, which is presently used only for these lights. Doesn’t look very bright in this flash photo, but adequate for passengers to find the seat belts on a dark night.
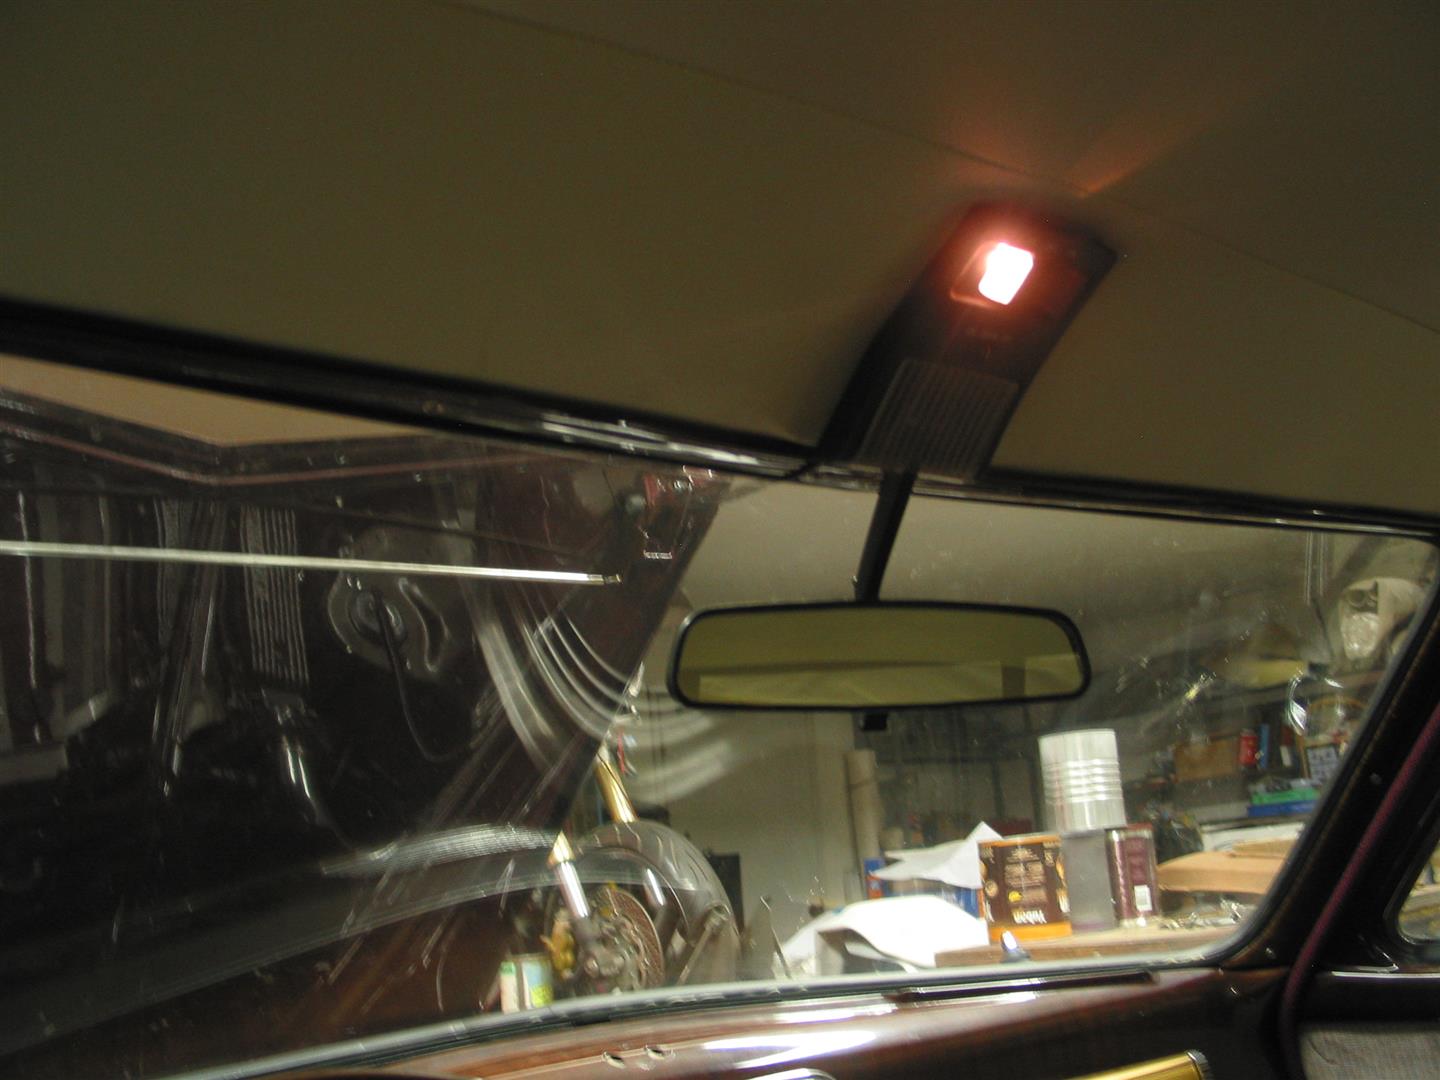
The rear view mirror was mounted on the dash, and sat pretty low. I have installed a mirror/dome light/map light from an early Mazda RX-7 – still thinking about painting it body color.

Some of you may not know that these cars have a curved shape from the headlights to the tail lights, no straight lines. The door skins, rocker panels, nothing is straight. But the cheesy looking aluminum door sill plates are straight, so they do not actually fit the rocker panel pinch weld flange. I made my own sill plates from stainless, two pieces because our press brake is only 30 inches. By joining the two halves at a slight angle, they fit the body almost perfectly. I will make a logo plate to cover the welded joint, which is not very pretty. Instead of a flat flange that lays on top of the carpet, I made it with a flange that angles down and buries itself into the carpet pile. This holds the carpet in place. I also extended the plate forward and aft of the door opening to finish off the ends.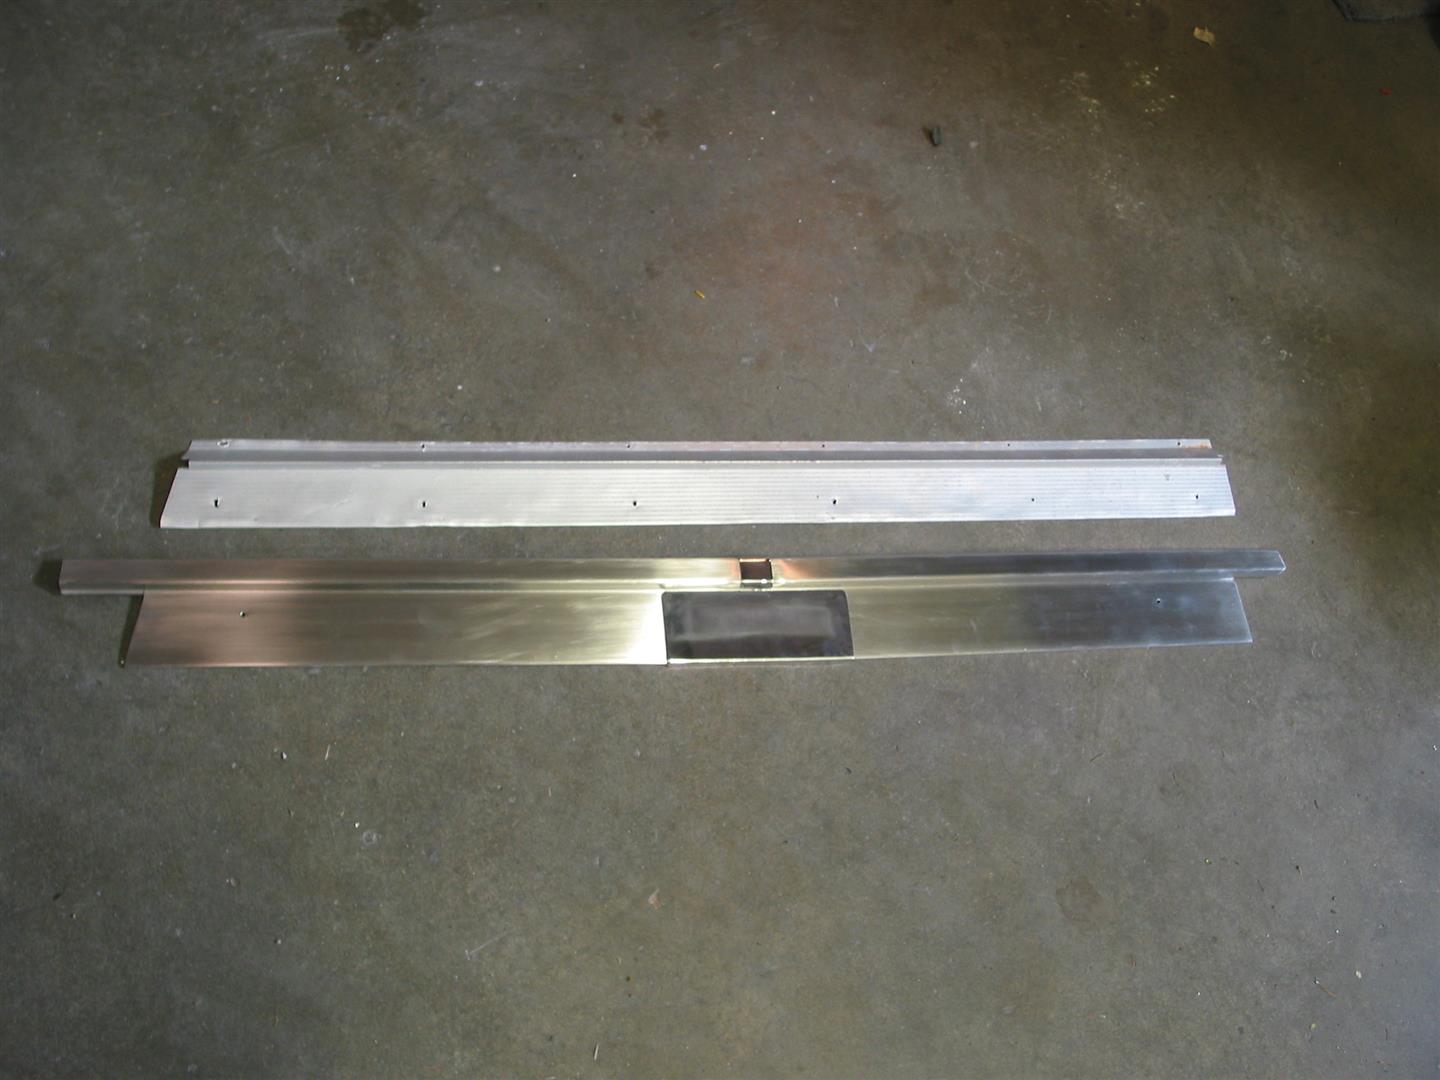
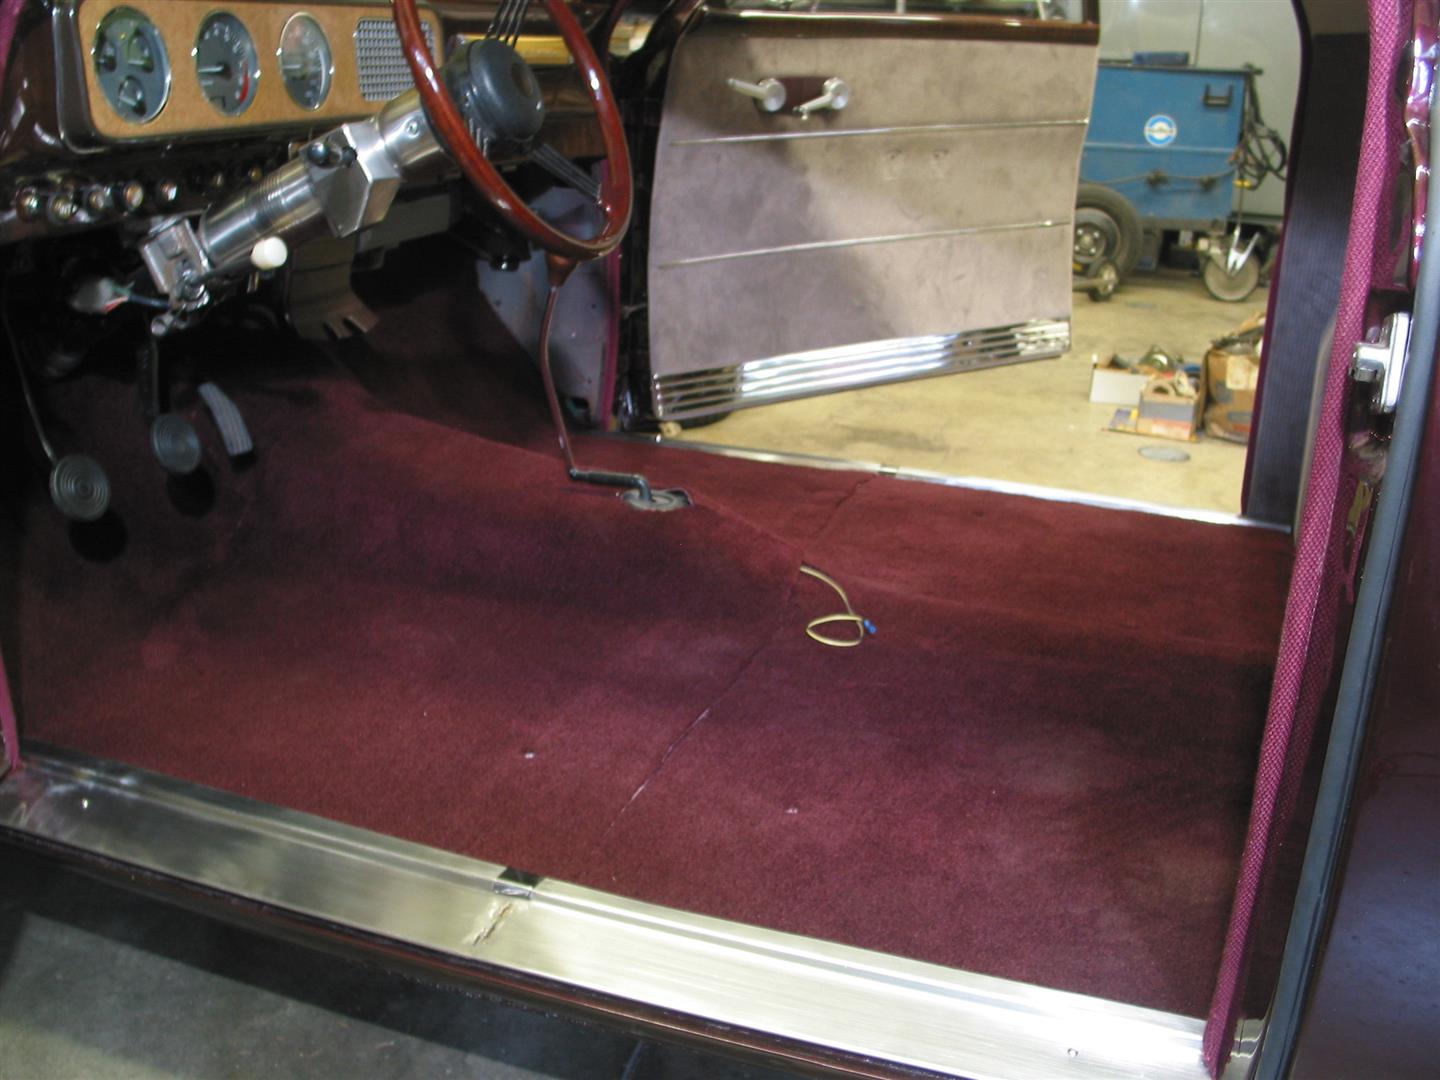
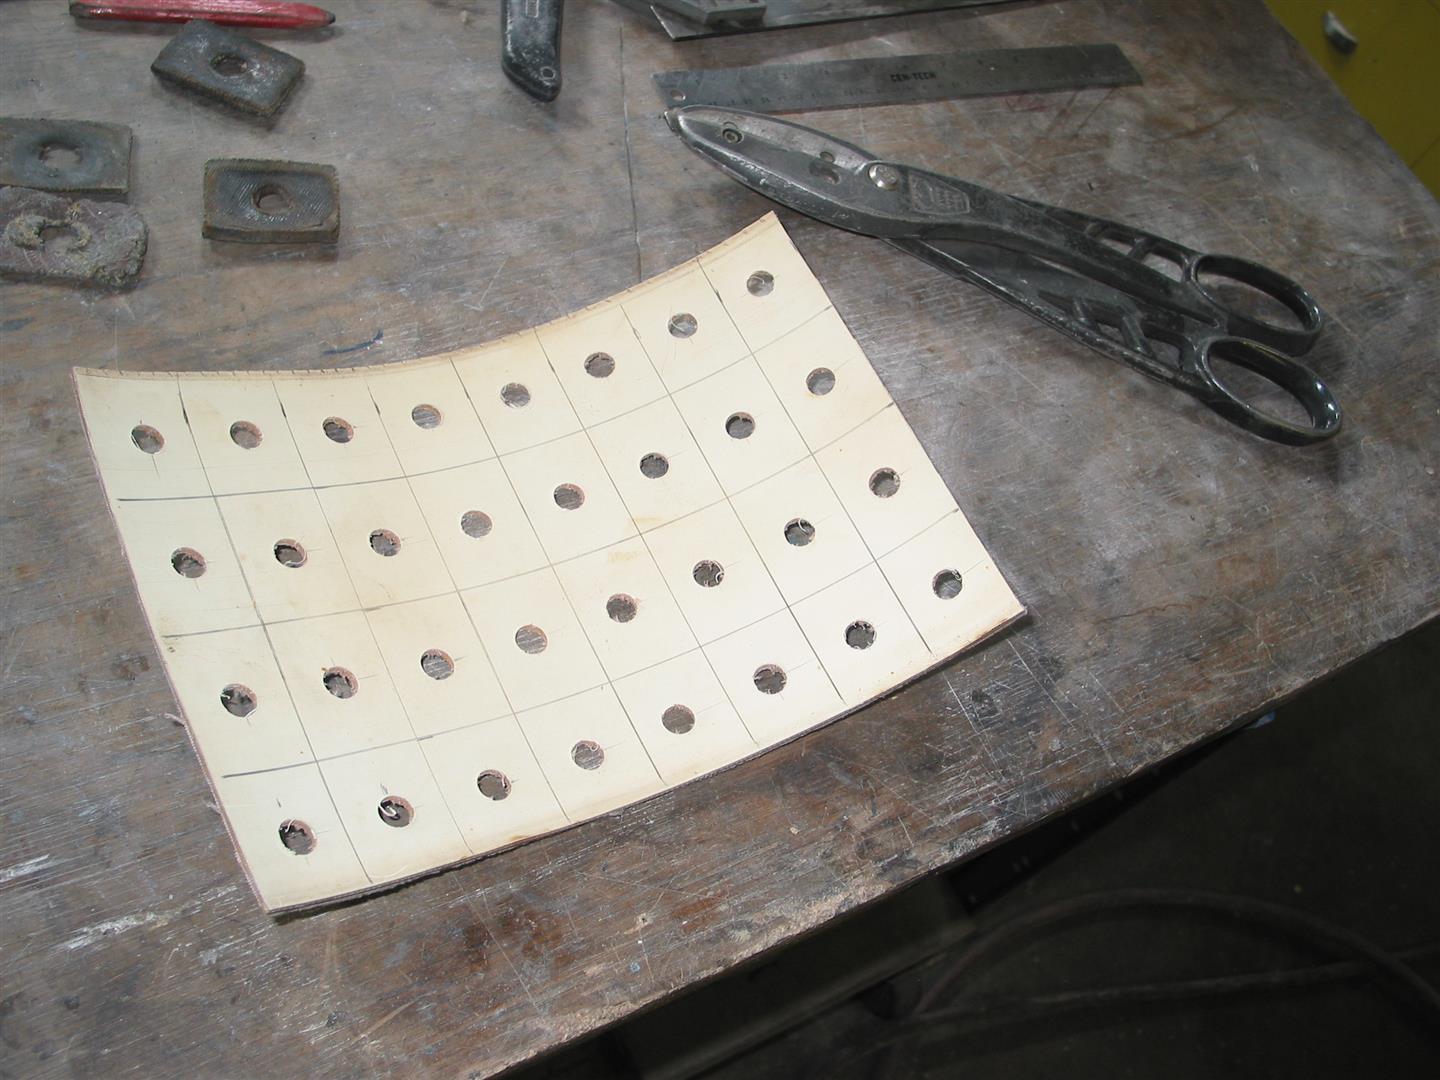
I filled in the drain channels and other low spots with bits of foam, and then laid down a sheet of 1/2 inch closed cell foam carpet pad, which is pretty firm. I bought 4 yards of the Essex cut pile carpet from Automotive Custom Carpets, maroon in color.
https://www.accmats.com/material-color/flooring/
It is very soft and plush feeling, seems to be high quality. It comes in 78 inch width, all nylon pile, quite flexible and can be stretched some. I covered the floor in two pieces, with the overlap hidden under the seat. I ran it back under the rear seat and rear side panels, under the sill plates and the forward kick panels, so there are no exposed edges and no need for sewn bindings. The only exposed cut is where the transmission tunnel kicks up to the firewall, and the heavy pile make that almost invisible. I still have to make the shift boot.
The Nissan 17 by 7 wheels came with plastic center caps. I got some old style Studebaker hub caps, had my machinist turn out the centers to fit the wheels, and turn down the plastic center caps so the Studebaker caps will fit flush when bonded to the plastic. I had 8 wheels and tires, so I took the best four wheels, which were just about perfect, painted them with epoxy primer, bright silver urethane and clear coat, and installed the best four tires, matched pairs for the front and the rear.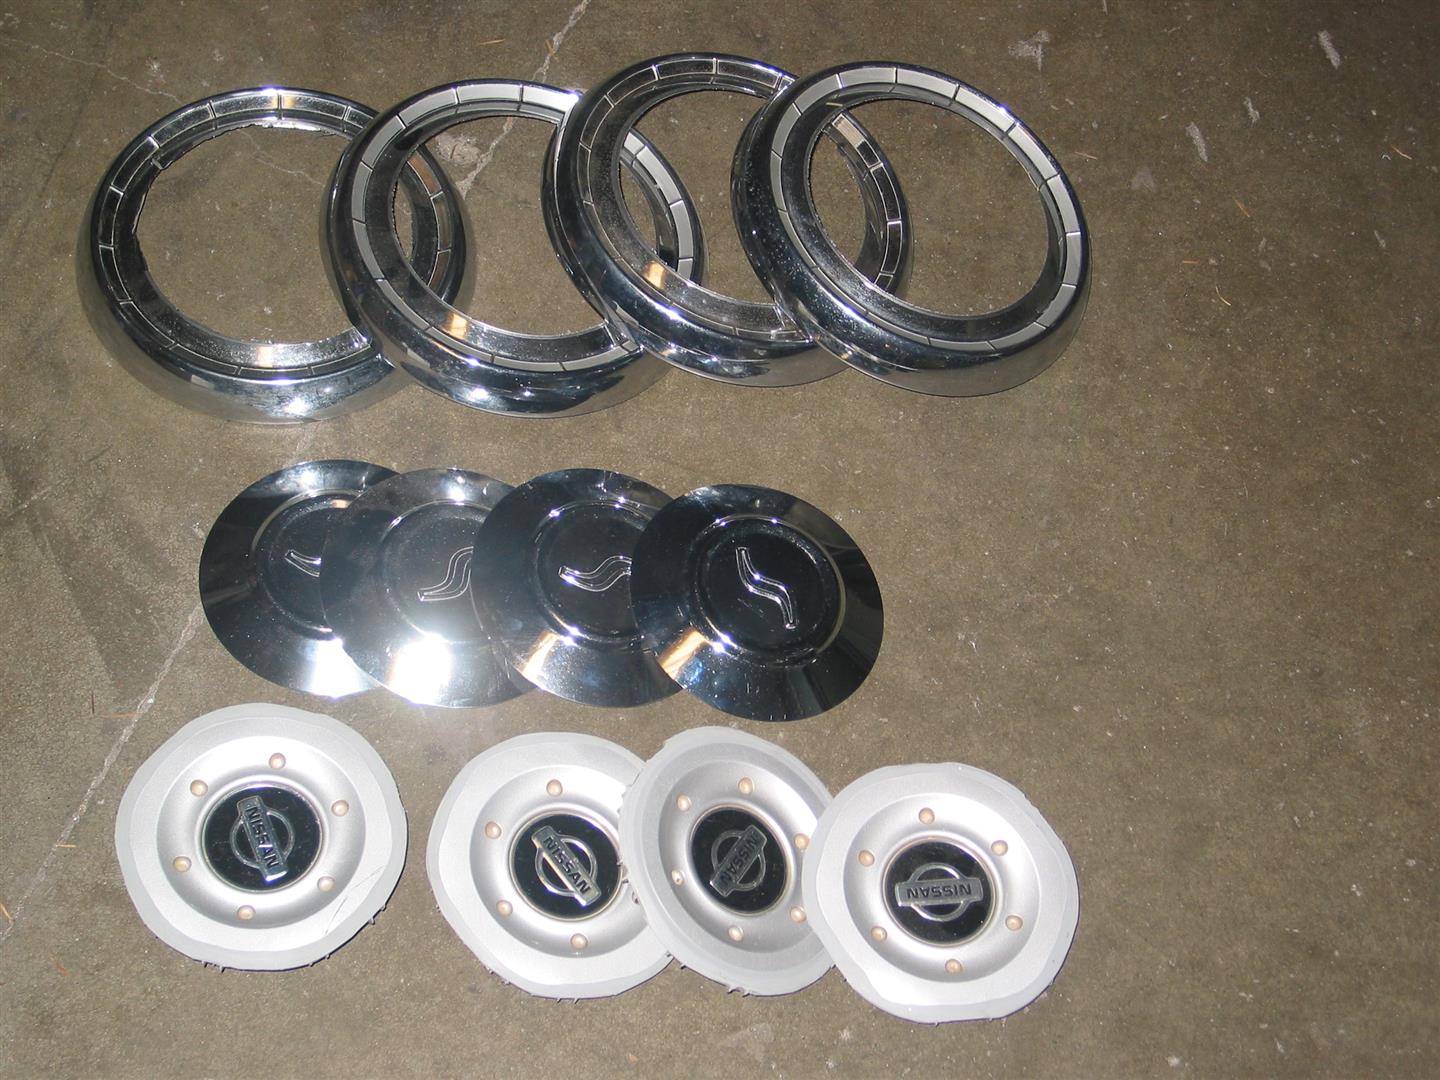
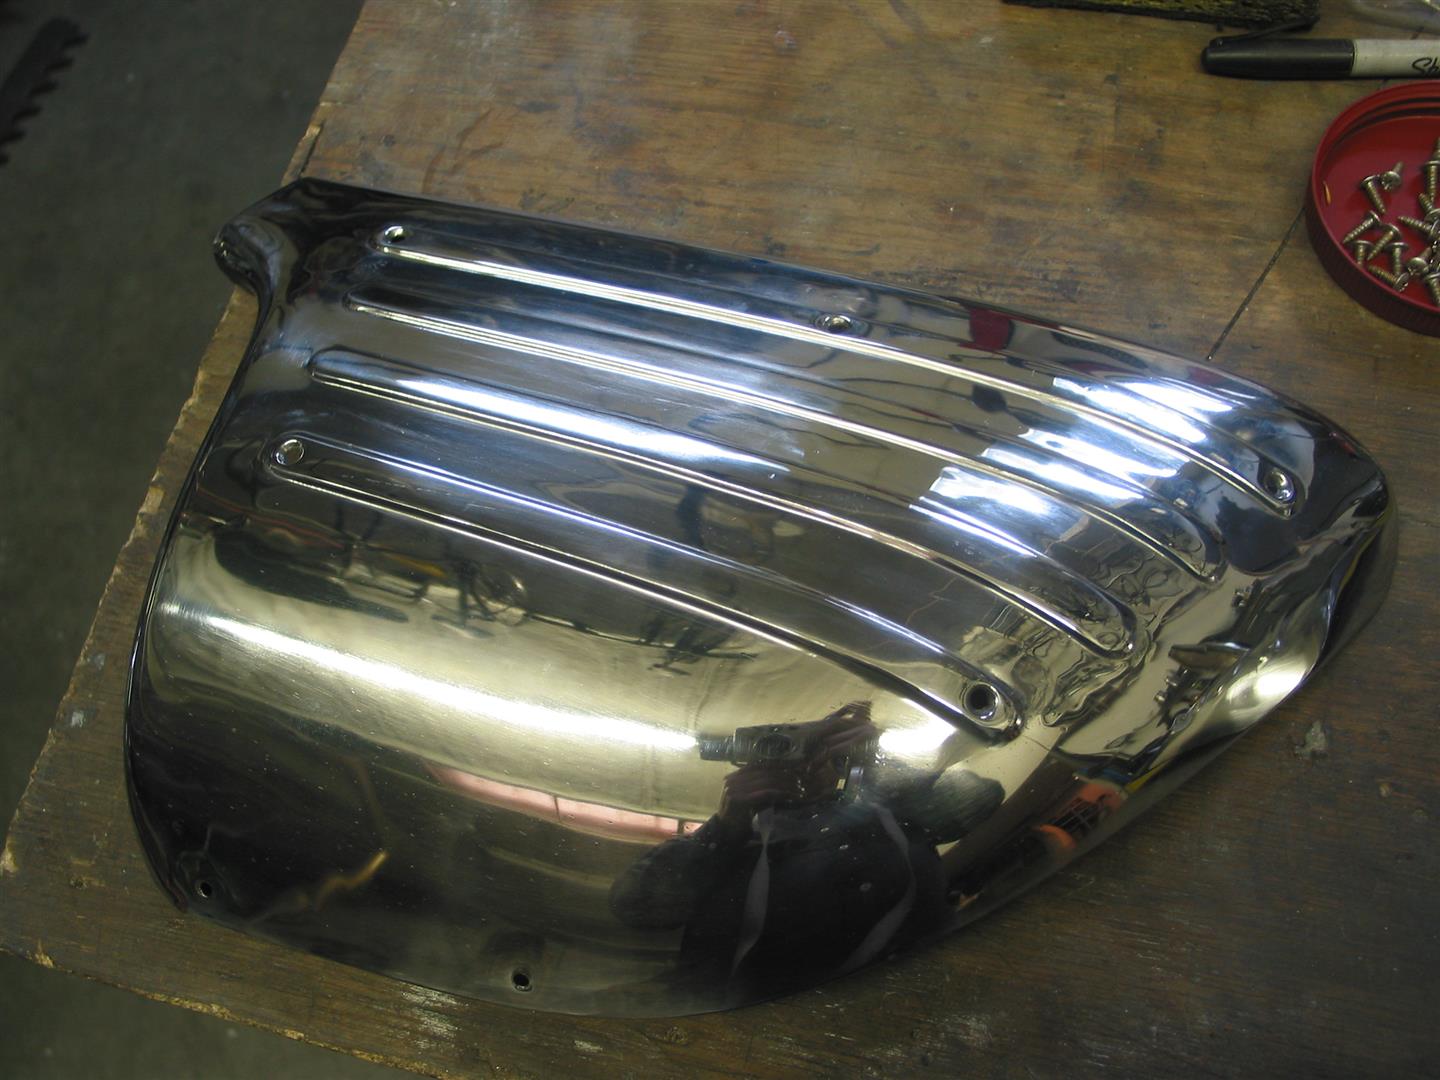
The stainless gravel shields for the rear fenders were so beat up I did not think they were salvageable. My friend and custom car guru Mel Pflugrad showed me how to straighten the dents and told me to get the expander wheel and a variety of abrasive belts from Eastwood. It was a lot of work but they look really good. We also straightened a few dents and buffed the stainless trim strips for the rocker panels. With all these things installed, it is looking like a Studebaker.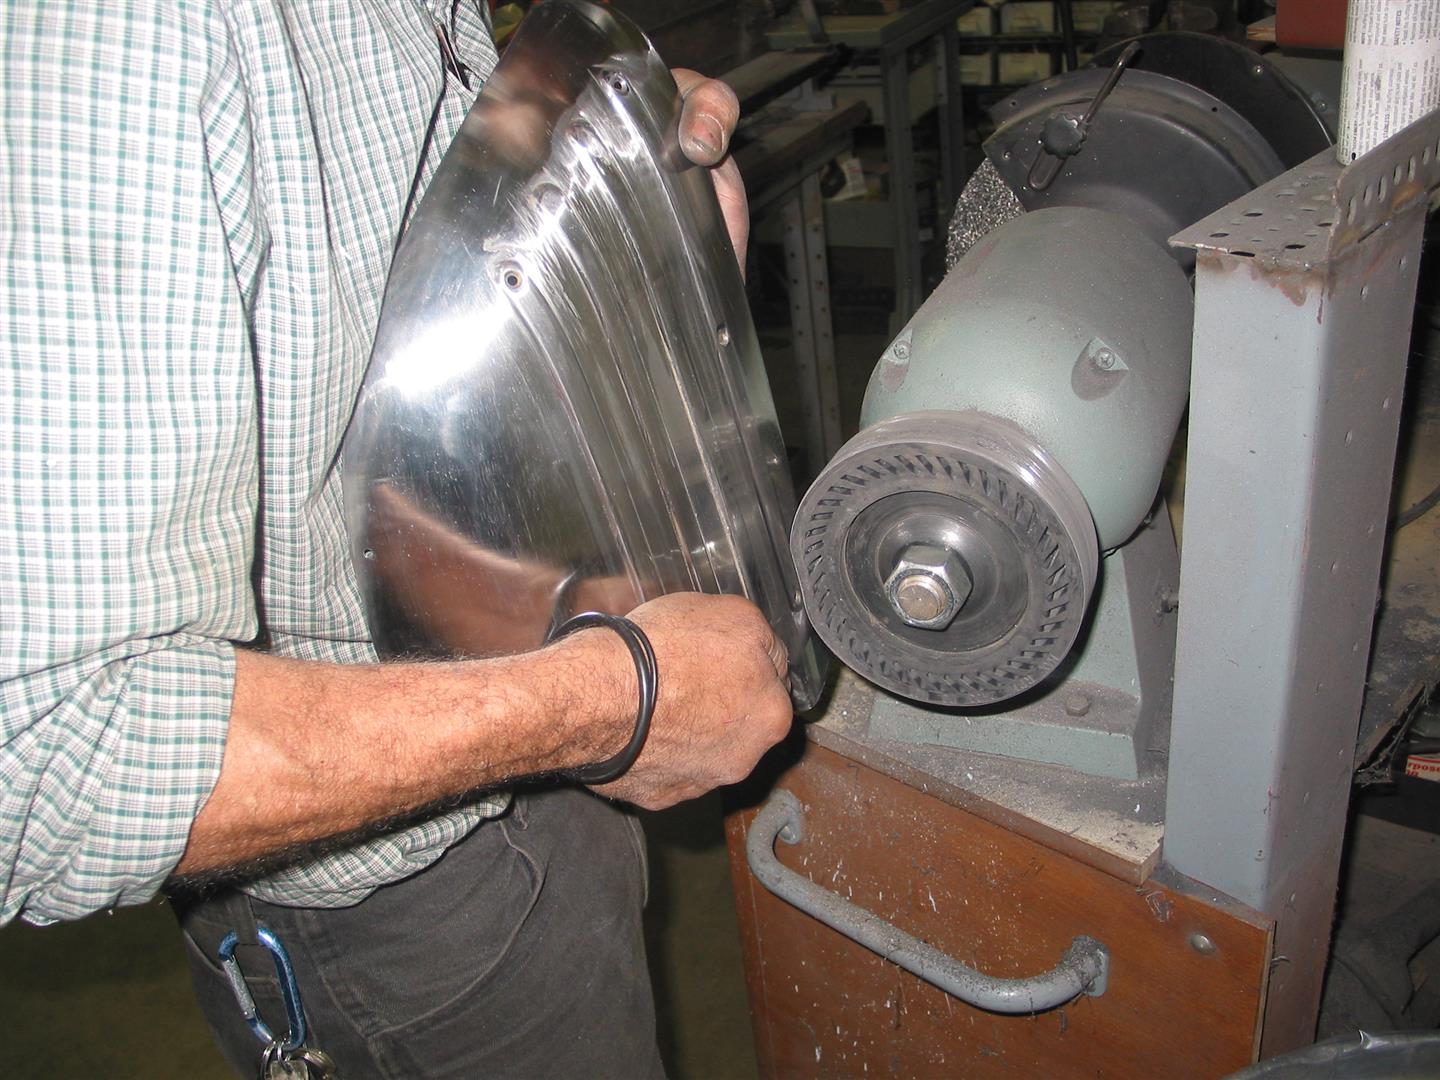
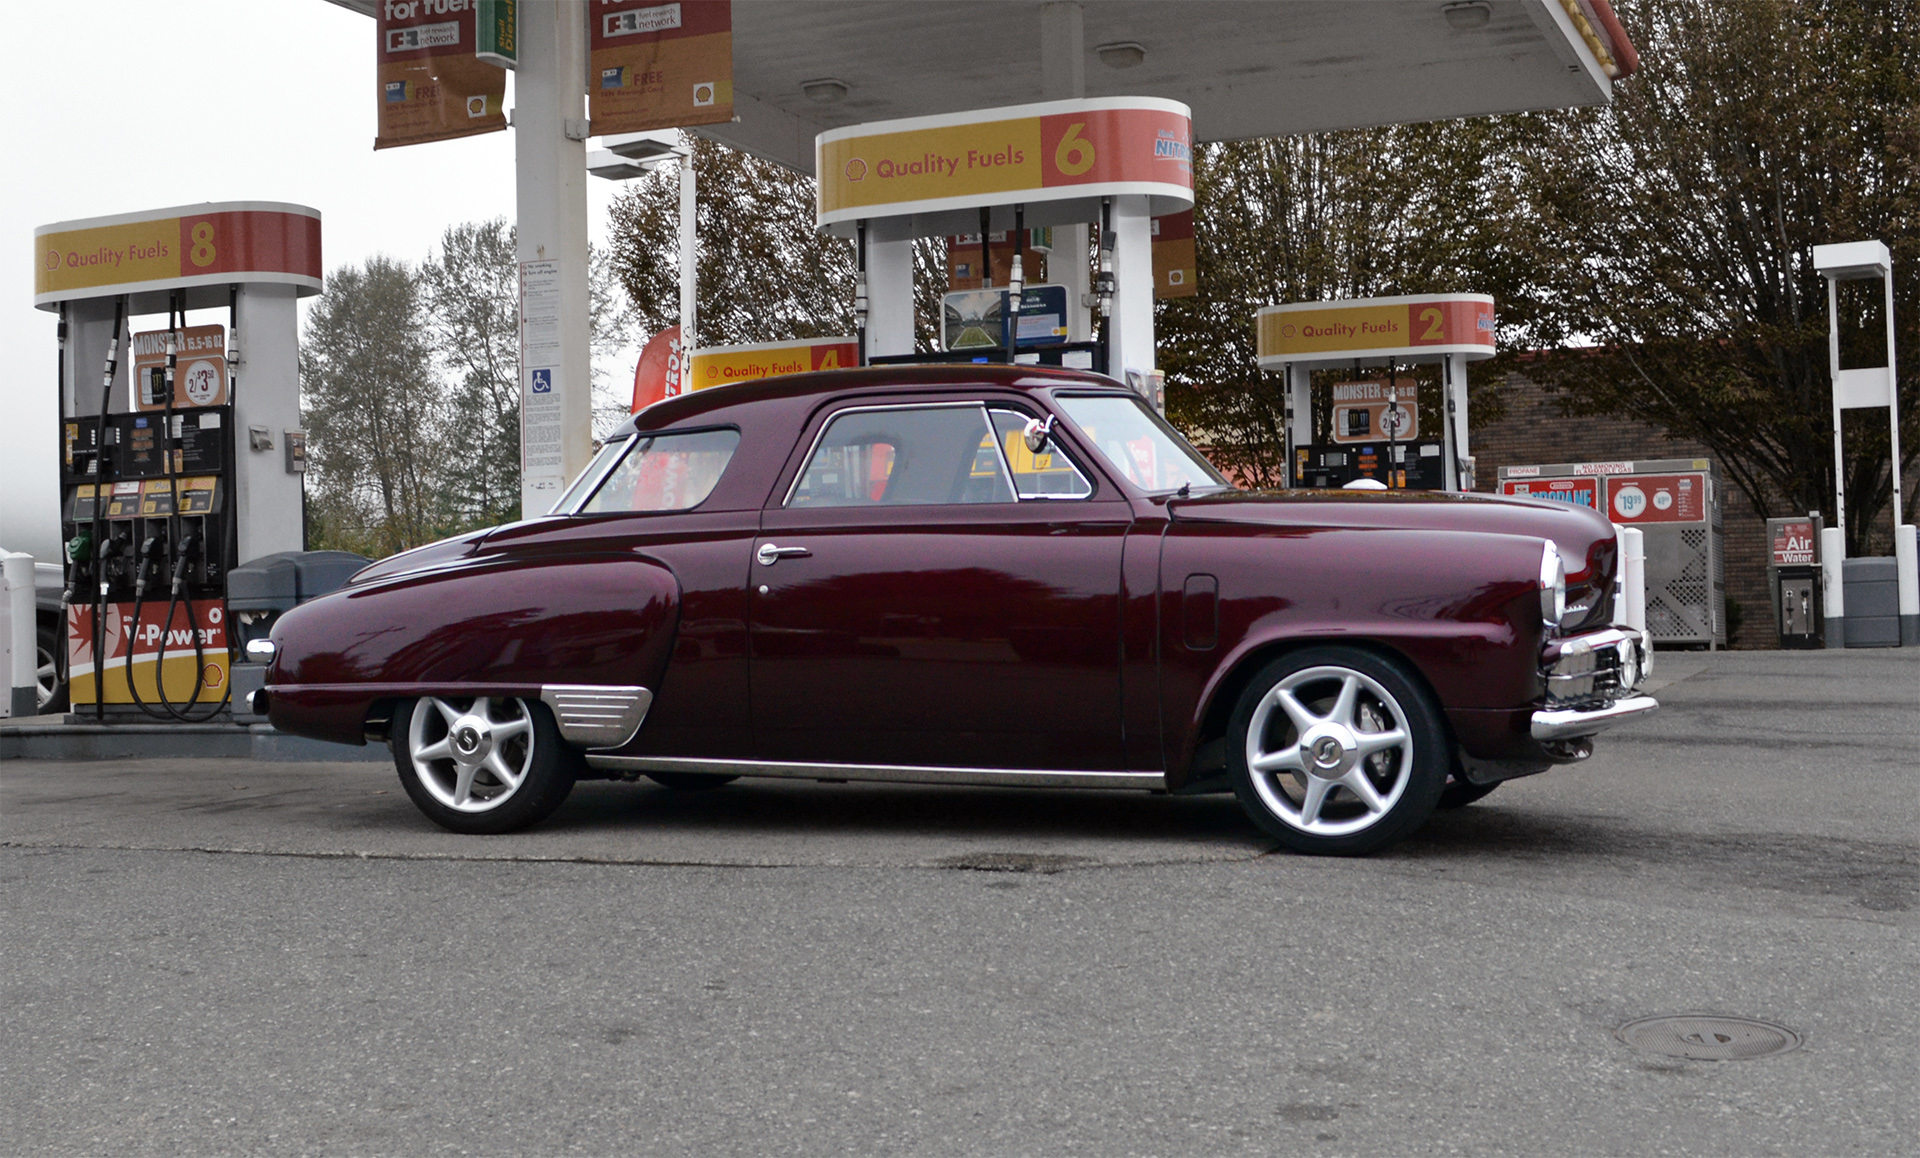
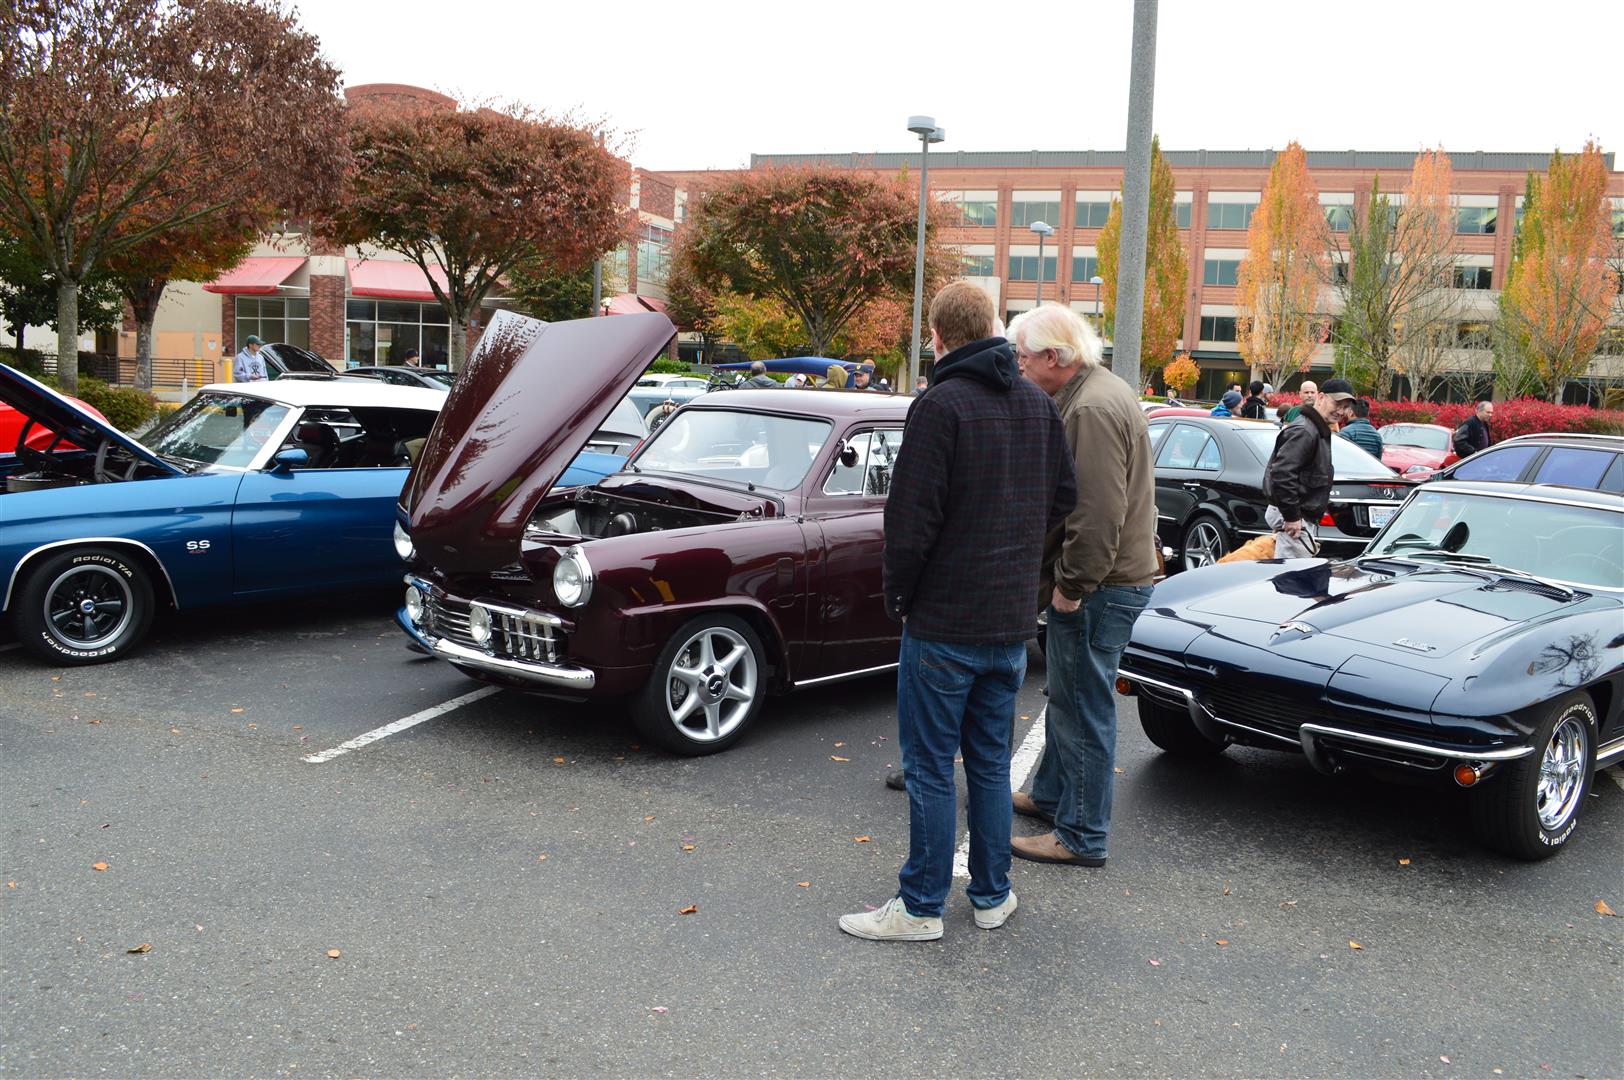
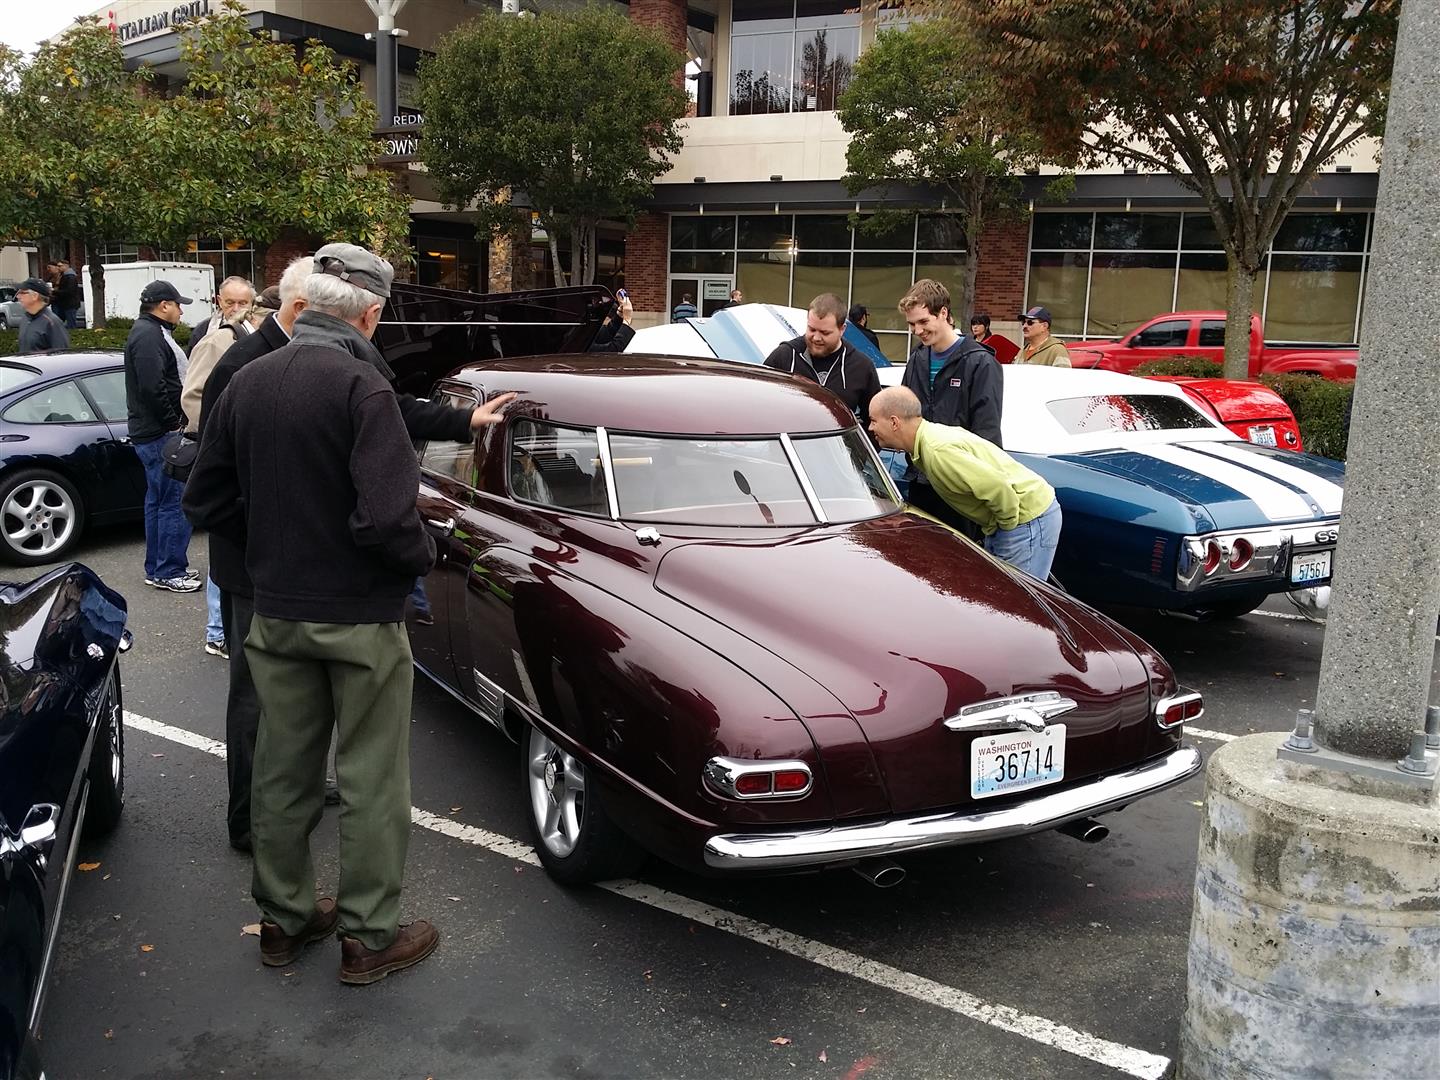
Took the first “road trip” of almost 40 miles round trip yesterday, 24 October 2015, to the last event of the season at “Redmond Exotics”. Redmond is the home of Microsoft and many other cyber companies, with a very high concentration of guys with too much money. The parking lot is full of Ferrari, Lambo, Maserati, Porsche, Lotus, GTRs, the occasional Bugatti Veyron, etc. with a few American street rods and customs off in the far corner.
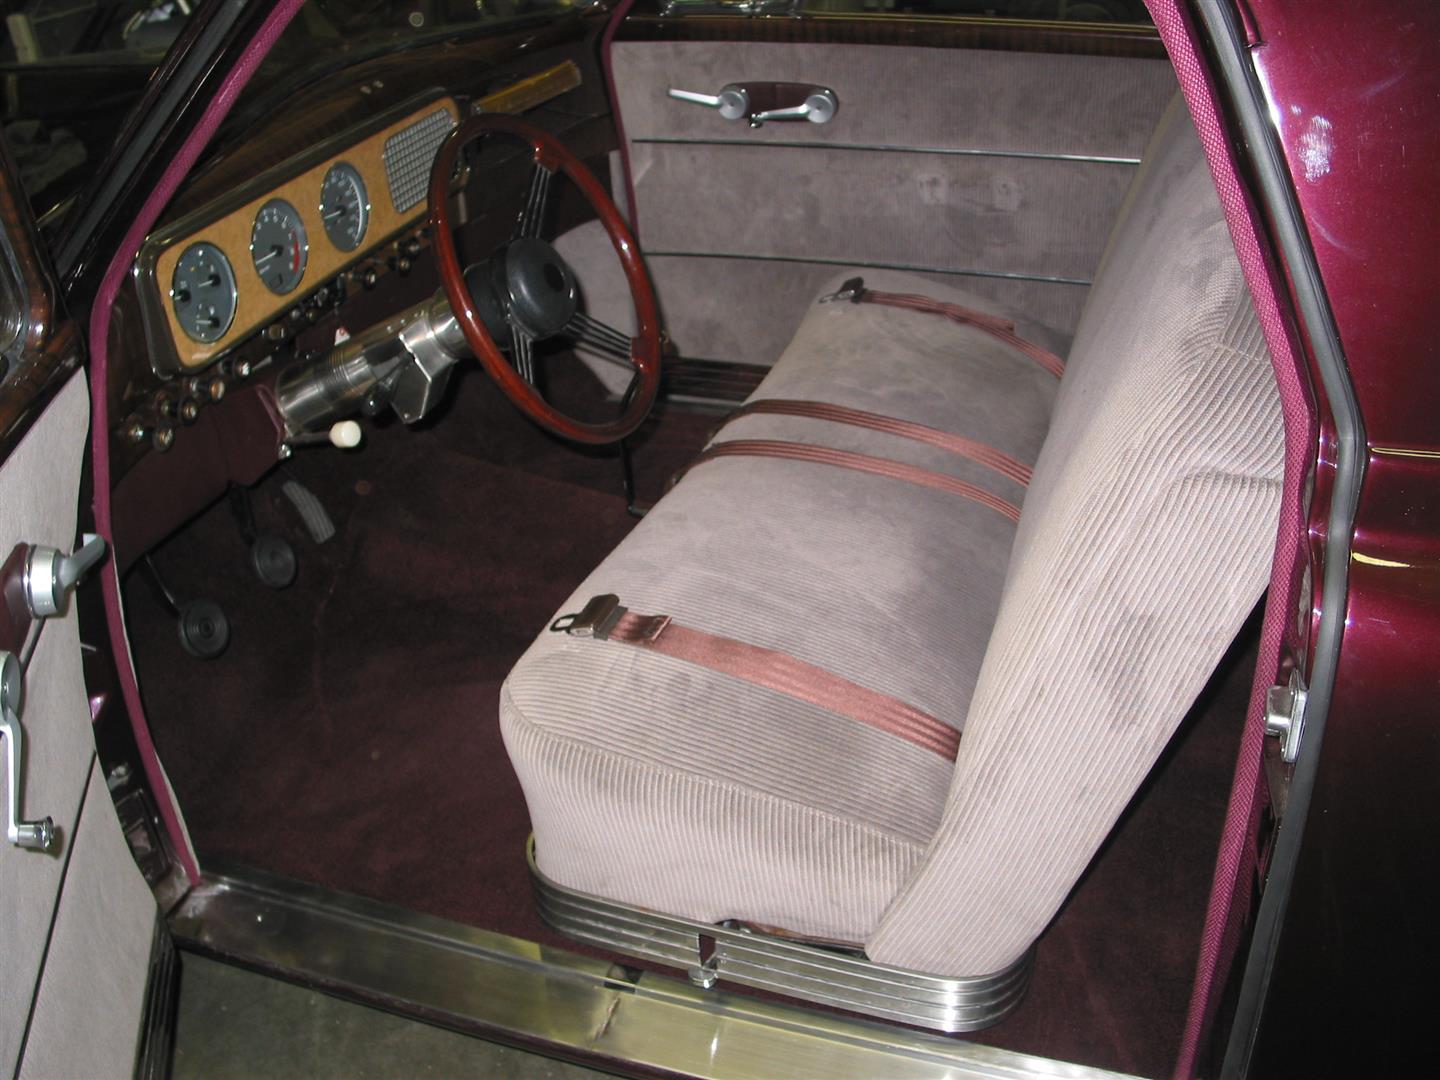
The Studebaker is running well, has very impressive brakes and steering, nice ride, very smooth and quiet, feels like it corners well, but I am really limited by the soft bench seat. I may eventually install a pair bucket seats so I can use the capability of this suspension.
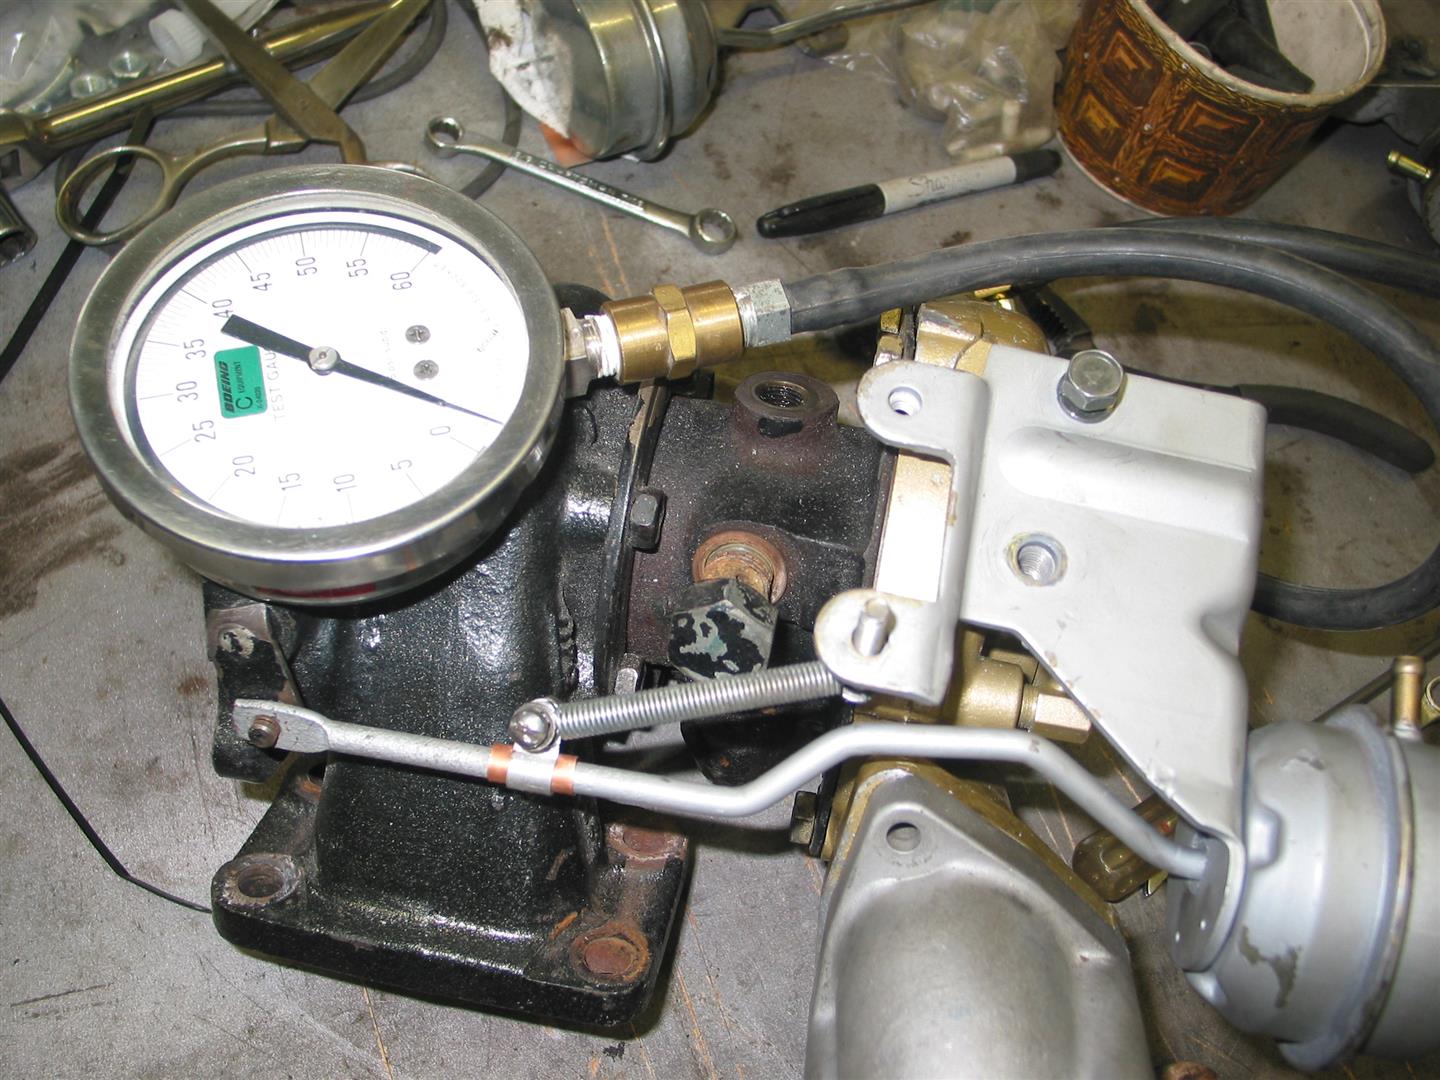
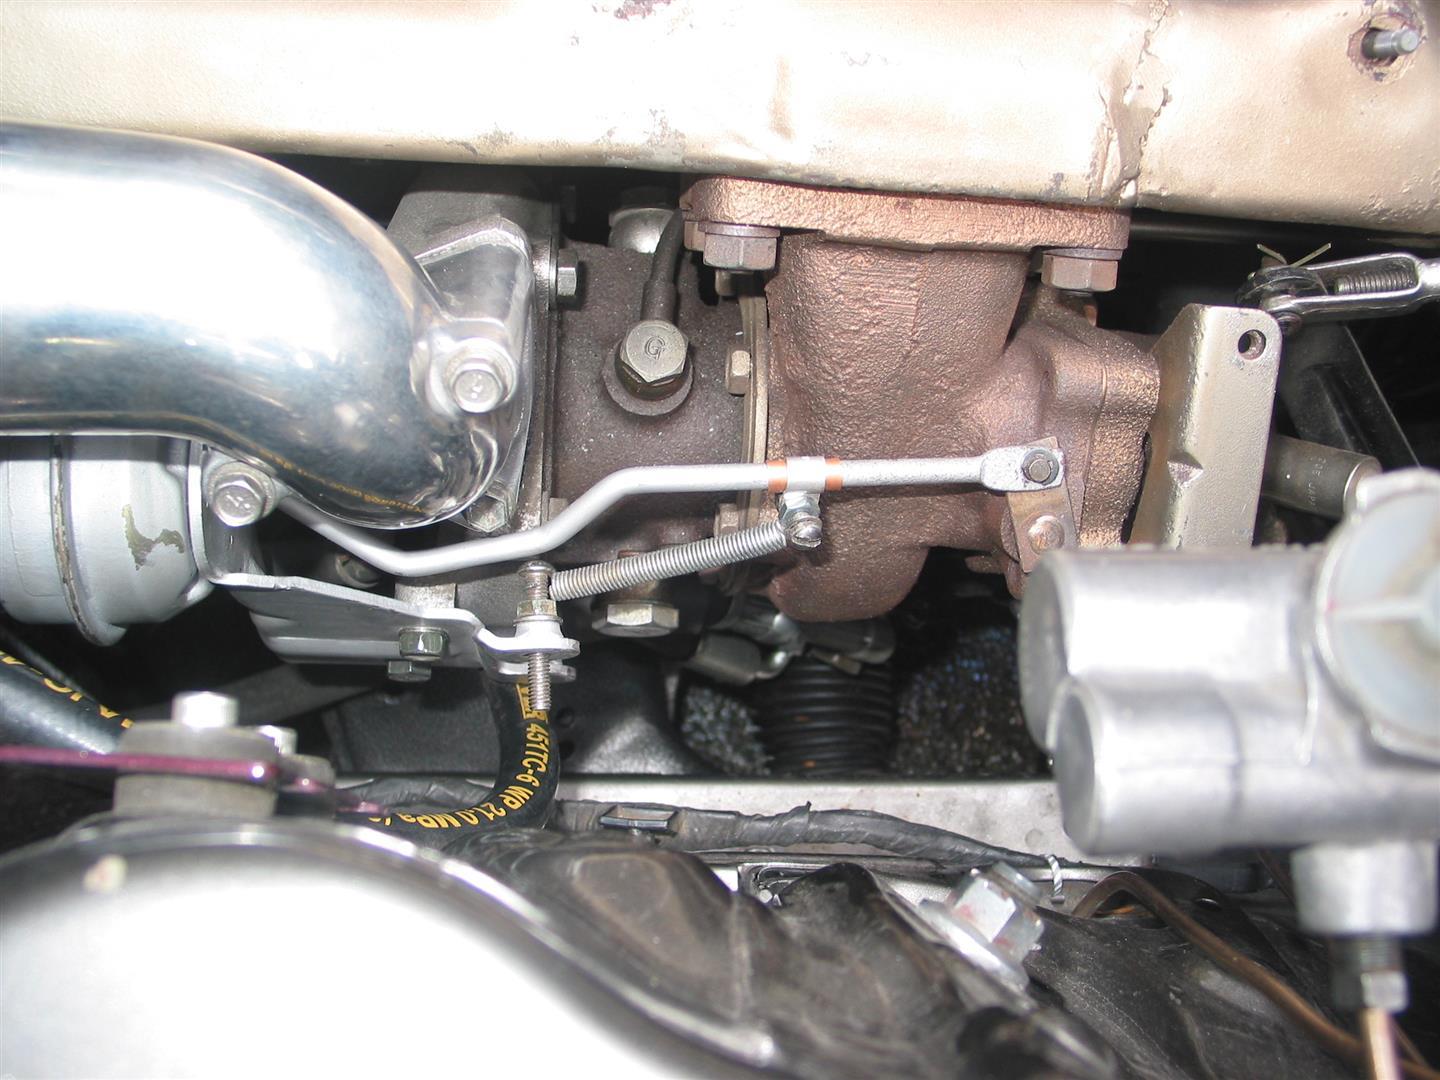
The stock turbo is limited to 10 pounds boost. I have read that this turbocharger should be limited to about 13-14 pounds because the ceramic turbine wheel will not survive the rpm of a higher boost. Rather than buy a boost controller, I decided to just add an external spring to the waste gate actuator and adjusted the spring tension so it opened at about 12 pounds.
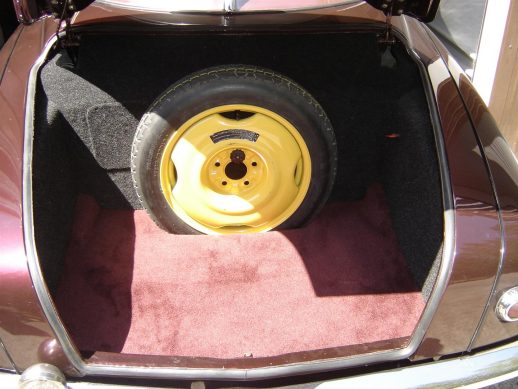
I obtained a Skyline space saver spare, which has the right offset to clear the brake calipers. I decided to stand it up right behind the fuel tank, to minimize the intrusion into the trunk space. The tire was too tall to fit under the trunk lid, so I made a pan to lower it, using a trailer fender and some flat sheet steel. I also fabricated some panels to finish off the trunk and covered them with carpet.